
SECTIONS
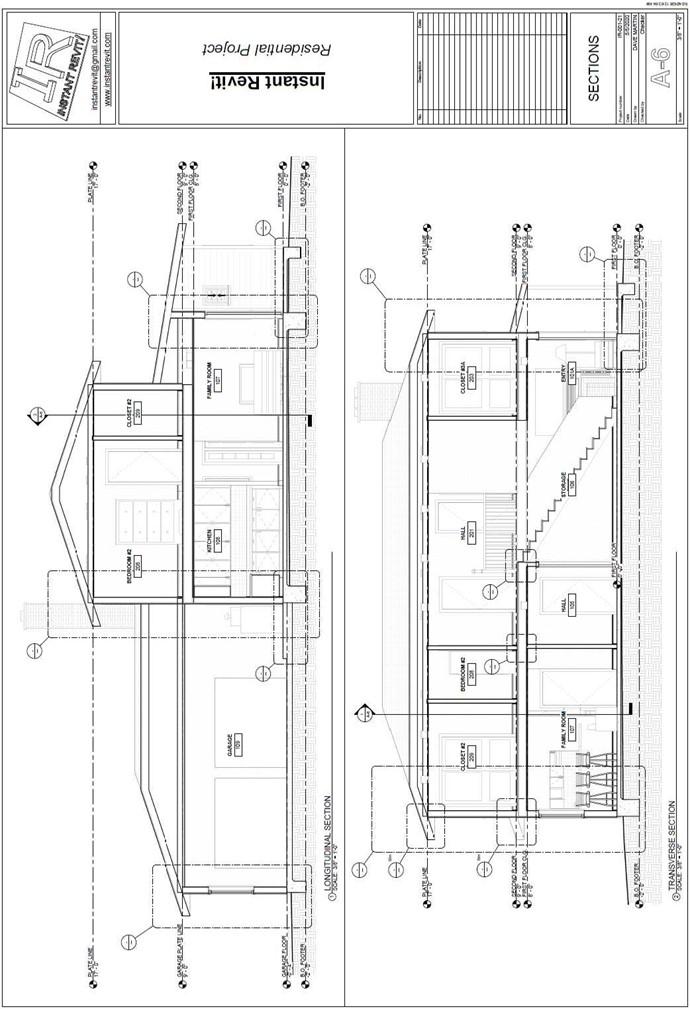
Sections
Creating the Sheet View
- Open the RL7-5 file. Save the file as RL7-6.
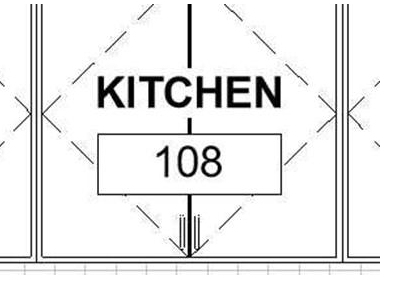
- Open the Longitudinal Section view and add room labels for each of the room in the section view. Repeat for the Transverse Section view.
On order to make the room tags more visible, you may wish to load the Room Tag – Masked.rfa file from the custom families folder in the Annotation folder.
- Create a sheet for the two section views.
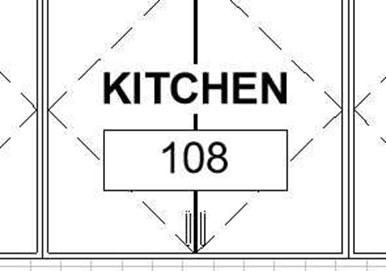
Masked Room Tag Family
-
Change the Concrete, Cast-in-Place Gray material so that the cut pattern is light gray
(RGB 192 192 192).
- Update the names of the section views to all caps.
- Rename the B.O. Footer level to all caps.
- The scale of the sections is 3/8″ = 1′-0″.
- Draw a medium detail line that divides the sheets in half.
- Drag and drop the Longitudinal and Transverse sections onto the sheet.
- Use the Title w Line – Medium Text type for the view labels.
- After placing the views line up the view labels.
- This is the end of Part 6. Save your file as RL7-6.


