
Assembling the PDF Portfolio
- Open the RL7-16 file. Save the file as RL7-17.
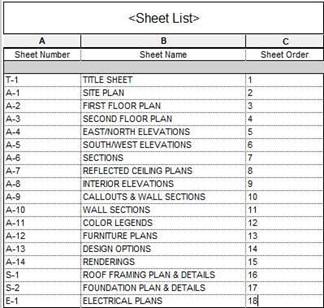
- Now that you have finished creating the sheets, you will create a Sheet Index. Follow this procedure to create the index.
- Go to the View tab, Schedules tool and select the Sheet List Tool.
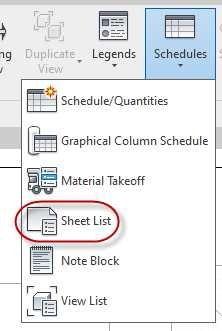
Sheet List Tool
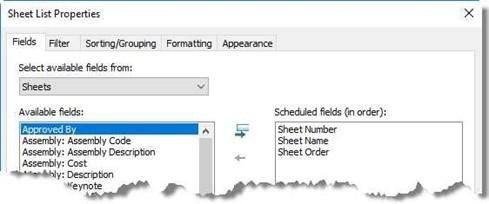
- In the Sheet List Properties, add the Sheet Number and Sheet Name fields.

Fields Added
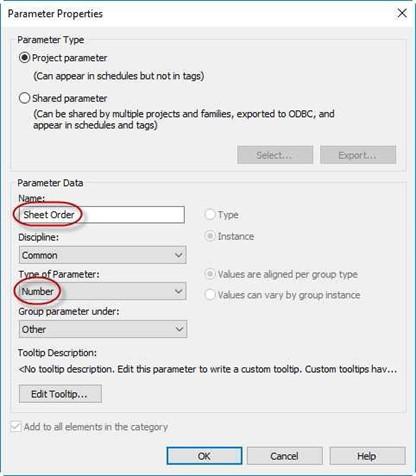
- Click on the New Parameter button.
Add a new Parameter called Sheet Order.
Use Number for the Type of Parameter.
-
Order the fields
 as shown…
Sheet Index Fields
Sheet Order Parameter
- Setup the columns as shown…
Set the sort order to Sheet Order. After sorting hide the column.
Sheet Index Setup
- Set the font sizes using the Appearance tab and the Font tool in the appearance panel.
- For the Title of the Sheet Index use Arial Black, 1/4″, Bold, Underline.
- For the header text use Arial, 3/16″, Underline.
- For the body text use Arial, 1/8″.
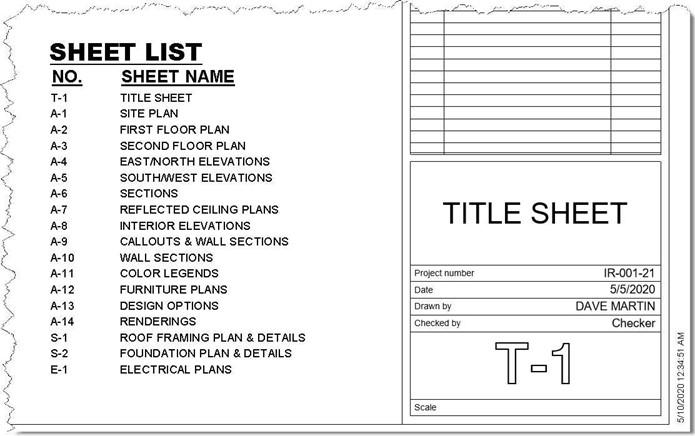
- When finished setting up the Sheet Index, drag the schedule onto the Title Sheet and place at the lower right corner.
Sheet Index Placed
Creating the PDF Portfolio File
Next you will create a PDF portfolio of your project. Since the Revit software does not have its own PDF driver, you will use the PDF ReDirect v2 program to create the PDF files of each sheet and merge them into one file.
The program is free. You may download it at www.exp-systems.com. After the program has been downloaded, a new print driver will appear. You may also use any other PDF program you wish.

Print Driver Loaded
- Click on the File Menu and select the Print command.
You may also access the Print tool in the Quick Access Toolbar.
-
The Print dialog box opens. Match the settings as shown.
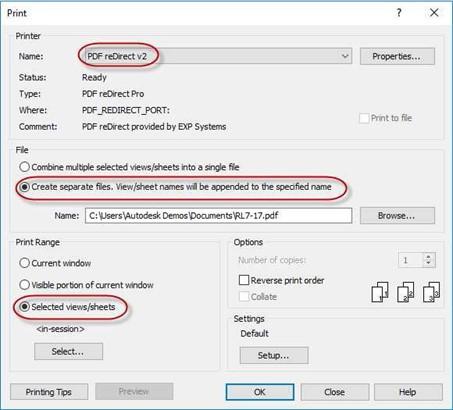 Your file location may be different.
Print Dialog Box
Print Command
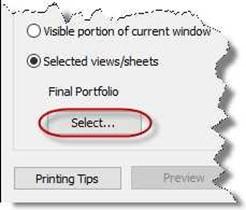
-
Click on the Select… button in the Print
Range area.
- The View/Sheet Set dialog opens.
Uncheck the Views checkbox and select the sheets as shown.
Click the Save As… button and save
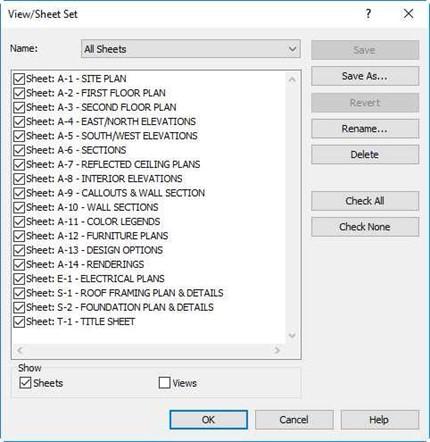 the set as All Sheets. Click the OK button.
View/Sheet Set Dialog Box
Select… Button
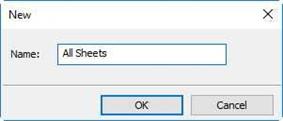
New Sheet Set
- Click the Setup… button at the bottom right corner of the dialog box.
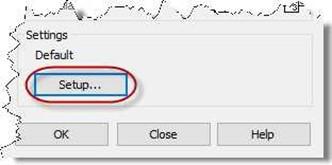
Setup… Button
- Match the settings in the Print Setup dialog as shown…
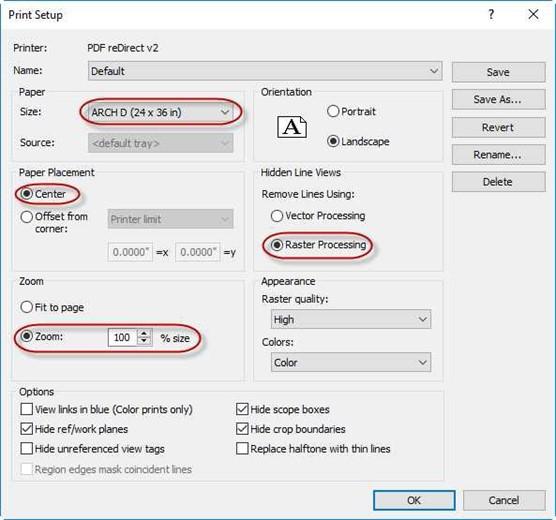
 Print Setup Dialog Box
- Click the OK button to close the dialog box.
Click OK in the Print dialog box to begin creating the PDF files.
-
Answer “Yes” to the Printing
Separate Files alert box.
Alert Box
It will take a few minutes as each file is created and the preview is generated.
Note: Wait until all the sheets have been processed and the previews are visible.
PDF reDirect v2 Interface
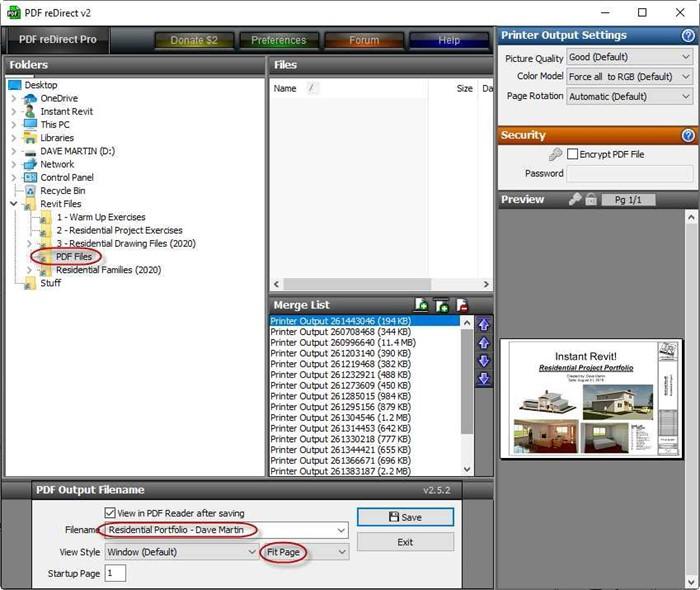
- You will need to reorder the list so that the Title Page is the first one in the list.
Click on the Printer Output file for the title page in the merge list and click the top blue arrow to move it to the top. You will also need to move the Electrical Plan to the bottom of the Merge List.
- As you click through each file you will see a preview appear in the area to the right. Use this to find the file to move.
- Once the file order is setup, click the Save button to create the portfolio.
- Name the file Residential Portfolio – Your Name and set the View Style to Fit page.
- Once completed you will have 18 sheets.
- To see an example of the completed Residential Portfolio, check the companion website at www.instantrevit.com.
- This is the end of Part 17, Tutorial Seven, and the Residential Project. Save your file as RL7-17.
Congratulations on Completing the
Residential Project!


