
Adding a Basement to the House
Starting the Tutorial
- Start Revit 2021 by clicking on the icon on the desktop.
- Open the last file from Tutorial Seven, RL7-17.
- Save the file as RLA-1.
In many parts of the country basements are a necessary part of a residential structure. In colder climates the basement is used to place the structural support of the house below the frost line. In warmer climates, basements are not needed but may be included to add additional square footage to house. In this procedure, the student will add approximately 750 square feet to the house. Just like any other habitable portion of the house, there are ventilation and light requirements. These will be discussed when the windows are added.
Note: When following the procedures in the Appendix, keep in mind that you created Design Options back in Tutorial Six. Because of this you will not be able to select some elements of the model until you switch to one of the Design options. It is recommended that you change to the Primary Design Option (Hip Roof) when modifying existing elements.
Modifying the Floors, Footers, and Creating the New Levels
- Open a new 3D view of the house.
Copy the view and save it as Basement.
- Hide the topography, trees, car, and people.
- Delete the footers for the first floor slab. Leave the footers for the rear and front porches.
Footers Deleted
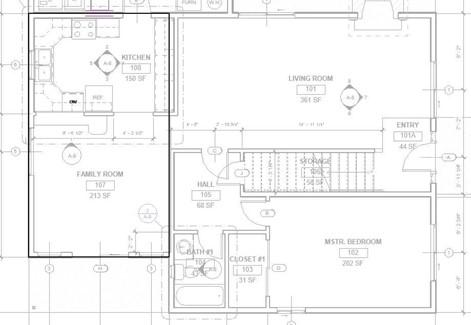
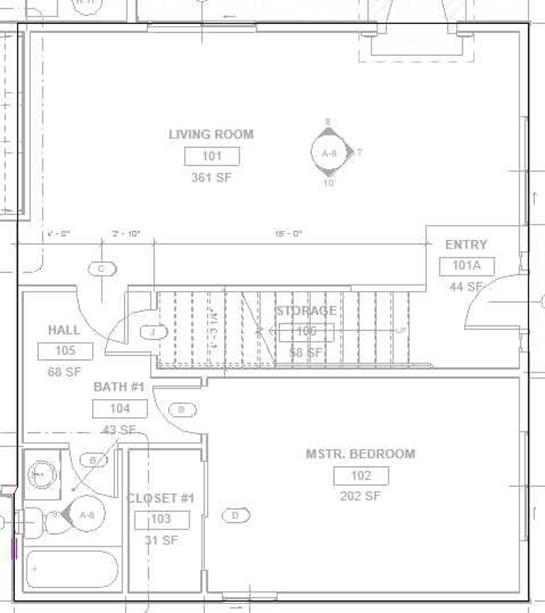
- Open the First Floor view.
-
You will be creating two floors. The floor for the Kitchen and Family Room will remain 4″ Concrete. The rest of the house will have a floor type of Wood Joist 10″.
-
Select the floor and pick the Edit Boundary tool.
- Adjust the boundary so that only the left side of the house is enclosed.
New Floor Boundary
- You will probably receive an error box regarding splitting elements. Click the Delete Splitting Element button to clear the error message.
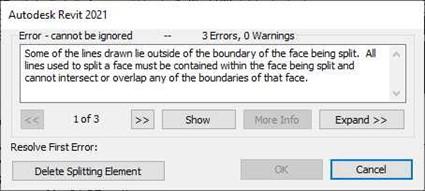
Error Box
- Add a new floor for the rest of the first floor. Start with the Wood Finish 10″ – Wood Finish type. Create a new type called “Wood Finish 10″ – w/Carpet”. Change the material of the first layer to Carpet. Use 1/8″ for the thickness.
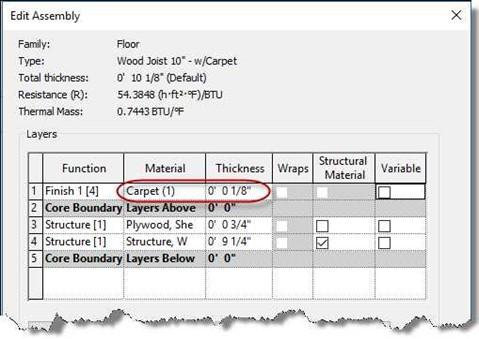
New Floor Type
- When adding the new floor boundary, create a jog at bottom left corner of the floor plan.
Floor Boundary for Remainder of Floor
- After completing the floor, you will need to redo the areas for the front entry and bathroom materials. Use the split face tool to create the areas.
- After completing the floor, select the concrete floor under the Kitchen/Family Room and adjust the boundary to align with the edge of the wood joist floor.
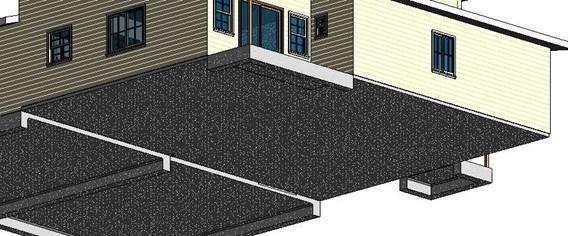
- Open the 3D view. Add the footers for the edge of the concrete slab floor. You may need to temporarily hide the neighboring slabs to see the edges of the slab. Use the Two Story Footer type.
- Unhide the other floors. When unhiding the floors, you may need to select the entire structure and use the Filter tool to isolate the floors.
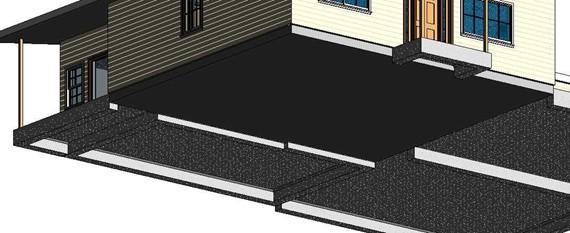
Floors and Footers Placed
Adding the New Levels
-
Open the Transverse Section View. Expand the bottom edge of the view to
approximately 15′ below the first floor.
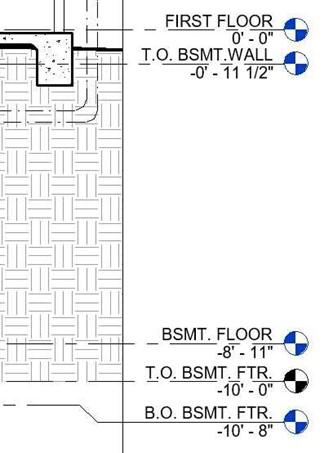
- Add three new levels to the view. All of these levels will be below the First Floor level.
|
Level Name |
Height from First Floor |
|
T.O BSMT. WALL |
-0′ – 11 1/2″ |
|
BSMT. FLOOR |
-8′ – 11″ |
|
T.O. BSMT. FOOTER |
-10′-0″ |
|
B.O. BSMT. FTR |
-10′ – 8″ |
Levels Added
- This is the end of Part 1. Save your file as RLA-1.


