
Adding the Fireplace and Furniture, Creating the Furniture Plans
In this part of the tutorial you will add the fireplace, mantel, and the furniture for the house. After that you will create a furniture plan for both floors.
- Open the RL5-3 file. Save the file as RL5-4.
- Open the First Floor view. Hide the Reference Plane elements from the previous tutorial (not the category).
- Zoom in on the northeast corner of the living room.
- Load the family files, Masonry Chimney.rfa and Fireplace Mantel.rfa from the downloaded families on the website.
- Click on the Component tool and select the Masonry Chimney family.

Chimney Family Selected
- Place the Chimney as shown.
Chain the dimensions with the dimension for the window.
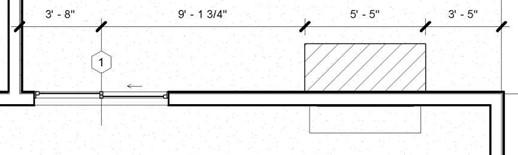
Chimney Placement
- You will need to create a plan region to display the Chimney properly.
- Click on the Plan Region tool in the View tab, Create panel.
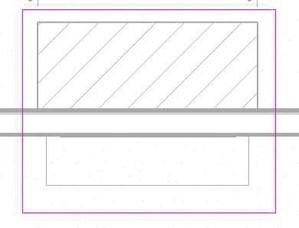 Sketch the boundary as shown.
Fireplace Mantel Placed
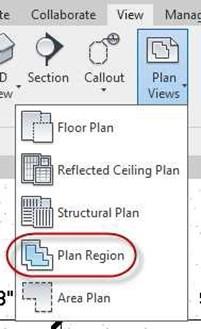
Plan Region Tool
- Click the Green Check to place the region.
- Click on the Edit… button next to the View Range category in the Properties Box.
- Set the Cut Plane to 2′-0″.
Now you will see the chimney hearth.
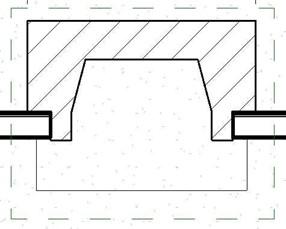
Cut Plane Set to 2′-0″
- You may hide the Plan Region Boundary if you wish, but it is not required. The lines will not show up when the drawing is printed.
-
Add the fireplace mantel. Use the 74″ x 55 3/4″ type. Center it on the fireplace.
You may create an interior elevation view to check the appearance.
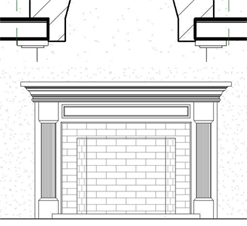
Fireplace Mantel Placed
Placing the Concrete Pad Beneath the Chimney
- Open the 3D view.
- Orient the view to show the outside base of the chimney.
Note the gap between the bottom of the chimney and the surface of the driveway.
You will add a concrete extrusion as you did in the garage. This will fill the gap.
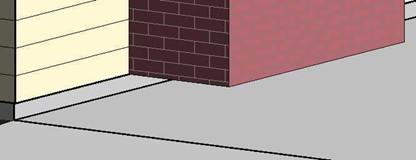
Gap Beneath Chimney
- Click on the arrow beneath the Component tool and select the Model-In-Place option.
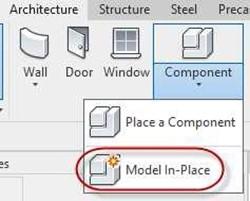
Model In-Place Option
- Choose the Generic Models Family Category.
- Name the family, Fireplace Base.
- Click on the extrusion tool in the Forms panel.
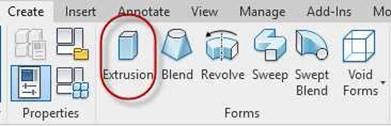
Extrusion Tool
- Set the material of the base to Concrete, Cast-in-Place gray.
- Click on the Set tool in the Work Plane panel.
- Click the Pick a plane button (if needed).
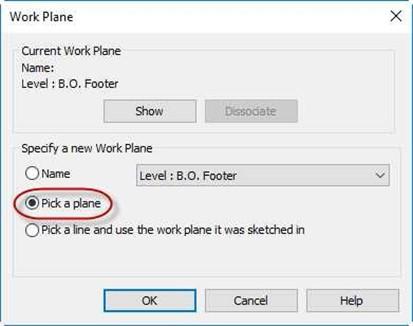
Pick a Plane Button

Set Tool
- Pick the side of the chimney facing you.
- Draw a rectangular shape below the chimney.
Align the shape with the edge of the chimney and the floor slab of the house.

The shape is 6″ tall.
Extrusion Shape
- Set the Extrusion End to 1′-0″ and the Extrusion Start to 0′-0″.
- Click the Green Check.
The pad is placed to the left of the chimney base.
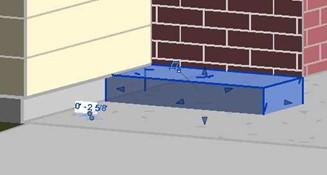
Chimney Base Placed
- Rotate the view so you can see the right side of the chimney.
- Click on the concrete pad and stretch the base using the arrows so that the entire bottom of the chimney is filled.
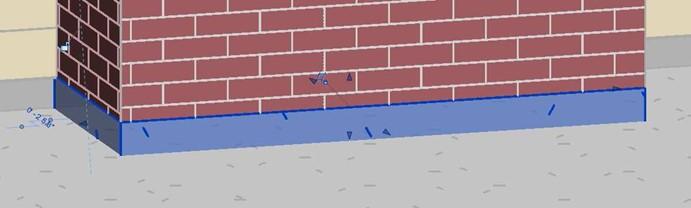
Base of Chimney Stretched
- Click the Green Check again to finish the model.
- The base and the Chimney are placed.
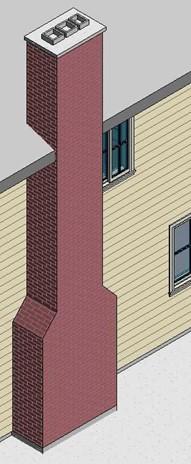
Completed Chimney
Placing the Furniture
- Open the First Floor view.
- You may notice that elements of the site are visible in the first floor view.
Hide these elements (if applicable).
- Right-click on the view name in the Project Browser and select Duplicate View, Duplicate.
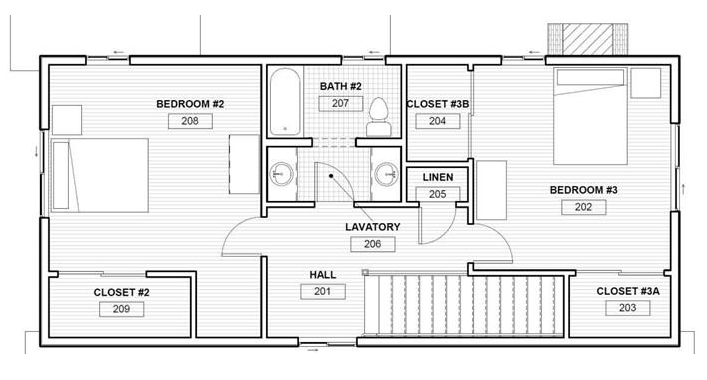
- Rename the view, FIRST FLOOR – FURNITURE PLAN.
- Hide the interior and exterior elevation marks.
- Tag the rooms. Use the room tag type that shows the name and room number only. Do not include the area of the room.
- Add the furniture for the first floor as shown.
Use the table to locate the families. Load the families as needed.
- The Dresser has been modified so you can identify the front side. It is the side with the hidden line.

Front Edge of Dresser
-
When placing the Mirror, locate it as shown about the Mantel. Later, you will create the FIRST FLOOR CLG. level.
Name this view LIVING ROOM – NORTH.
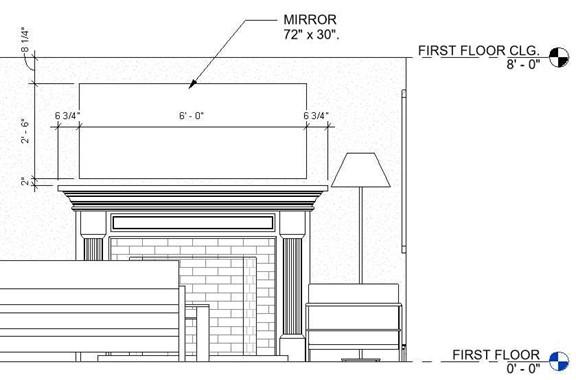
View of Mirror in Living Room
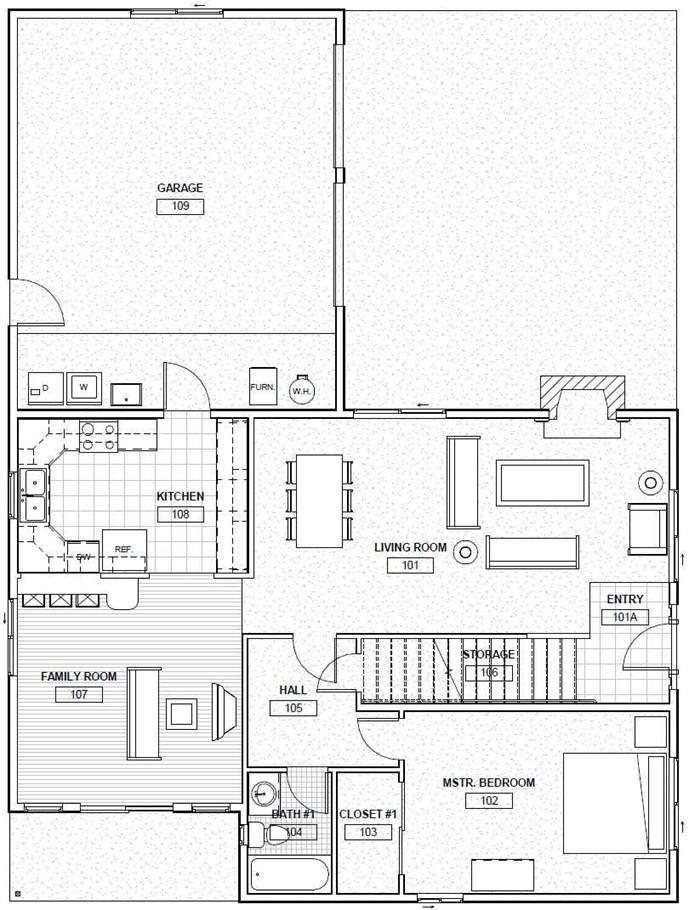
First Floor Furniture Plan
|
Family Name |
Where Located |
|
Living Room |
|
|
Table-Dining 24″ x 36″ x 24″ |
Furniture, Tables folder. |
|
Chair-Breuer |
Included with template. |
|
Sofa 72″ |
Included with template. |
|
Floor Lamp – Standup 100W – 120V |
Lighting, Architectural, Internal folder. |
|
Chair-Corbu Chair |
Furniture, Seating folder. |
|
Table-Coffee 36″ x 72″ x 18″ |
Furniture, Tables folder. |
|
Mirror 72″ x 30″ |
Loaded Previously Create custom size. |
|
Family Room |
|
|
TV Stand |
Furniture folder. |
|
TV – Flat Screen 42″ |
Furniture folder. |
|
Table-Coffee 24″ x 24″ x 24″ |
Loaded Previously. |
|
Bar_Stool-Generic |
Custom Families Furniture folder. |
|
Sofa 72″ |
Loaded Previously. |
|
Master Bedroom |
|
|
Bed-Standard King 78″ x 80″ |
Included with template. |
|
Table–Night Stand 24″ x 24″ x 30″ |
Furniture, Tables folder. |
|
Dresser – Modified 48″ x 72″ x 24″ |
Custom Families Furniture folder. |
|
Bedrooms #2 and #3 |
|
|
Bed-Standard Queen 60″ x 79″ |
Included with template. |
|
Table–Night Stand 24″ x 24″ x 30″ |
Loaded Previously. |
|
Dresser 48″ x 72″ x 24″ |
Loaded Previously. |
Note: You may wish to use different furniture and place in a different arrangement.
If you are adding furniture that is not on the list and cannot find it in the family folders, use the BIMobject website or other Manufacturer’s sites. There are also other sites such as: RevitCity and ARCat.
|
Site Name |
Web Address |
|
BIMobject (Replaces Autodesk Seek) |
https://bimobject.com/ |
|
ARCAT |
|
|
RevitCity |
|
|
Herman Miller |
http://www.hermanmiller.com/design- resources/3d-models-revit.html |
|
Steelcase (Commercial) |
- Create the Second Floor Furniture Plan using the same methods.
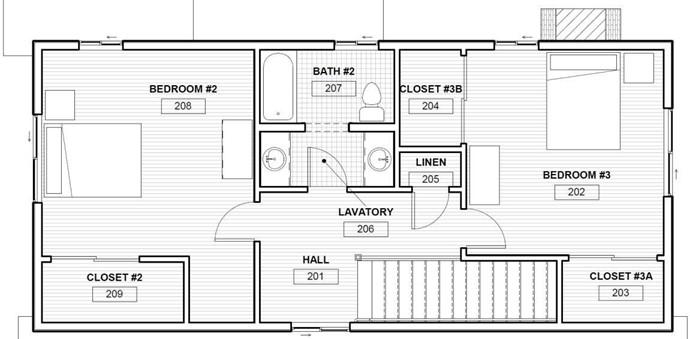
Second Floor Furniture Plan
- To place the Lavatory room tag outside the room, select the tag and check the leader checkbox in the options bar.
You will need to add the Dot Filled 1/16″
end to the leader.
- This is the end of Part 4. Save your file as RL5-4.

Leader Box Checked


