
Adding Baseboards, Cornice Molding, and Tiles to the Walls
In this last part of Tutorial Five, you will be adding baseboards and cornice molding to the house. Cornice molding is placed between the top of the wall and the edge of the ceiling. Baseboards are placed between the edge of the floor and the bottom of the wall.
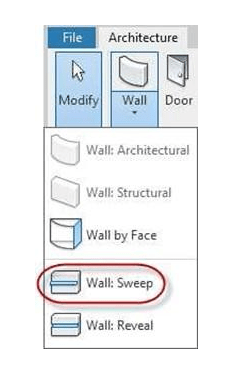
Within the wall tool there is a tool that is used to add these elements to the project. You will use this tool called wall sweep to add the elements by sweeping the profile along a path or at the line that is the seam between the floor and wall or the wall and ceiling.
You will also add tiles to the walls in the bathrooms on the first and second floors and the kitchen. You will use the Paint and the Split Face tools to do this.
Adding the Baseboards on the First Floor Walls
- Open the RL5-6 file. Save the file as RL5-7.
- Open the First Floor view.
Duplicate the view without detailing. Name the view FIRST FLOOR – Baseboard. You will only use this view to place the Baseboards and Cornice molding elements. This view will not be placed on a sheet in the portfolio.
-
Hide the section marks.
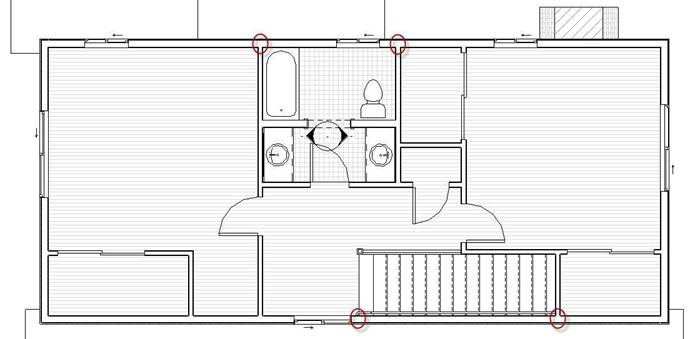
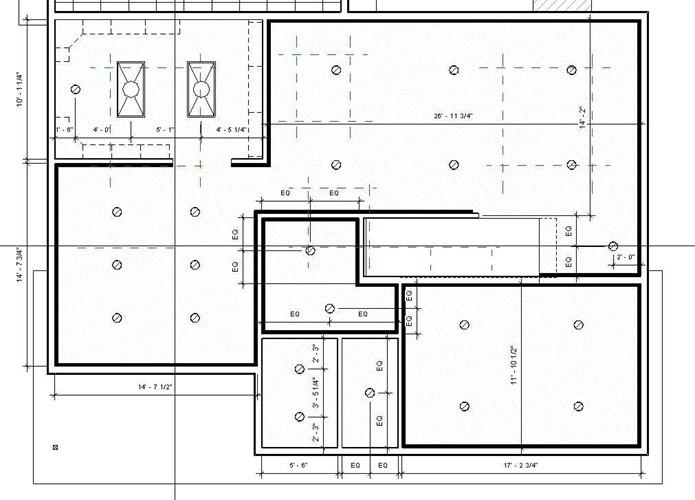
- Next you will need to split certain walls. This is because some of the walls will not have baseboards and/or cornices over their entire length.
Refer to the drawing for the locations of the splits.
You may need to drag the wall end at the south end of the east garage wall up slightly so that the two horizontal wall end will join together.

Wall Split Locations (First Floor)
- When location the split at the wall intersections, locate the point at the middle of the “T” along the wall.
There will be a dashed blue line to indicate the location.
- Add a new interior elevation view at the north side of the Living room.
- Open the view.
Click on the Wall Sweep tool.
- In the Properties dialog box. The type selector will show two profiles types.
Choose the Wall Sweep -Cornice type and then click the Edit Type button to create two new baseboard types.
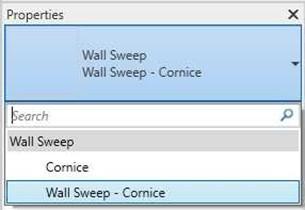
Wall Sweep Types
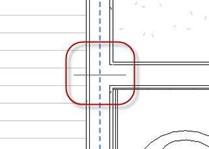
Split Location at Northwest Corner of First Floor Bath

Interior Elevation Placed
Wall Sweep Tool
-
Name the new wall sweep
Wall Sweep –
Baseboard – Wood.
Match the settings as shown.
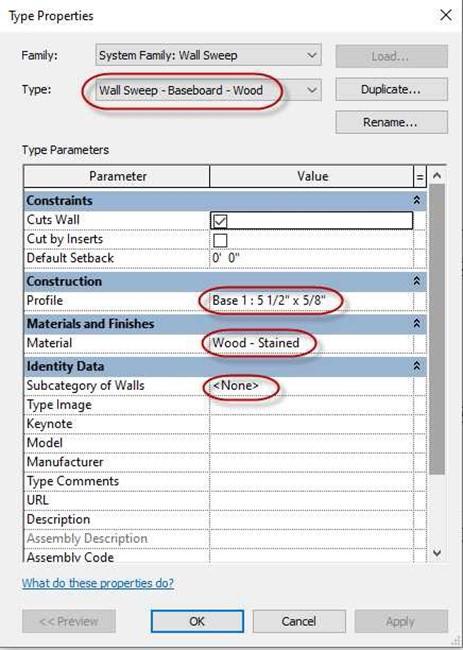
 Type Properties for Wood Baseboard
- Open the First Floor – Baseboard view.
Click on the baseboard that you just added.
Click on the Add/Remove Walls tool.
Add/Remove Walls Tool
Click on the walls to add the baseboard. Work your way around the house. You will only be able to add the baseboards to one side of the walls.
The baseboard will be placed on the side of the wall that is clicked first.
Note: Do not add baseboards to the inside walls of the Bath and the Kitchen.
- Once you have added baseboards to all the walls possible, create a new interior elevation view facing one of the walls without a baseboard.
 Add baseboards to the rest of the walls.
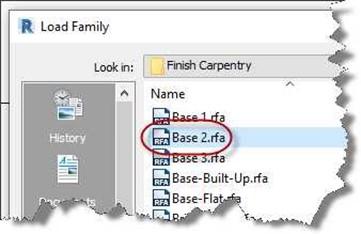
- Before adding the baseboards in the Kitchen and Bathrooms, you will need to load a new profile.
Click on the Insert tab and then Load Family.
Go to the Profiles, Finish Carpentry folder.
Load the Base 2.rfa file.
Base 2.rfa File
-
Open one of the interior elevation views in the Kitchen.
- Click on the Wall: sweep tool.
Create a new Wall sweep type for the vinyl type. You will use this type in the Bath and Kitchen.
You will need to create a new material for the type.
Click on the walls within the Kitchen and Bath. You will only need to choose walls that have the baseboard area exposed.

Wall Sweep – Baseboard – Vinyl Parameters
Adding the Baseboards on the Second Floor Walls
- Open the Second Floor view.
Duplicate the view without detailing. Name the view SECOND FLOOR – Baseboard. You will only use this view to place the Baseboards and Cornice molding elements. Once you are finished you will delete the view.
-
Hide the section marks.
- Next you will need to split certain walls. This is because some of the walls will not have baseboards and/or cornices over the entire length.
Refer to the drawing for the locations of the splits.
- Use the vinyl baseboard material for the bath and lavatory. Use the wood material for all other walls.
Wall Split Locations (Second Floor)
Adding the Cornice Molding on the First and Second Floor Walls
- Open the elevation view that you used when you added the first baseboard.
- Click on the Wall: Sweeps tool and choose the Wall Sweep – Cornice type.
Add the cornice molding to the top of the wall. You will need to align the top pf the molding with the bottom edge of the ceiling.
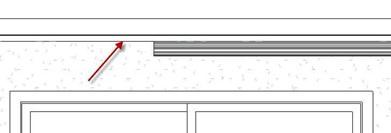
Cornice Molding Aligned to Ceiling Line
- Open the First Floor Ceiling Plan view. You will not need to duplicate the view.
- Click on the cornice molding that you just added. Use the Add/Remove walls tool to add cornice molding to the edges of the rooms.
Add molding to all rooms except the Kitchen, Closet, Bathrooms.
You will need to add additional cuts to some of the walls to place the cornice molding correctly.
Cornice Molding Added to First Floor Walls
- Open the SECOND FLOOR – Baseboard view.
-
Add one segment of cornice molding to the wall/ceiling line.
- Pick the segment and use the Add/Remove Walls tool to add additional segments.
As before, do not add the molding to the lavatory, bathroom, closets, or linen room.
You will need to split some walls as you are adding the molding.

Cornice Molding Added to Second Floor Walls
Cleaning up the Corners Using the Modify Return Tool
- Next you will clean up the wall end and wrap the baseboard around the corners of the walls. Use will use the camera tool to do this.
Corners to Clean Up
- Create a camera view using the Camera tool located in the View tab, 3D View tool.
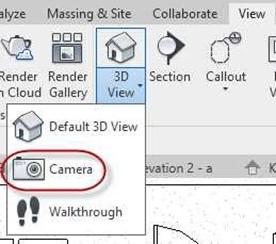
Camera Tool
- Click next to the area marked on the drawing.
- Click a second point to aim the camera.
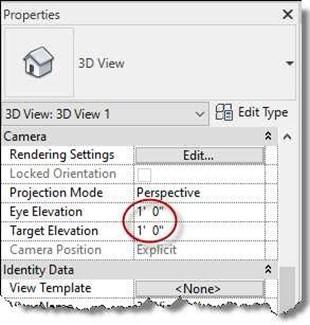
In the Properties dialog, set the eye elevation and the target elevation to 1′-0″

Camera Location
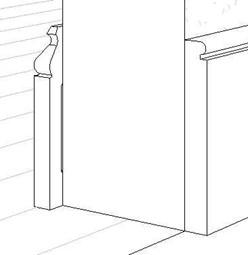
- Now you should see the corner with the two baseboards
Click on the baseboard for the Family Room and then the Modify Returns tool.
- The cursor will change to an Exacto blade icon.
Click on the end of the baseboard.
Elevations Set to 1′-0″
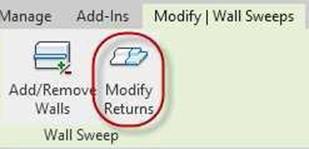
Modify Returns Tool

Baseboard Selected
- The end of the baseboard will make a 90 degree turn.
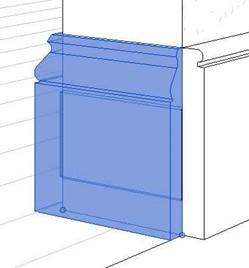
- Click on the baseboard piece again.
Then click on the dot at the bottom of the profile.
Click and drag to the other corner of the wall.
- Click on the other baseboard piece in the Kitchen.
Click on the Wall Returns tool and create a 90 degree corner at the end of the piece.
This completes the corner. Repeat the process for the other two corners.
Baseboard End Turned
 Baseboard Dragged to Other Corner
Corner Completed
- Work around the drawing and make sure that the walls are joined where that were cut. Check both the first and second floors.
Delete any extra elevation views that were created to add the baseboard and cornice molding.
Adding the Wall Tile Material in the Bathrooms and Kitchen
In this section you will add tile material to the walls in the Bathrooms and Kitchen. This process is similar to the procedure for adding the different floor materials in RL2-9.
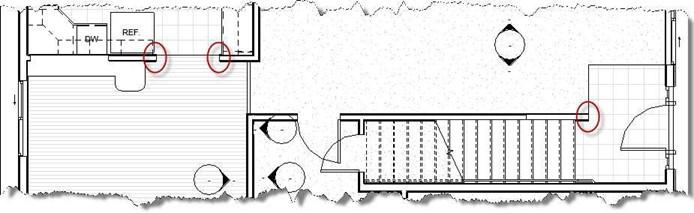
- Open the FIRST FLOOR – Baseboard view. Zoom in on the Kitchen.
Open the KITCHEN – WEST view and hide the notes.
- Click on the Split Face tool.
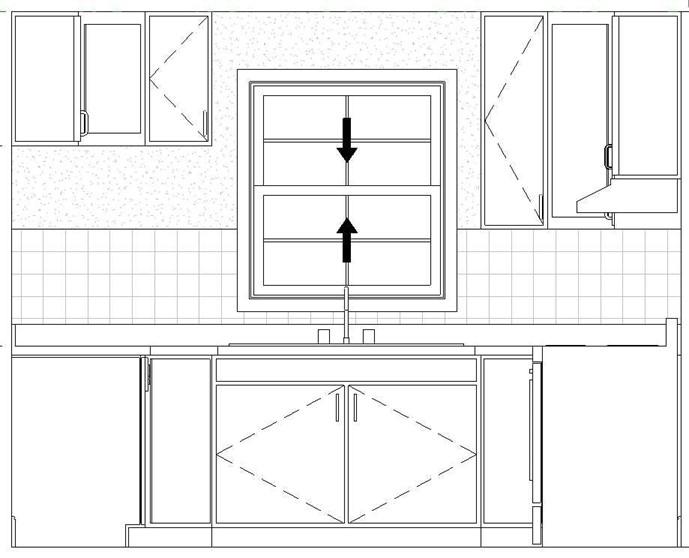
Select the wall face by selecting the edge of the window.

Wall Face Selected
- Create a boundary at the top of the backspace to the bottom of the cabinets on the left side. Also select the inside edges of the walls.

Tile Boundary
- Click the green check to complete boundary.
- Create a new material called Tile, Porcelain, 4in (Kitchen). When creating the material, make a new asset and change the color.
Tile Material Placed in Kitchen
- Repeat the process for the rest of the Kitchen.
All the views will have the tile located at the same height from the counter.
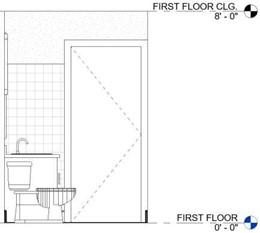
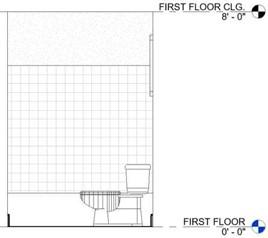
- Zoom in on the first floor bath.
You will place tile from the top of the
bathtub to 2′-0″ below the ceiling.
Click on the interior elevation marker and add three additional views, north, south and east.
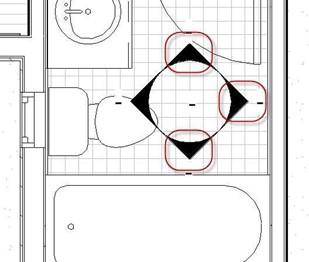
Three Additional Views Turned On
- Open each of the elevation views and use the Split Face tool to create the area for the tile.
Use the Paint tool to paint the surface. Use the same material as was used for the floor [Tile, Porcelain, 4in (Bathroom)]. Refer to the views below for the location of the tile.

East Elevation West Elevation
North Elevation South Elevation
- Remove the three extra views for the bathroom.
-
Open the Second Floor
– Baseboard view.
Turn on the north and south elevation views. You will need to adjust the front clipping plane to see the wall surfaces.
You will only add tile around the bathtub.
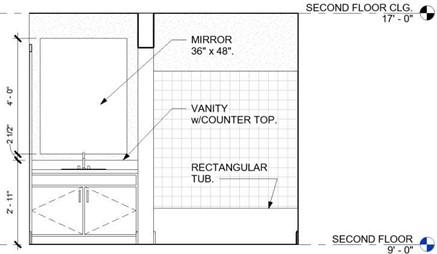
West Elevation

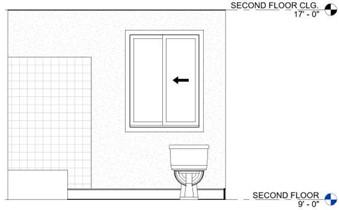
South Elevation North Elevation
- To finish up this tutorial, with the exception of the First and Second – Baseboard views open each plan view and hide the baseboards and cornice molding.
To do this, right click on one of the baseboards and select the Select All Instances option and then Visible in View.
This will select all the baseboards at one within the view.

Visible In View Option
Note: You will need to do this for the wood and vinyl baseboards separately in each view.
-
Hide the baseboards and repeat for the other First and Second Floor views.
- Use the same technique to hide the Cornice Molding in the First and Second Floor ceiling plan views.
- This is the end of Part 7 and Tutorial Five. Save your file as RL5-7.


