

Introduction to the Revit® Software
The Revit program is considered a BIM modeling program. BIM stands for Building Information Modeling. One of the features of BIM models is that the different drawings are linked together into one drawing file. Unlike other Computer Aided Design (CAD) programs, Revit uses parameters to control the size of elements such as doors, windows, and walls. The two-dimensional drawings that are generated are based on a three-dimensional model of the structure. This means that if changes are made to the design file, the changes are made over the entire model and within the related 2D views such as floor plans, sections, and elevations. This greatly speeds up the revision of the model that occurs during the design process and helps with the maintenance during the life of the building.
This section covers the concepts of the software and the parts of the Graphics User Interface (GUI). At the end of the section you will install the Autodesk family files and the custom family file from the Instant Revit! website.
Opening Revit Screen
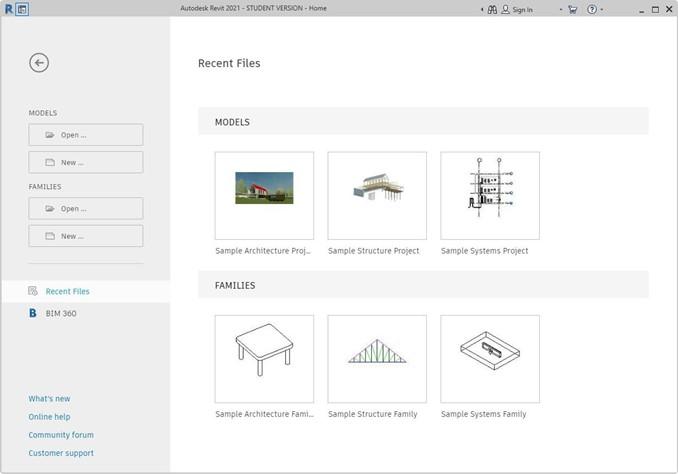
This is the first screen you will see after starting the Revit 2021 software. There are links for opening new or existing projects. New files can be created by accessing various template files. These files contain preloaded family files, views, dimensions styles, etc. After drawing files have been saved, the most recent accessed files will be shown in the Projects area.
Families may also be created using the software. Custom families will be created and download as part of the tutorials. An example of families would be doors, windows, walls, and furniture. Manufacturers of building components may provide families of their products free of charge on their company websites.
First Use of the Software
When starting the Revit software for the first time you will have an opportunity to customize the interface.
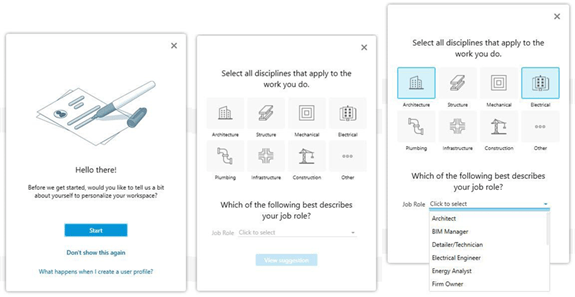
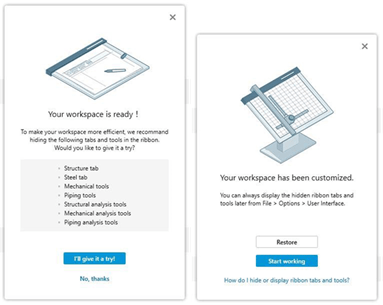
These five boxes will guide you through the steps to change the interface. This will be based on the choices determined by the type of projects that will be completed. You may also change the tabs and tools that are visible in the User Interface selection in the Option dialog box. In addition, other changes to the interface may also be made.
Revit Interface
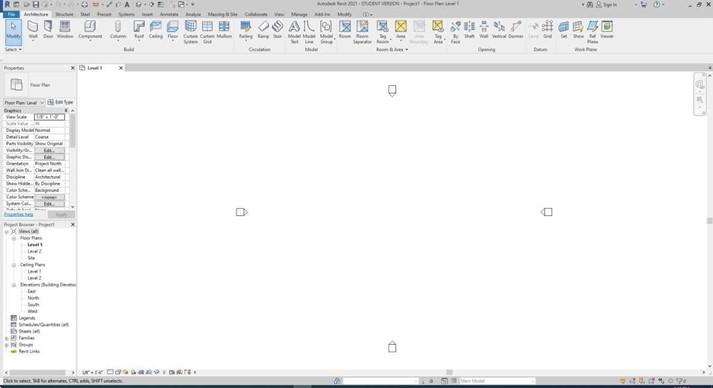
This is the Revit Interface. This screen contains the tools for creating your design. These tools are contained in a Ribbon Panel. Above the Ribbon panel is the Quick Access Toolbar that contains commonly used tools. On the left is the Properties dialog box and Project Browser. The main portion of the screen is the Drawing Area. At the bottom is the View Control Bar. This and other parts of the interface will be discussed.

Quick Access Toolbar
The Quick Access Toolbar is located at the top left edge of the screen. It contains the Home, Open, Save, Undo, Redo, Print, Measure, Aligned Dimension, and other commonly used tools. Most of these same tools are also available in the Ribbon Panel. The tools within the toolbar are removed by right-clicking on them. You can also add tools from the ribbon panel into this tool bar.

InfoCenter
The InfoCenter is used to search and access the help files, access product updates, display the favorites panel, access your Autodesk Account, and launch the Autodesk App store. Later, you will access your Autodesk Account to use the cloud rendering feature. It is not necessary to have an account to use the software.

Ribbon, Tabs, and Panels
This is the Ribbon. The Architecture Ribbon is shown. Clicking in the Tabs above the ribbon will switch to other ribbons. Within the ribbon are collections of tools known as Panels. The Build Panel is shown. Some of the panels can be expanded by clicking on them. If the panel is able to be expanded, it will be indicated with a small down arrow.

Options Bar
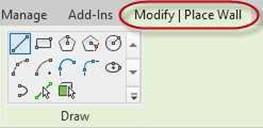
Contextual Tab
The Options Bar appears depending on the tool that is being used. In this example a portion of the options bar for the Walls tool is shown. Along with the options bar, the Contextual Tab will also appear when certain tools are accessed. This tab will contain tools that are specific to the selected tool. When the tool is closed the tab will close.
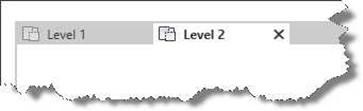
Drawing Area and View Tabs
The main portion of the interface is the Drawing Area. A feature with Revit 2021 is the use of View Tabs. This allows the user to quickly switch between different views within the same drawing or different drawing files. By clicking on the “X” the view tabs are closed. When all the tabs are closed, the drawing will be closed. By holding the mouse over the tab, the name of the drawing file is shown.
The Properties Dialog box contains information about the current tool, view, or selected element. The dialog box for the Wall tool is shown.
The box will change as elements or tools are selected. The parameters for specific elements can be changed. In some cases, new family types can be created by using the Edit Type button.
The Project Browser is used to navigate through the Revit drawing file. The browser is separated into different categories such as Views, Legends, Schedules, Sheets, Families, and Groups.
As the student progresses through the project new categories will be created to help organize the drawing.
Both the Properties Dialog Box and Project Browser can be docked on either or both sides of the screen. By default, they are stacked on top of each other on the left side of the screen.
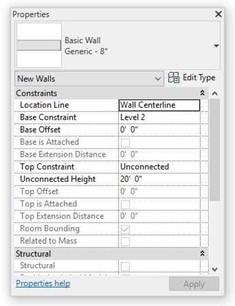
Properties Dialog Box
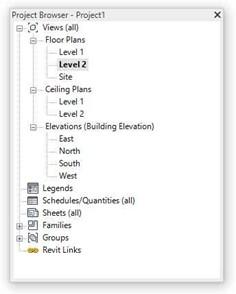
Project Browser
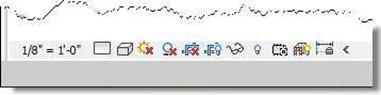
View Control Bar
The View Control Bar contains tools to change the scale of the view, set the detail level, change the visual style, set the sun path, and other tools that affect to look of the drawing elements. Also, individual or groups of elements may be hidden and revealed using this toolbar.
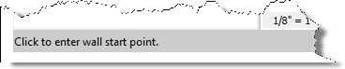
Status Bar (Left)
The Status Bar is located at the bottom of the screen. The left portion of the bar gives instructions on the use of the current tool. In this example, the bar is prompting to click the start point for the wall. As with the options bar, the information will change depending on the tool being used.

Status Bar (Center)
This portion of the status bar allows you to create Worksets. This allows multiple users to work on a project at the same time. Worksets are not covered in this book. The other tool is used to create Design Options and to edit these options. Design Options will be covered later in the book.
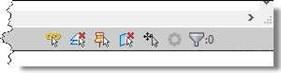
Status Bar (Right)
The right side of the status bar contains tools for selecting links on the drawing, selecting underlaid and pinned elements, turn on the Drag Elements on Selection option, show background processes, opens the Filter dialog box, and displays the number of selected elements. Only this last option will be used in this book.
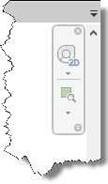
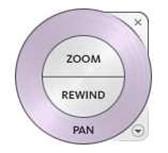
Navigation Bar (2D Version)
Steering Wheel (2D Version)
The Navigation Bar is used to change the view of the drawing. The 2D versions of the bar and wheel are shown. By clicking on the tool at the top the Steering Wheel tool will open. This allows zooming, rewinding to previous views, and panning the view of the model.
When the view is changed to 3D, the bar and steering wheel will change to show additional options.
There are other tools and concepts that will be covered within the tutorials. Instead of covering all the tools now, the tools will be presented in the context of the tutorials.
File Options
File Menu Options
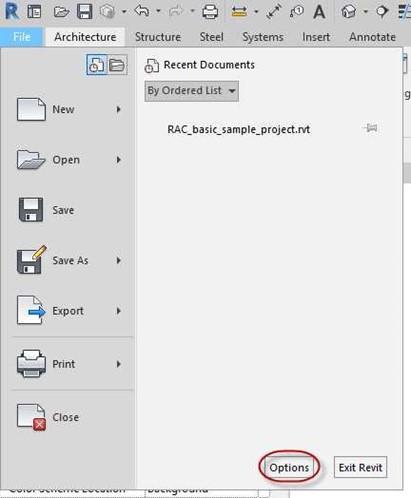
By clicking on the File Menu, different commands and options may be accessed.
-
A new file may be created by clicking on the New command. This will also prompt the user for a template file.
-
Existing files may be opened with the Open command and files may be saved by using the Save command. If the file is to be saved under a different filename, the Save As command may be used.
-
There is also a recent document list on the right side. To keep files available, the file may be pinned by clicking the icon to the right of the file name.
-
The Export command is to save/export files under other CAD formats or other file types such as bitmap formats like JPG.
-
The Print command is used to output the drawing to a printer. This will be discussed after the end of the first tutorial.
-
When finished with the file, the Close command is used to completely close all the open views and the drawing file.
The Revit software has options that may be changed. To access the Option dialog box, open the File menu and click on the Options button at the bottom of the box.
Options Dialog Box

This is the Options Dialog Box.
Options Dialog Box
-
In the General option, the Save Reminder Interval setting is set to 30 minutes. In the Username area the username will be indicated if the user has signed into to their Autodesk account.
-
The User Interface option allows the user to modify the tools, keyboard shortcuts, double-click options, and other settings. This accomplishes the same thing and the initial User Interface setup when the software is started.
-
If the display settings need to be changed, the Graphics option is used. The background color of the drawing area can be changed as well as the selection and pre-selection colors.
-
The Hardware option is used to turn the hardware acceleration off. Unless there are issues with the display, this should be left checked.
-
The File Locations option is used to change the location of template files and the path for other files that are regularly accessed.
-
The Rendering option is used to set the location of files to be accessed when rendering the model as well as the pathways and settings for other rendering settings.
- Check Spelling is used for options for the automatic spellchecker.
-
SteeringWheels is used for options associated with the 2D and 3D steering wheel tools.
-
ViewCube is used to turn the ViewCube off and on and change the location on the screen.
-
Lastly, the Macros option is to change the Application macro security setting and the Document macro security settings.
Note: Most of these options will not need to be changed.
Downloading the Revit Family Files from the Autodesk website
- Beginning with this version of the Revit software, the family files are no longer installed during the installation of the Revit software. If you have not already installed the files, follow these steps to install the Revit family files from the Autodesk website.
 Start the Revit 2021 software by clicking on the Revit 2021 icon on the desktop.
- After the software has opened click on the New… button under Models.
- In the New Project dialog box click on the Browse button
Revit 2021 Icon
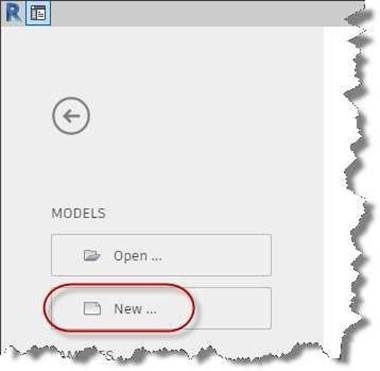
New… Button
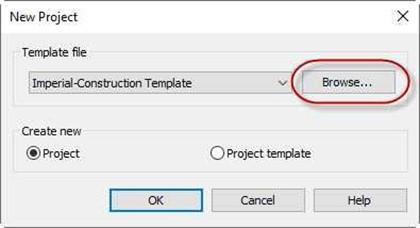
New Project Dialog Box
 Select the default.rte as the template file.
Click OK and then Open to open the Revit file.
Default.rte File Selected
- Once the file has opened, click on the Insert tab and the Get Autodesk Content tool from the Load from Library panel.

Get Autodesk Content Tool
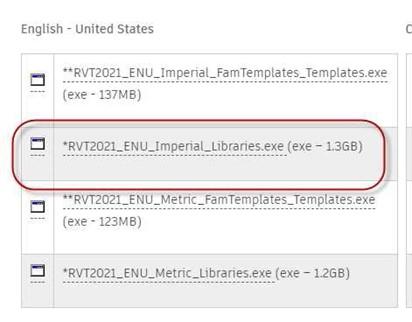 This will open a webpage that will guide you to download the correct file. For the projects in this book you will download the file called:
RVT2021_ENU_Imperial_ Libraries.exe
Note: You will not need to download the Template files. These were downloaded when the software was installed.
- The file will download to your Downloads folder. The file is 1.3 GB in size and will take a while to download.
After the file has downloaded open your Downloads folder and click on the file to execute it.
File to Download
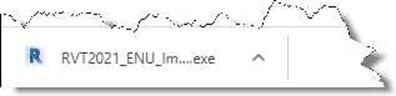
File Downloaded
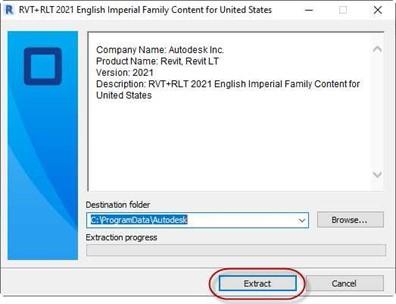 After executing the file, a dialog box will open.
Click the Extract button to begin the process of installing the family files in the correct folder.
English Imperial Content Dialog Box
- The program will extract the files. This will take a few minutes.
After the extraction and installation process is finished, return to the Revit program.
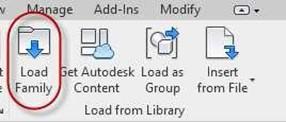 Click on the Load Family tool in the Load from Library panel.
- You will now see new family files installed on the C:\.
The full folder path for the files is:
C:\ProgramData\Autodesk\RVT 2021\Libraries\English-Imperial
Note: The ProgramData folder is hidden. You will need to show hidden files to see the folder.
Load Family Tool
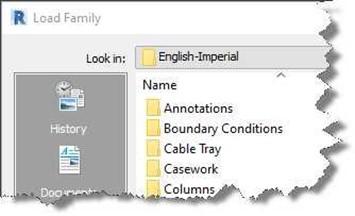
Partial View of the Folders in the English-Imperial Folder
- Next you will install the custom family files from the Instant Revit website.
Downloading the Custom Family Files
- Prior to starting the Revit program and beginning your first project, you should first download the Custom Family files from the website.
- Visit the companion website at www.instantrevit.com.
Note: If you have emailed me for access to the tutorial videos and support files, you will be able to see a demonstration of this project and all of the other projects in this book.
- Click on the link titled “Support Files & Portfolios” on the left of the page.
- When the page opens, click on the Revit 2021 Family Files link.
- To download the files, you may either click on the Family Files link for individual files or the Zipped File link for all the family files at once. (This is the recommended method.)
- If you clicked on the Zipped Files link, you will now have a new file called Families – Revit 2021.zip in your Downloads folder.
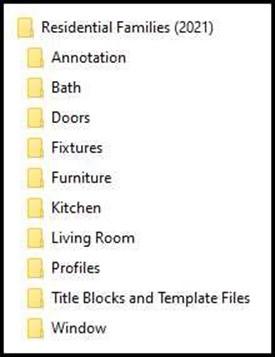 Extract the file. You will see multiple folders with different family files contained inside.
You will copy/move these files to your folder that contains your Revit Project.
Note: These folders only contain additional family and support files that are not included with the Revit software.
Starting the Tutorial
- Before starting the Revit program, you should create a group of folders and sub- folders on your hard drive or flash drive to store your files. Create the folders as shown in the example. You will store your drawings from this tutorial in this folder.
- Start Revit 2021 by clicking on the icon on the desktop.
Downloaded Family Files
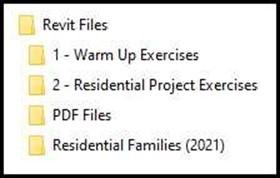
Sample File Structure
- As you did when you were downloading the Autodesk family files, create a new file using the Default.rte template file.
- Click the OK button. After the project file opens, click the Save icon in the Quick Access Toolbar and name the file WU1-1. Save the file in your “1- Warm-Up Exercises” folder.

Save Tool and Quick Access Toolbar
Note: Throughout the three warm-up exercise tutorials you will name the file according the part that you are completing. As you finish the part of the tutorial, save the file as the current part file name and then save the file as the next part.


