Creating a PDF of the Drawing
This next part is an optional portion of the tutorial. Follow these steps in this part if you wish to create a PDF files of your completed project. At the end of the textbook there will be a procedure that will show you how to merge the PDF files into one portfolio file.
Next you will create a PDF file of your drawing. Since Revit does not come with a way to print to a PDF file, you will use another program called PDF reDirect v2 to create the PDF files of each sheet and merge them into one file. This program does not come with the Revit software. You may also wish to use another program to create the PDF file.
The PDF reDirect program is free. You may also wish to purchase the Pro Version which has additional features you may find useful. For this book the free version was used. The website to download the program is located at www.exp-
systems.com.
- Open the WU1-4 file. Save the file as WU1-5.
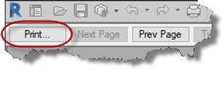
- After installing the PDF reDirect software, click on the File Menu and select the Print command.
You may also select the Print tool in the Quick Access Toolbar.

Print Command in the Quick Access Toolbar

Print Command
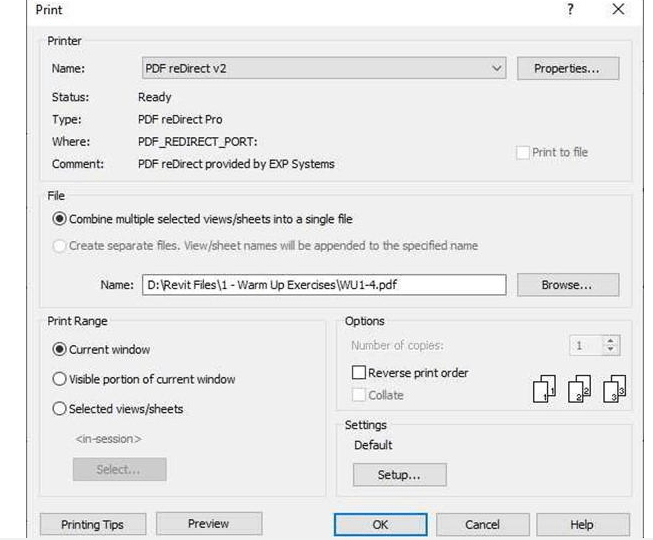
- The Print dialog box opens. Match the settings as shown.
(You may see a different folder name in the File section of the dialog box.)

Print Dialog Box
- Click the Setup… button in the Settings area.
Match the settings as shown. Click the OK button when finished. The two settings you will need to change are the Paper Placement and Zoom settings.
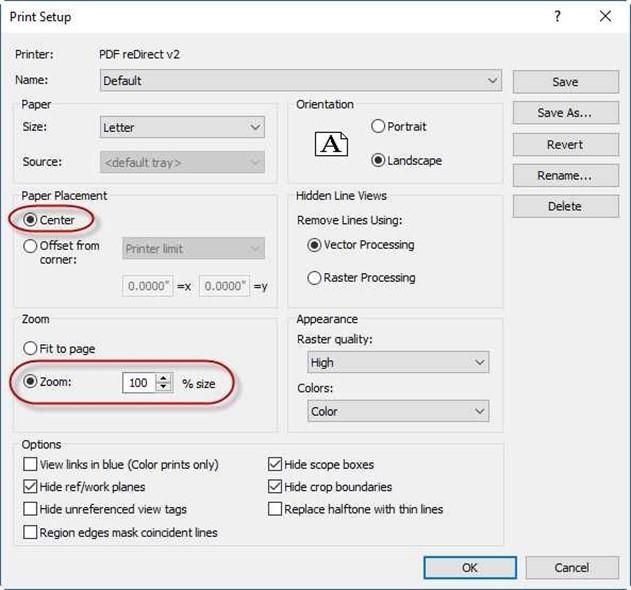
Print Setup Dialog Box
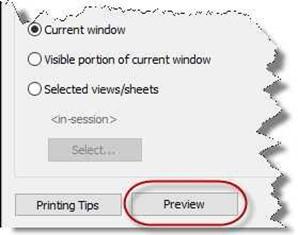 In the Print dialog box, click the Preview button to confirm that the settings are correct.
- The Preview window opens. Check the setup of the page and then click the Print… button at the upper left corner of the window to close the preview.
Preview Button
-
In the Print dialog box, press the OK button to create the PDF file. The PDF redirect V2 dialog box opens.
You will need to change the Page Rotation setting to 90° Clockwise to show the drawing in landscape orientation.
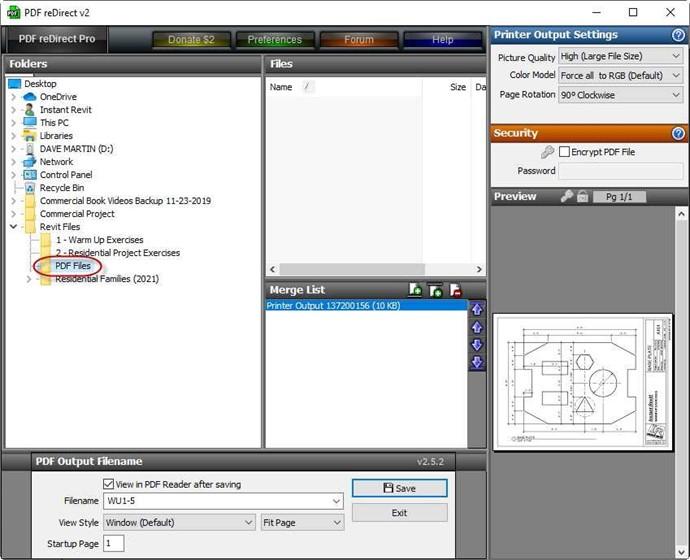
PDF re Direct v2 Dialog Box
-
Select the PDF Files folder as the save location. Click the Save button to save the file.
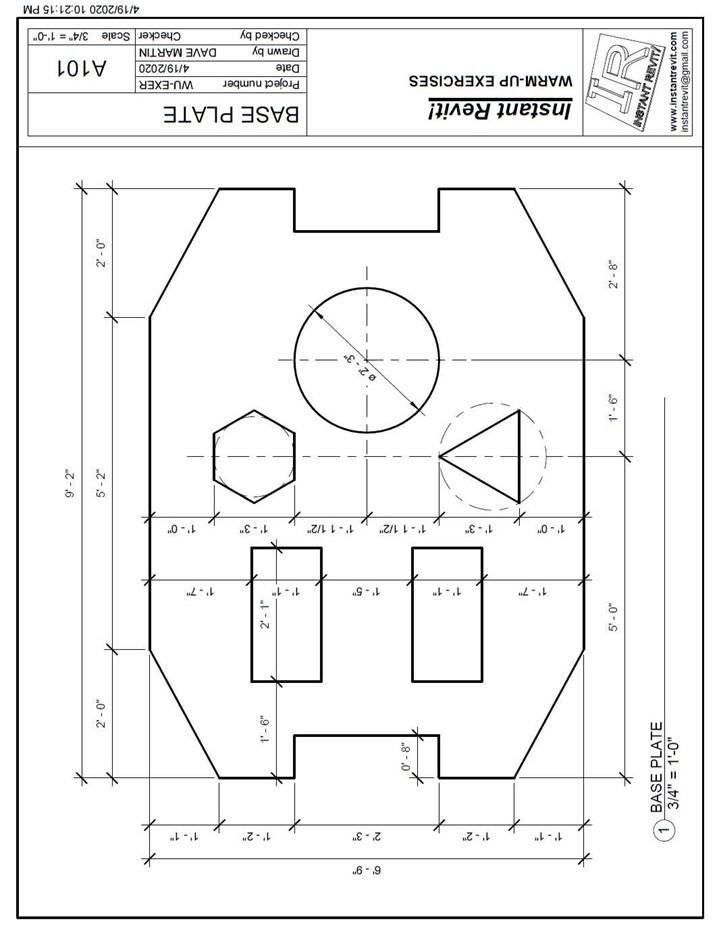
On the next page is the completed version of the project.
- This is the end of Part 5 and Warm-Up Exercise #1. Save your file as WU1-5.