
Creating the Residential Building Layout
Starting the Tutorial
- Start Revit 2021 by clicking on the icon on the desktop.
- Create a new drawing file using the Residential-Default template file.
This will be the only time that you will need to create a new file from a template file.
From here on, you will use the previous file as your starting point for the next tutorial part.
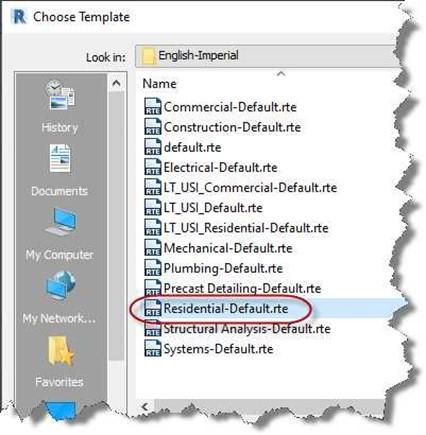
Residential-Default Template File
- Name the file RL1-1. (RL1-1 = Residential Lesson One, Part 1)
- Save the file in the “2- Residential Project Exercises” folder.
- Open the file.
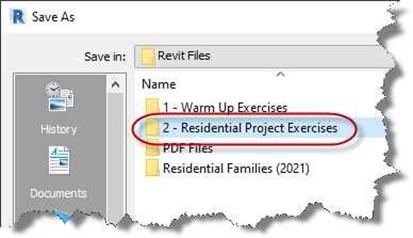
Residential Project Exercises Folder
Note: Throughout the seven tutorials you will name the file according the part that you are completing. As you finish the part of the tutorial, save the file as the current part file name and then save the file as the next part.
Adding and Modifying the Levels, Deleting the Sheets
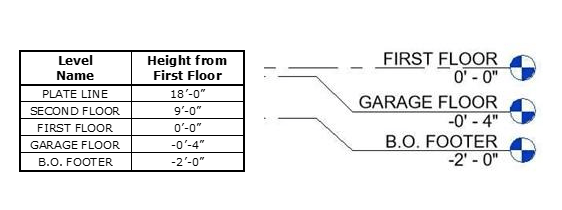
First you will need to modify the levels that come with the template. These levels will control the heights of key features of the building. Slab Heights/Floors, Walls, Roofs, and other features rely on a level to control their location.
- In the Project Browser, go to the Elevations (Building Elevation) view category and double-click on South. This will open the South Elevation.

South Elevation View
- Modify the Levels as shown in the chart. To change the height, select the level and then click on the numerical height. When the small box appears, modify the text.
Delete any extra levels.
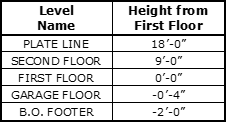
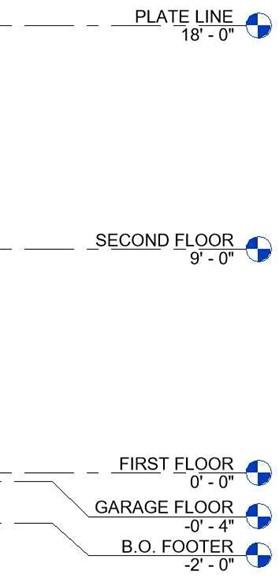
Updated Level Names and Heights
- As you rename the levels, you will see the Confirm Level Rename dialog appear. Click “Yes” to rename the corresponding view in the Project Browser.
- To create the bend in the level marker, click on the level line and then the Add Elbow toggle on the line.
- Click, hold, and drag on the handles to adjust the location of the level text.

Confirm Level Rename Dialog Box

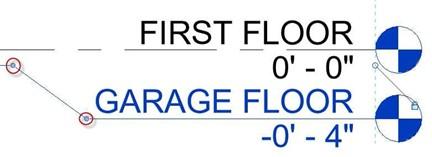 Add Elbow Toggle
- Do this for each elevation view. (East, North, South, and West) In the East elevation view, you will need to unhide the B.O. Footing level marker. This is discussed in the next tutorial part.
Deleting the Sheets
The reason for deleting the sheets is that you will be creating new sheets at the beginning of Tutorial 7 when you begin the portfolio. You will also create some sheets during the tutorials to see what portions of the project look like on sheets.
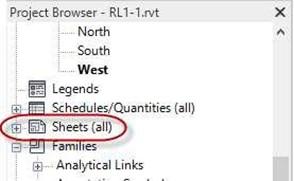
- Scroll down to the Sheets section in the Project Browser.
Click the “+” sign next to the Sheets (all) text.
This will expand the section to show all the sheets within the project.
Sheets Section
-
Select the first sheet then scroll down to the last sheet and hold the Shift key.
Select the last sheet, all the sheets will be selected.
- Press the Delete key to delete the sheets.
- This is the end of Part 1.
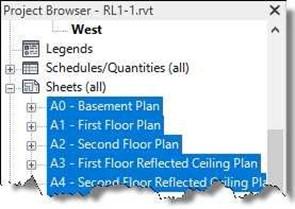
Sheets Selected
As you did at the beginning of the tutorial, save your file as RL1-1.


