
Updating the Portfolio to Include the Basement Drawings
Just like you did in the RL7 tutorial, you will be creating sheets for the basement portion of the project. The basement plan, interior elevations, sections, and details will be integrated into the current portfolio.
Part 1 – Sheets A-1 through A-7
- Open the RLA-6 file. Save the file as RLA-7.
- You will follow a procedure like the one in RL7.
Examples of the drawings for the entire portfolio will be given at the end of each part.
- The first sheet will be T-1. The Sheet List will be updated as more sheets are added. Change the Longitudinal Section rendering to show the basement.
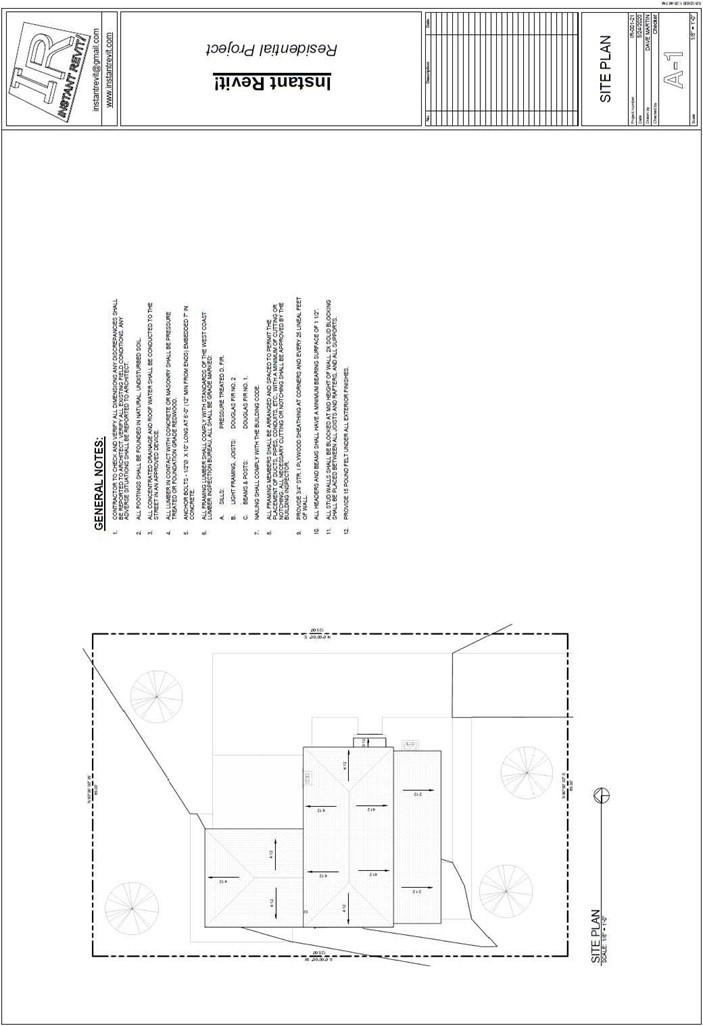
- The next sheet is the A-1 Site Plan sheet.
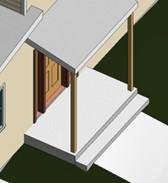
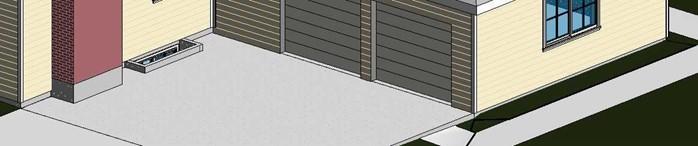
Due to the change in topography you will need to add an additional sheet at the front porch.
You may also need to modify the topography for the driveway area.
Additional Front Porch Step
- For the A-2 Floor Plan sheet, you will need to modify the Door, Window, and Room Finish Schedules.
- The A-3 sheet has only one change, an additional section line will be added for the Basement section.
- There will be a new sheet added to the set. Create a sheet named A-3.1. This sheet will be for the Basement Floor Plan.
- For the A-4 sheet, remove the North Elevation view. The east elevation will have the Basement outline added with hidden lines. This will be done on all the elevation views.
- Create new sheet named A-4.1 North Elevation. Place the north elevation on the sheet and update the view.
- Update the A-5 sheet. Remove the West elevation view and update the south elevation view.
- Create new sheet named A-5.1 West Elevation. Place the west elevation on the sheet and update the view.
- Update the A-6 sheet. Update the Longitudinal section view. Remove the Transverse Section view.
- Create new sheet named A-6.1 Transverse Section. Place the section on the sheet and update.
- Create new sheet named A-6.2 Basement Section. Place the section on the sheet and update.
- Update the A-7 sheet. Add the Basement Reflected Ceiling Plan view at the bottom right corner of the sheet.
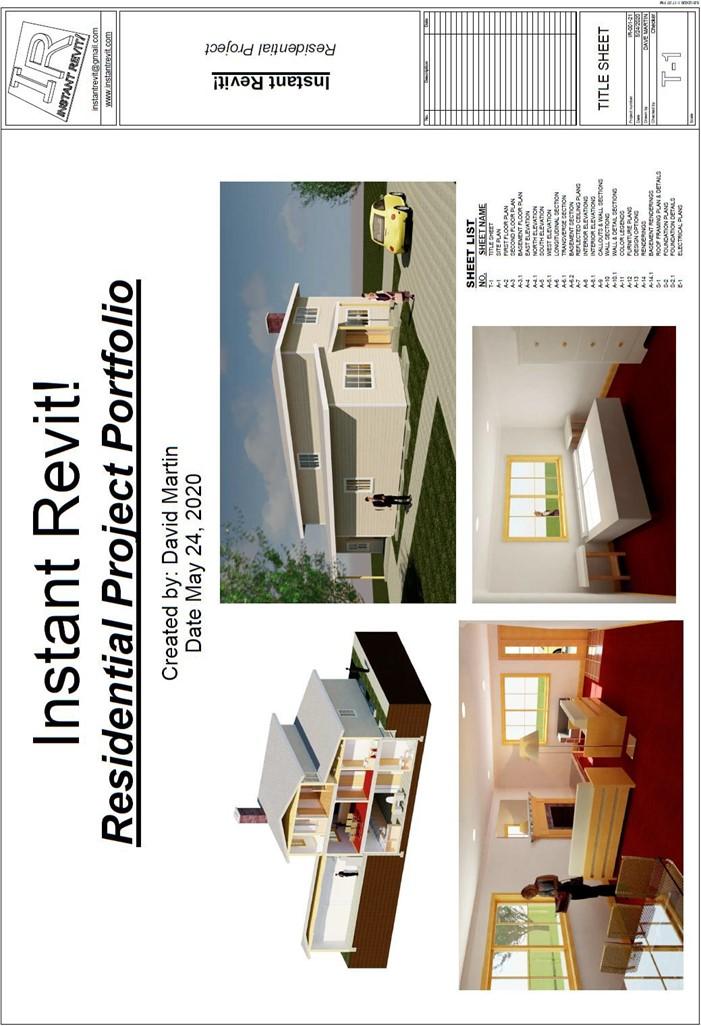
T-1 Title Sheet
- Site Plan Sheet
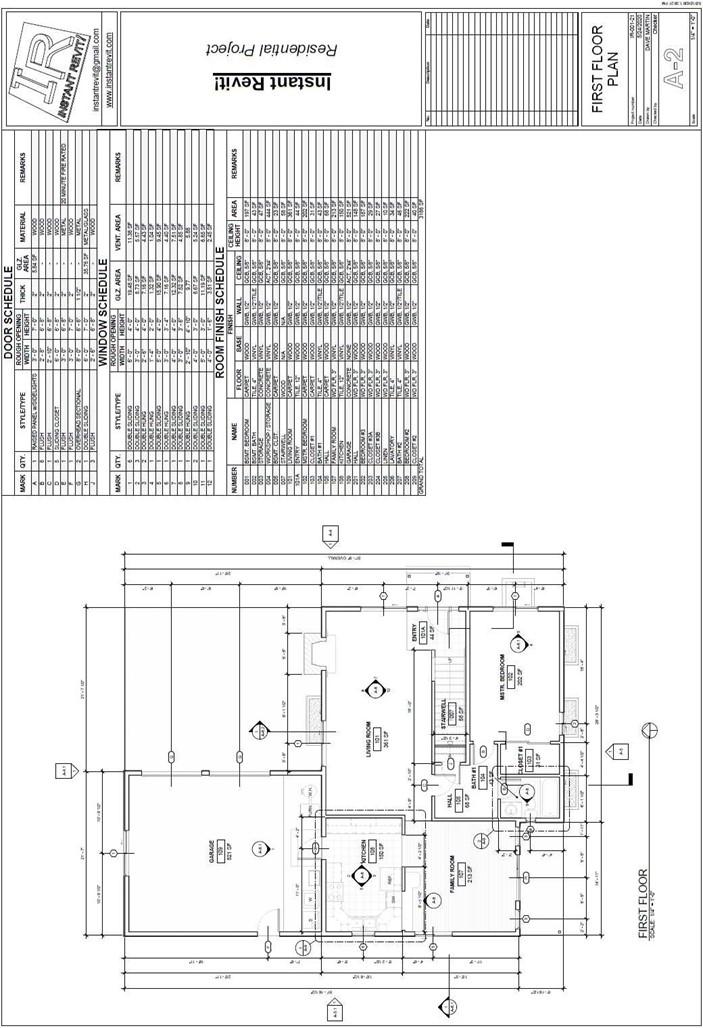
- First Floor Plan
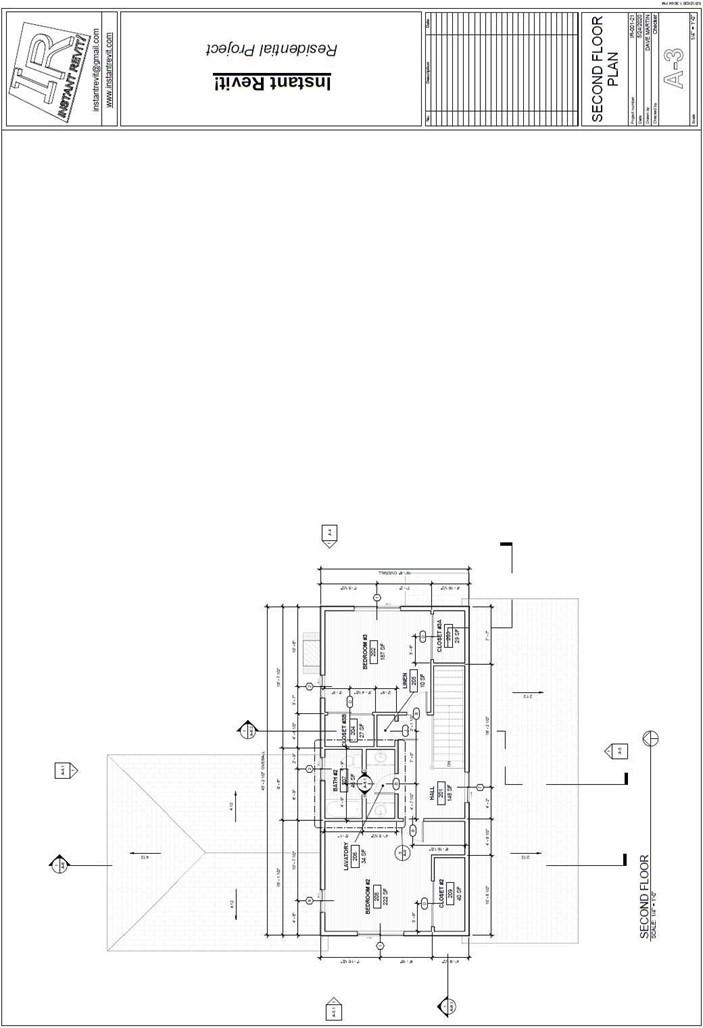
- Second Floor Plan
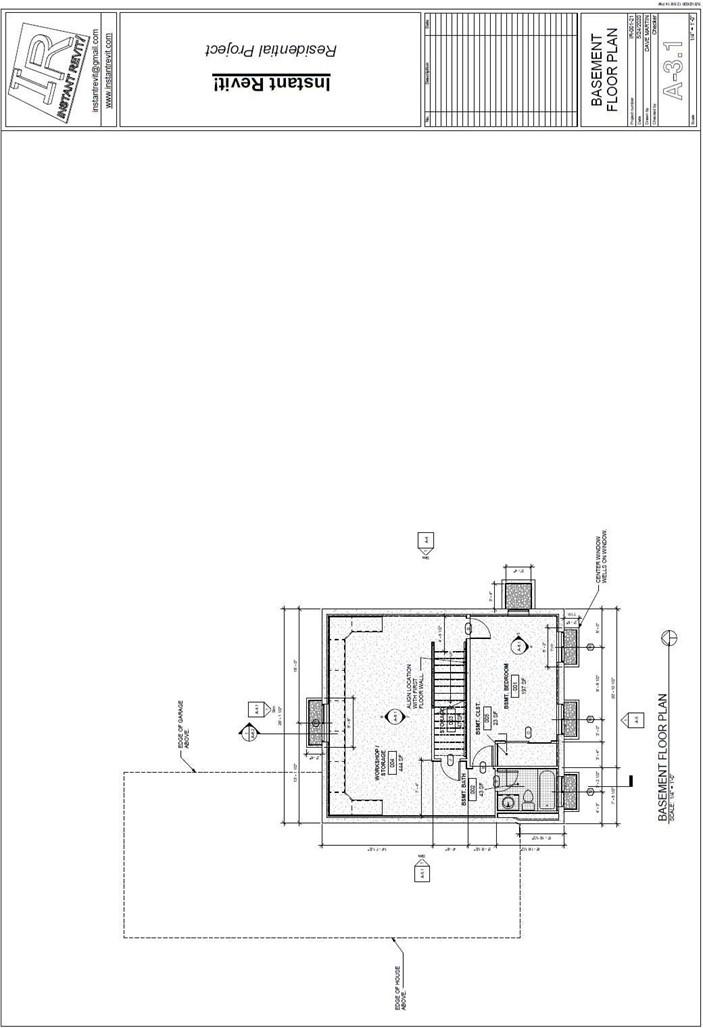
A3.1 Basement Floor Plan
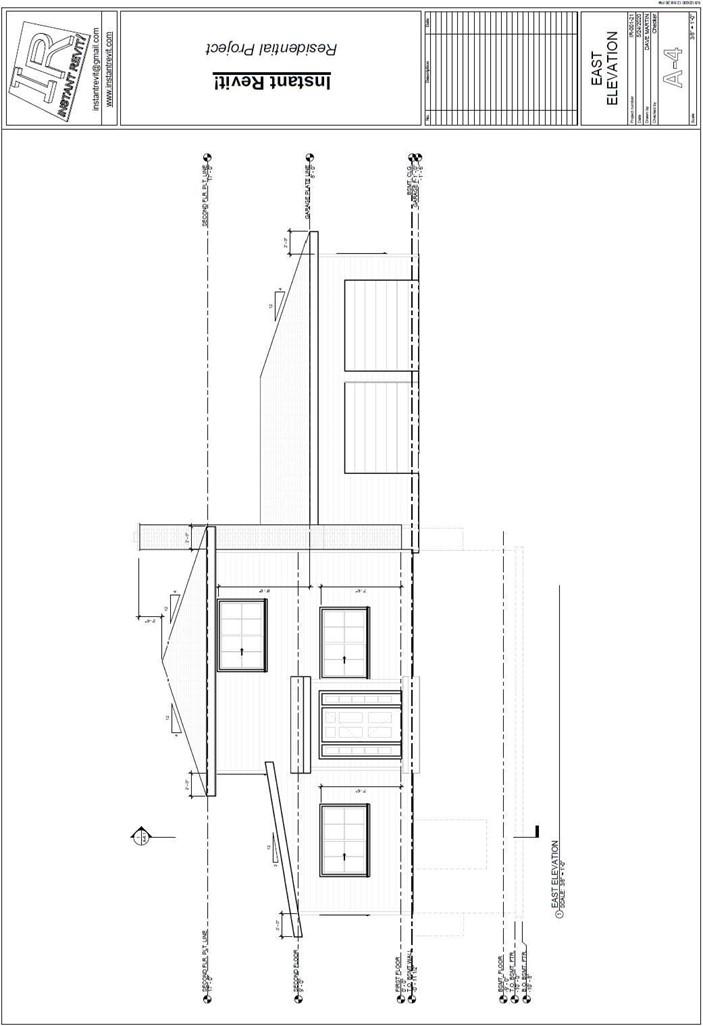
- East Elevation
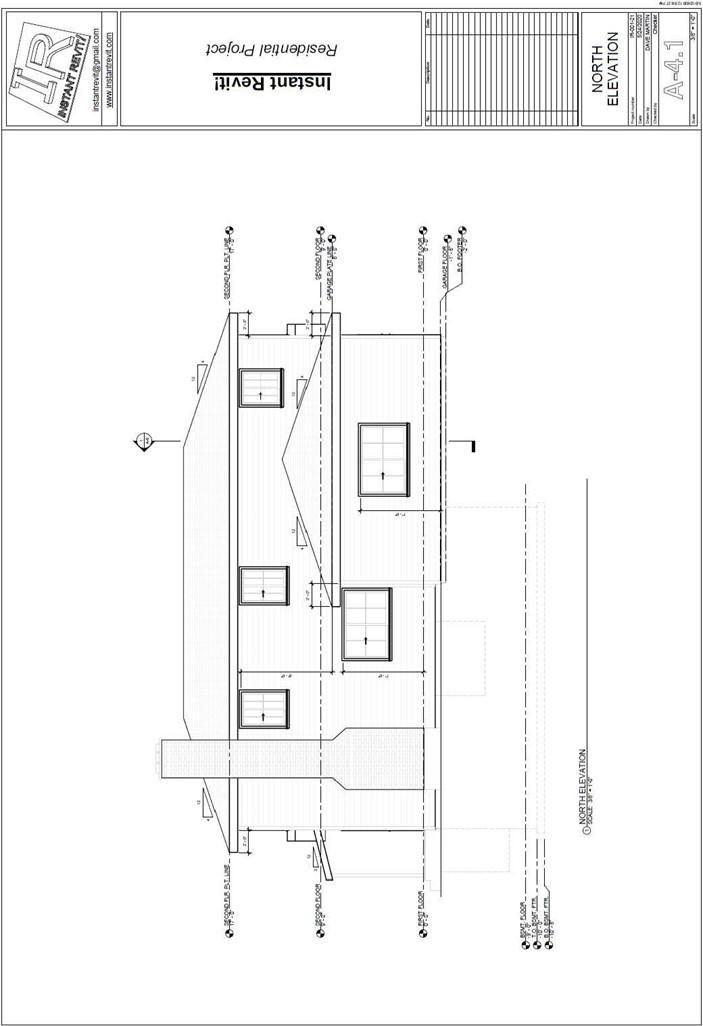
A-4.1 North Elevation
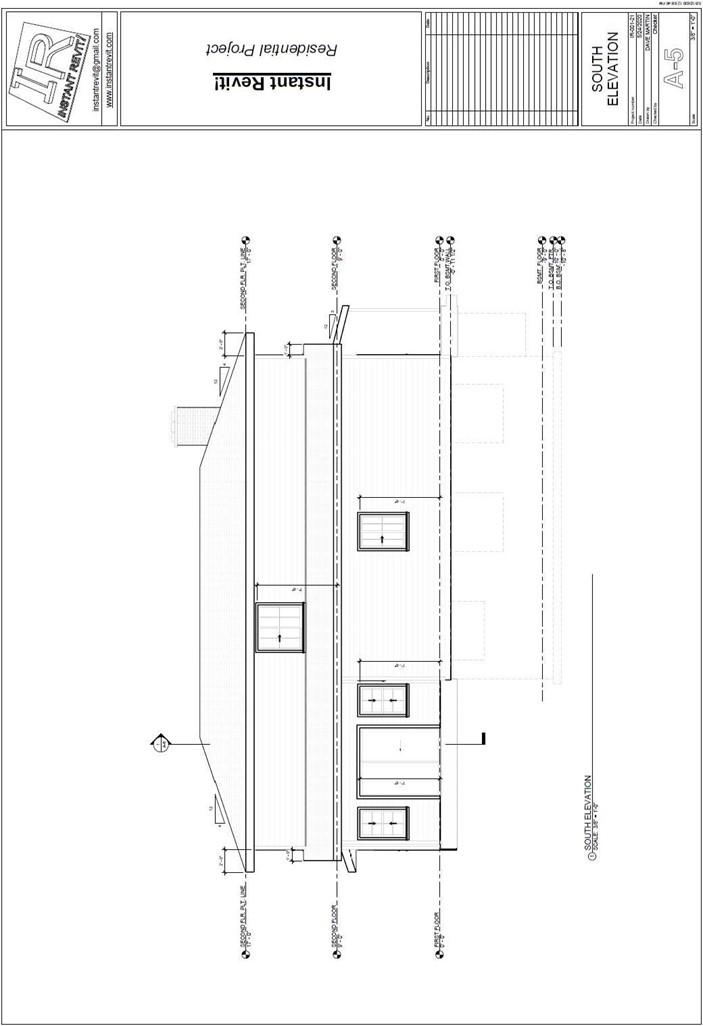
- South Elevation
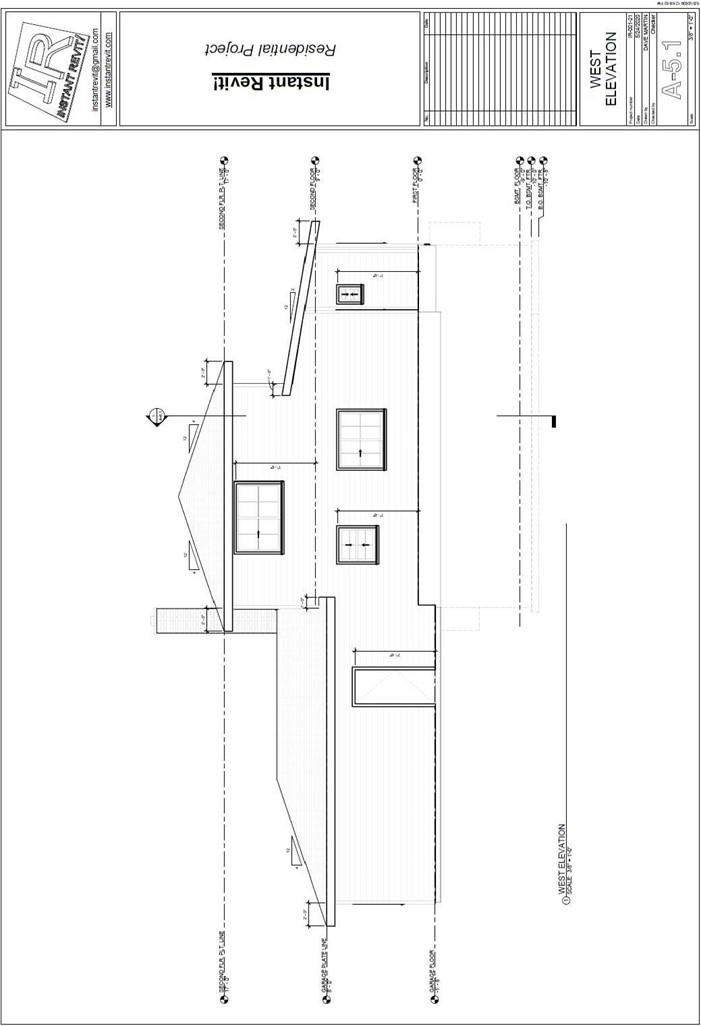
A-5.1 West Elevation
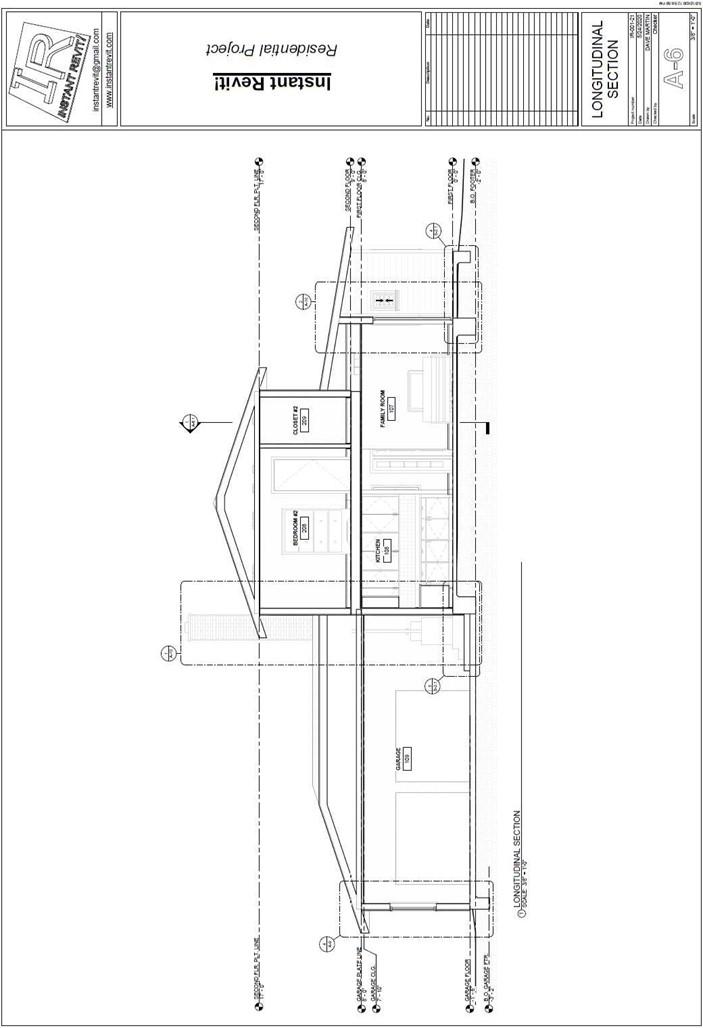
- Longitudinal Section
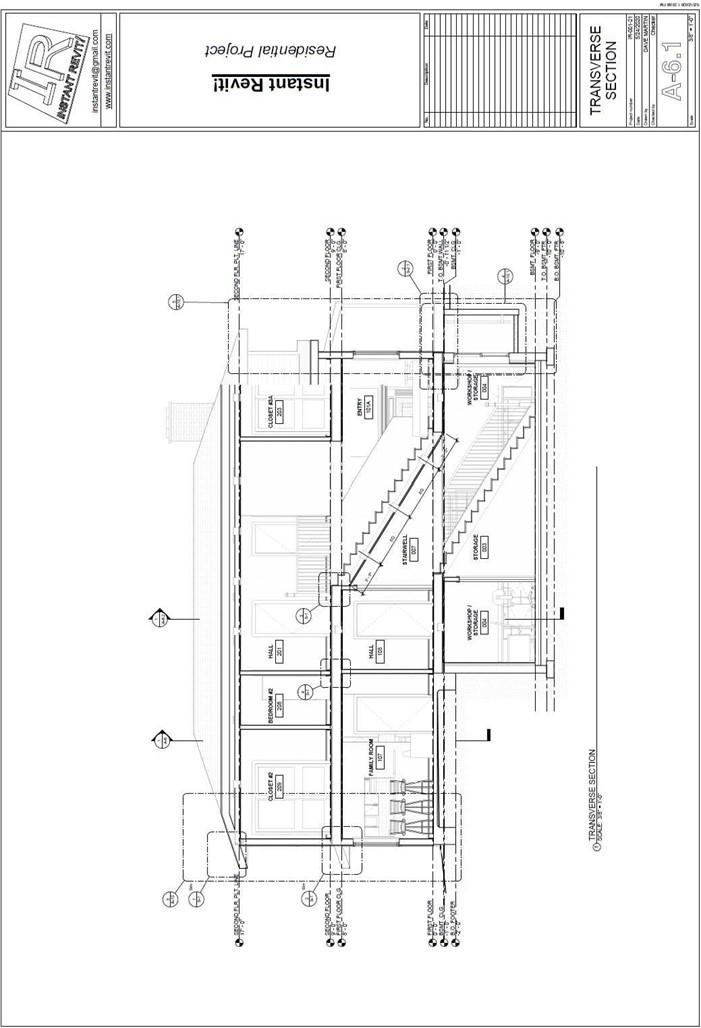
A-6.1 Transverse Section
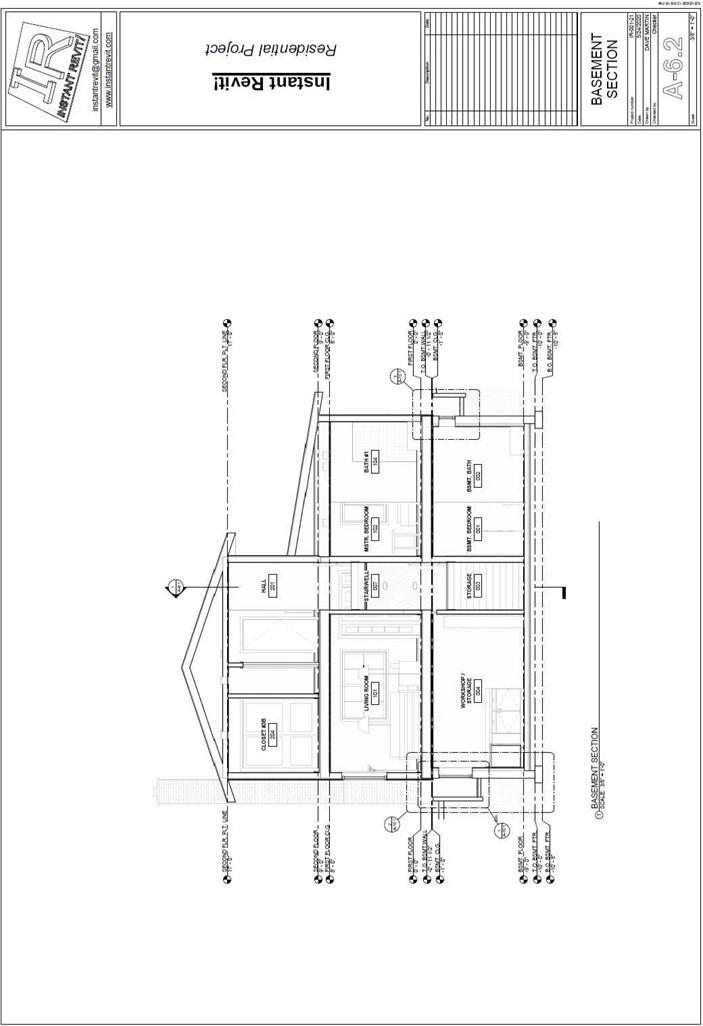
A-6.2 Basement Section
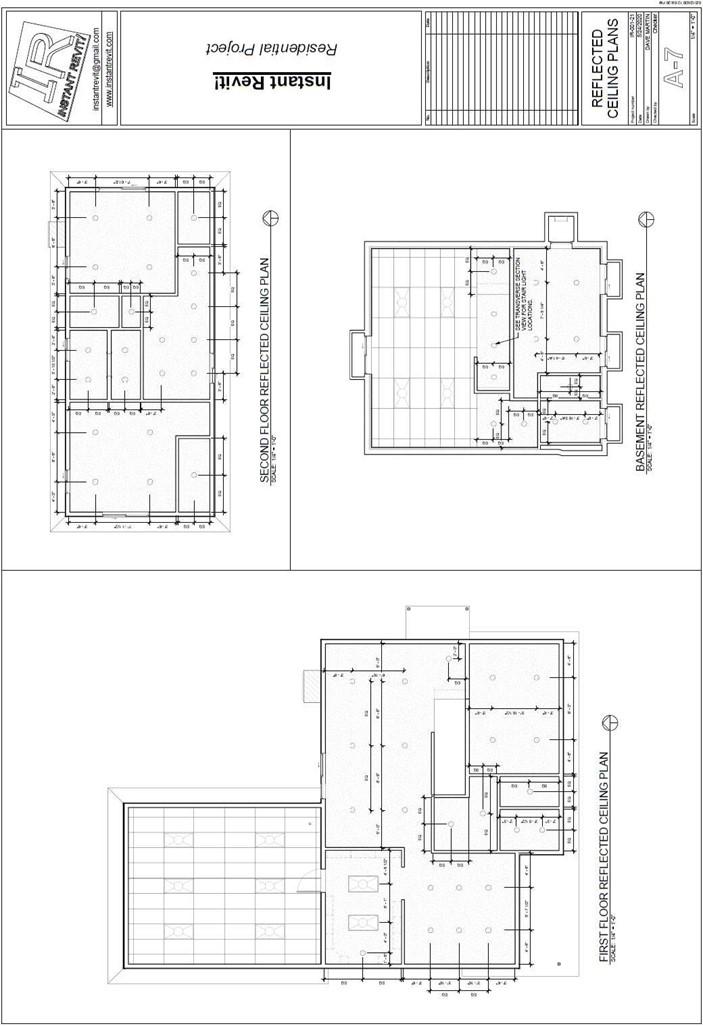
- Relected Ceiling Plans
- Interior Elevations
Part 2 – Sheets A-8 through A-12
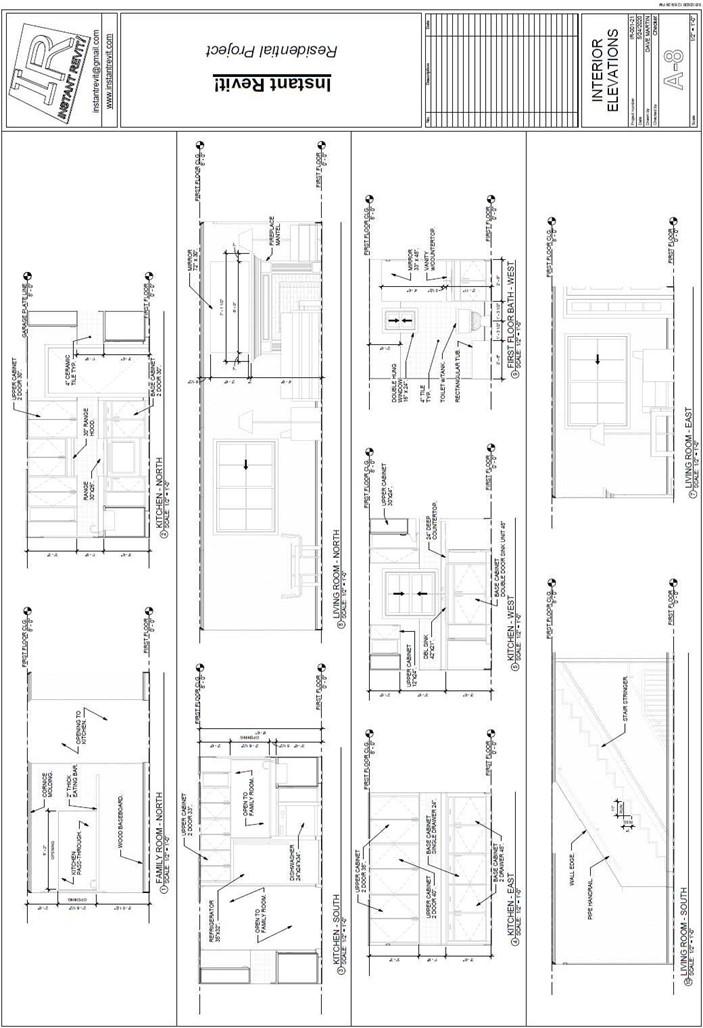
- Update the A-8 Interior Elevation sheet.
The elevations that will be on this sheet will be:
- Family Room – North
- Kitchen – North
- Kitchen – South
- Living Room – North
- Kitchen – East
- Kitchen – West
- First Floor Bath – West
- Living Room – South
- Living Room – East
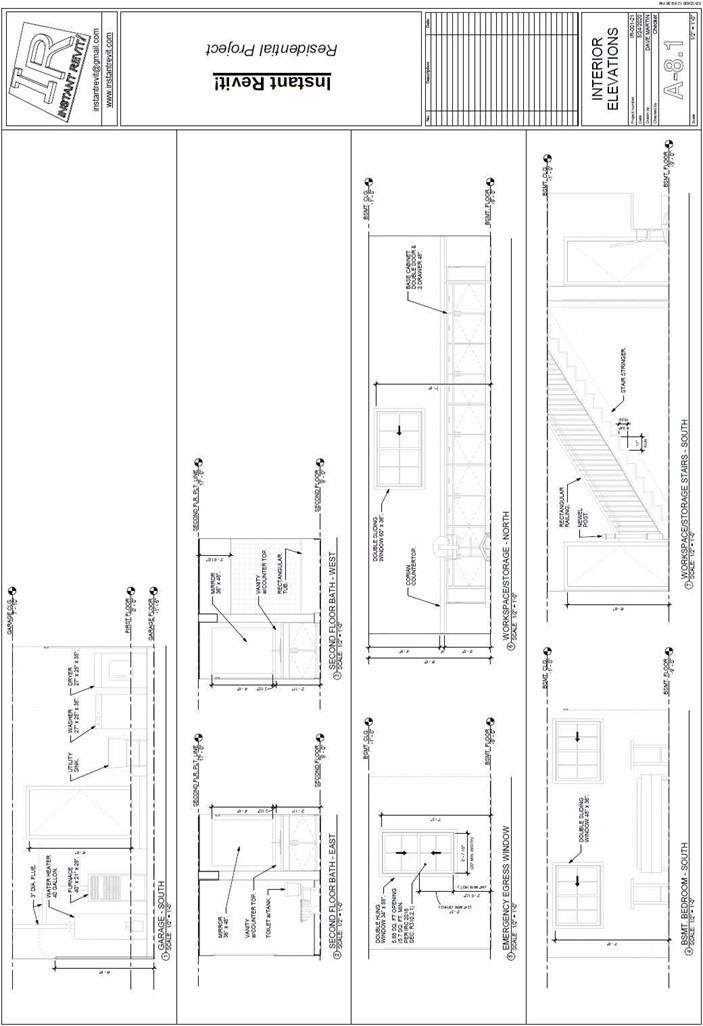
- Create the A-8.1 Interior Elevation sheet.
The elevations that will be on this sheet will be:
- Garage – South
- Second Floor Bath – East
- Second Floor Bath – West
- Emergency Egress Window
- Workspace/Storage – North
- Basement Bedroom – South
- Workspace/Storage Stairs – South
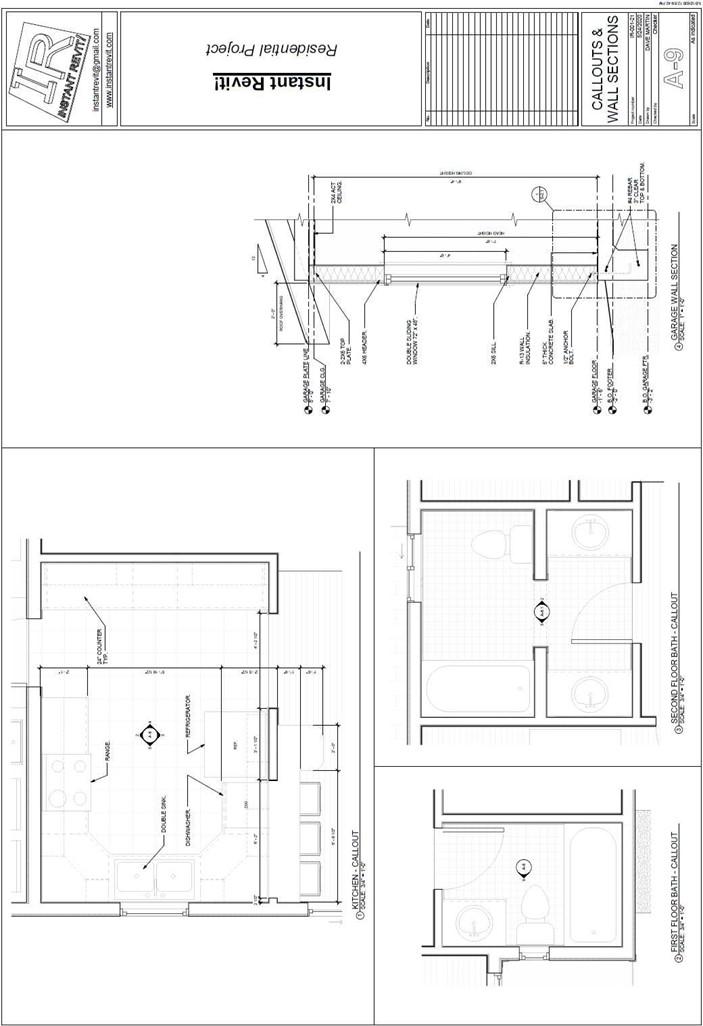
- For sheet A-9 Callouts & Wall Sections, the only change is to add medium lines around each of the view. There are no other changes.
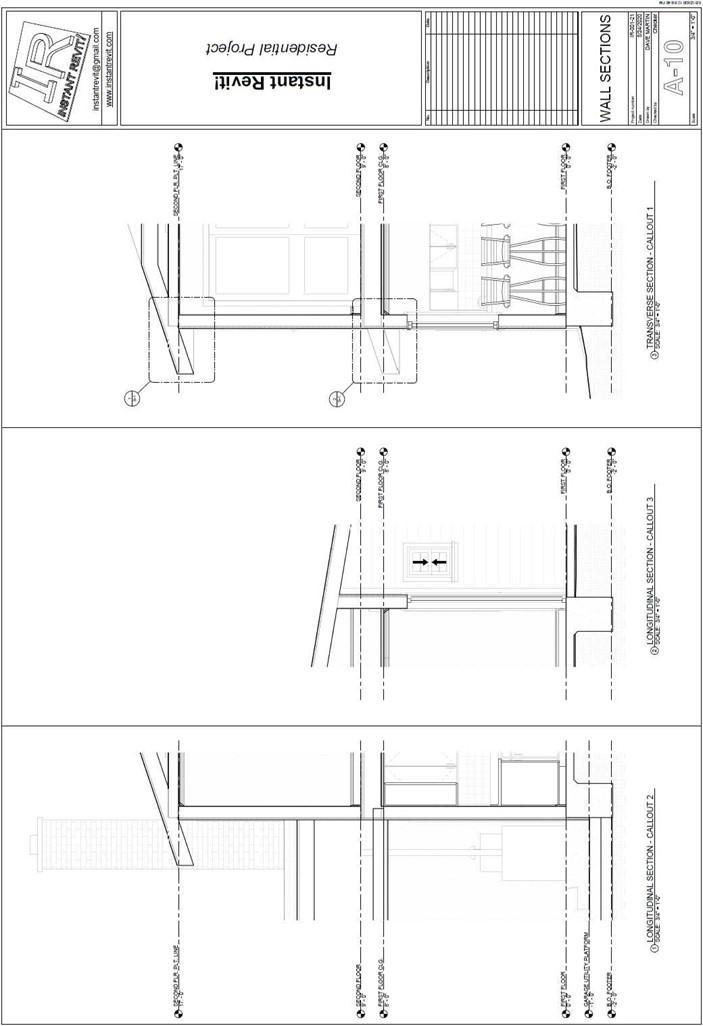
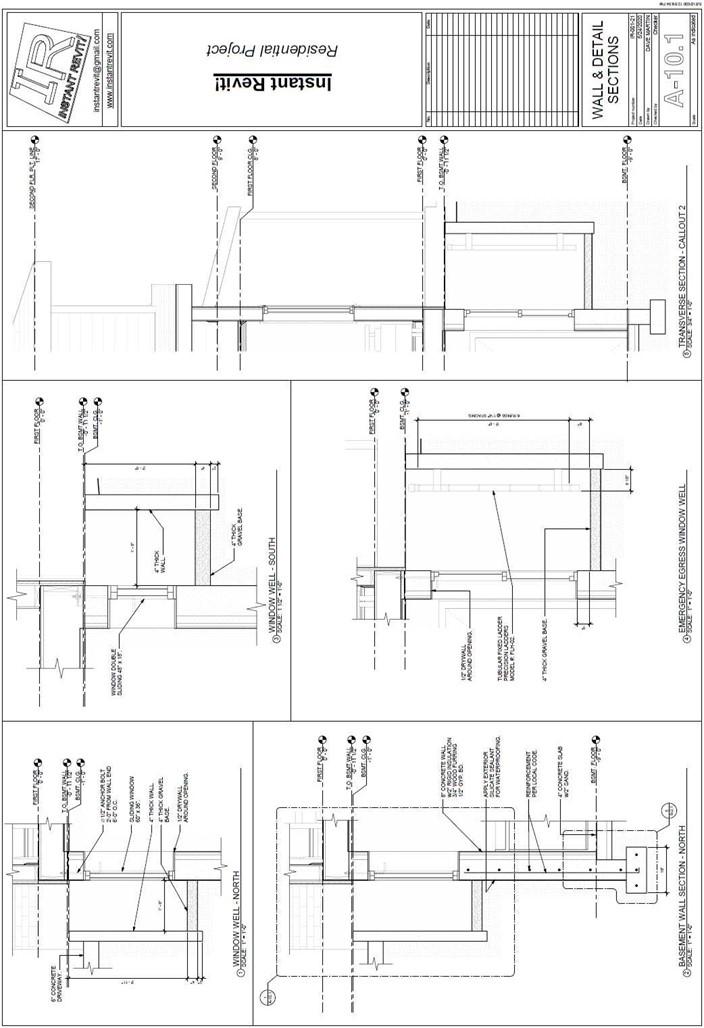
- For sheet A-10, move the Transverse Section – Callout 2 view to sheet A-10.1
- Create the A-10.1 Wall & Detail Sections sheet.
The views that will be added will be:
- Window Well – North
- Basement Wall Section – North
- Window Well – South
- Emergency Egress Window Well
- Transverse Section – Callout 2
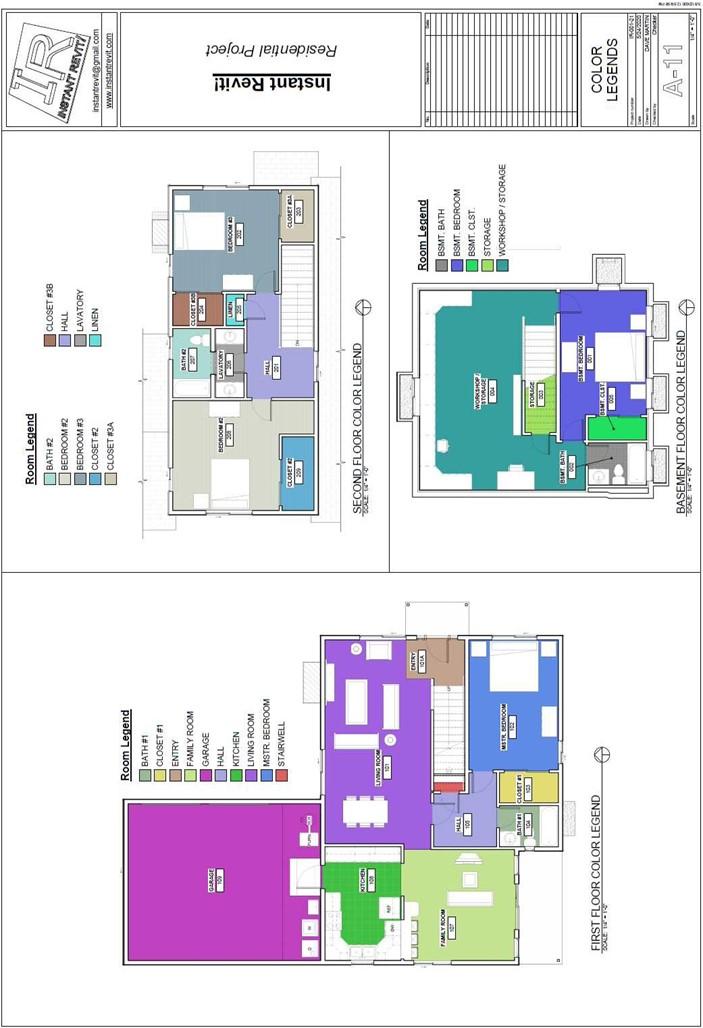
- Update the A-11 Color Legends sheet.
- Create and add the Basement Floor Color Legend. Set up the view the same as the First and Second Floor Color Legends. Used the masked version of the Room Tags for all three views.
- Divide the views with medium lines as you did for the reflected ceiling plan sheet.
- Add break lines to the second floor color legend to block out a portion of the garage and first floor roofs.
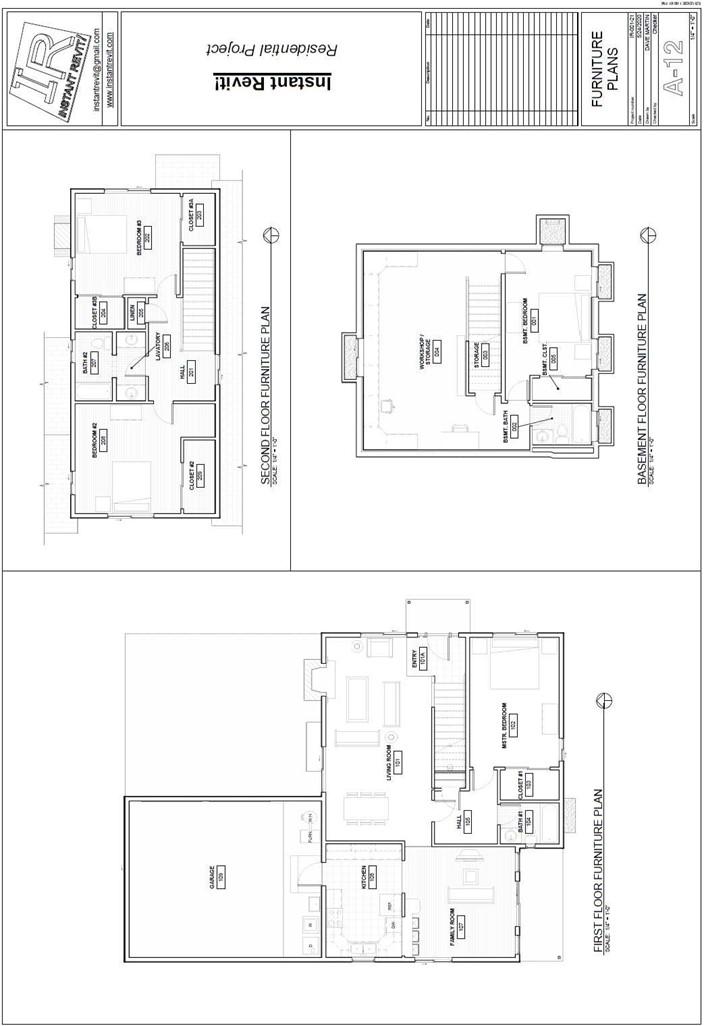
- Update the A-12 Furniture Plans sheet.
- Add the Basement Floor Furniture Plan.
- Divide the views with medium lines as you did for the color legend plan sheet.
- Copy the break lines from the second floor color legend view and paste to the second floor furniture plan view.
A-8.1 Interior Elevations
- Callouts & Wall Sections
- Wall Sections
A-10.1 Wall & Detail Sections
- Color Legends
- Furniture Plans
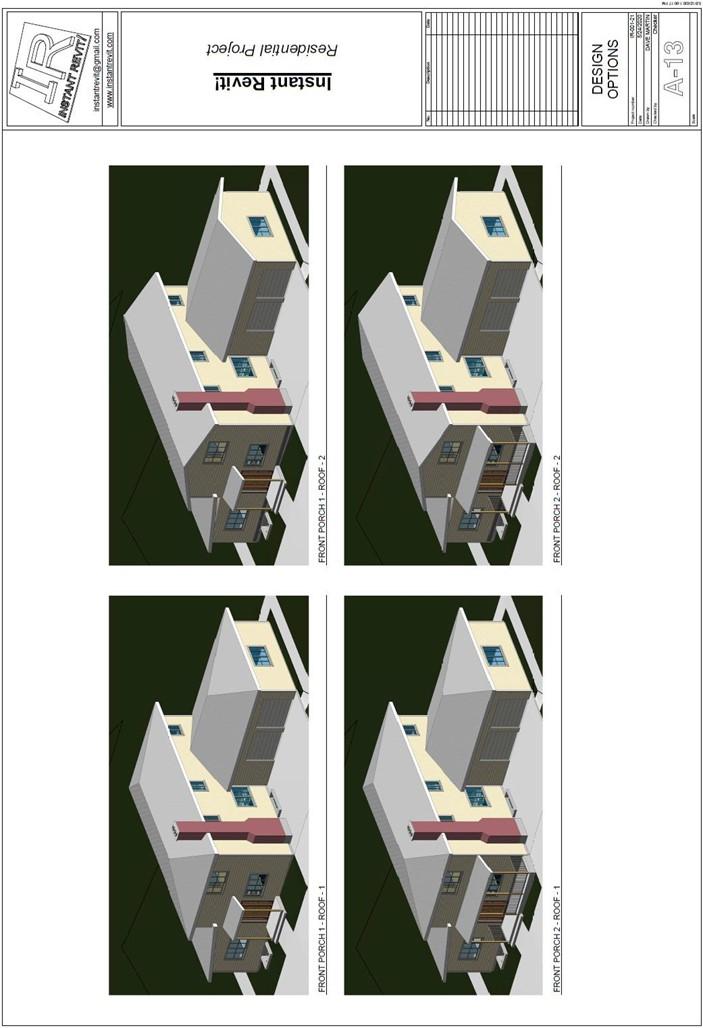
Part 3 – Sheet A-13 through S-2.1
- For sheet A-13 there will be no changes to the views. You will need to adjust the bottom of the three garage walls to -1-6″ from the first floor level.
You may also need to change the Base Offset Distance for the exterior walls to
-1′-0″ so that the siding is at the top of the basement walls.
You will also need to move the extra step that was added to the porch slab to both design options. For the larger porch option move the step out from the porch so that the tread extends 11″ outward and 6″ below the surface of the porch.
The views will be updated automatically to show the window wells.
Base Extension Distance and Base Offset Adjusted
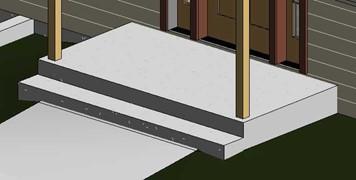
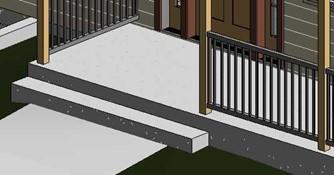
Smaller Porch Option Step Added Extended Porch Option Step Added
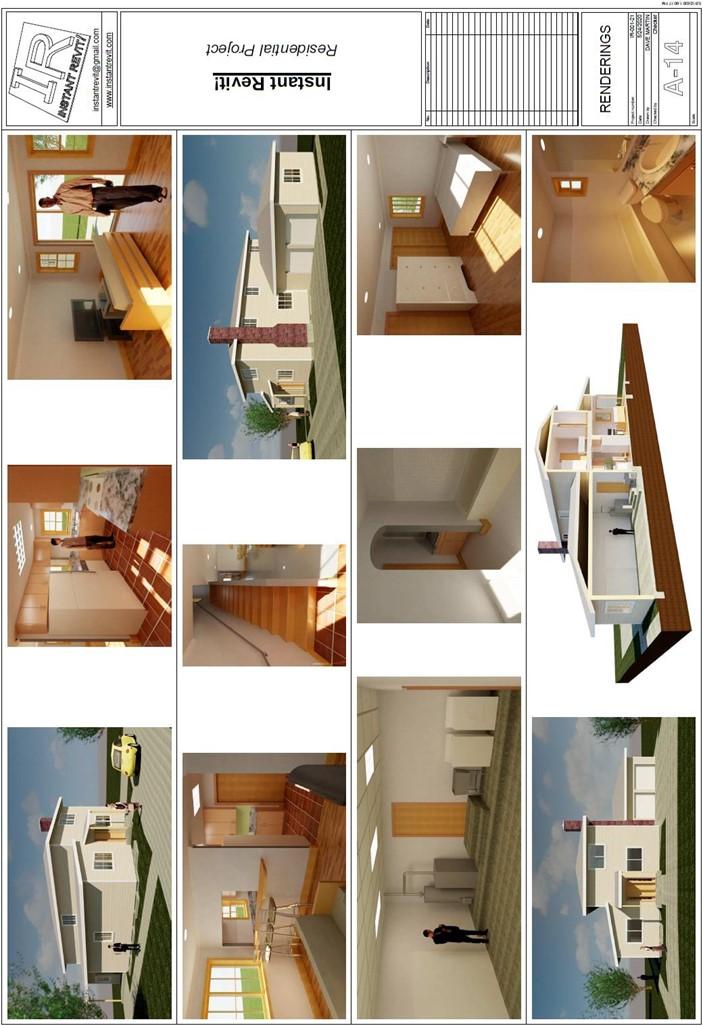
- For sheet A-14 you will need to render most of the views again along with the basement views. Remove the renderings that you are rendered again.
The sheet will remain divided into four rows. There will be a 3/16″ gap above and below the renderings. This will mean that each rendering will be 5 3/8″ high.
There will be a total of 12 renderings on this sheet.
-
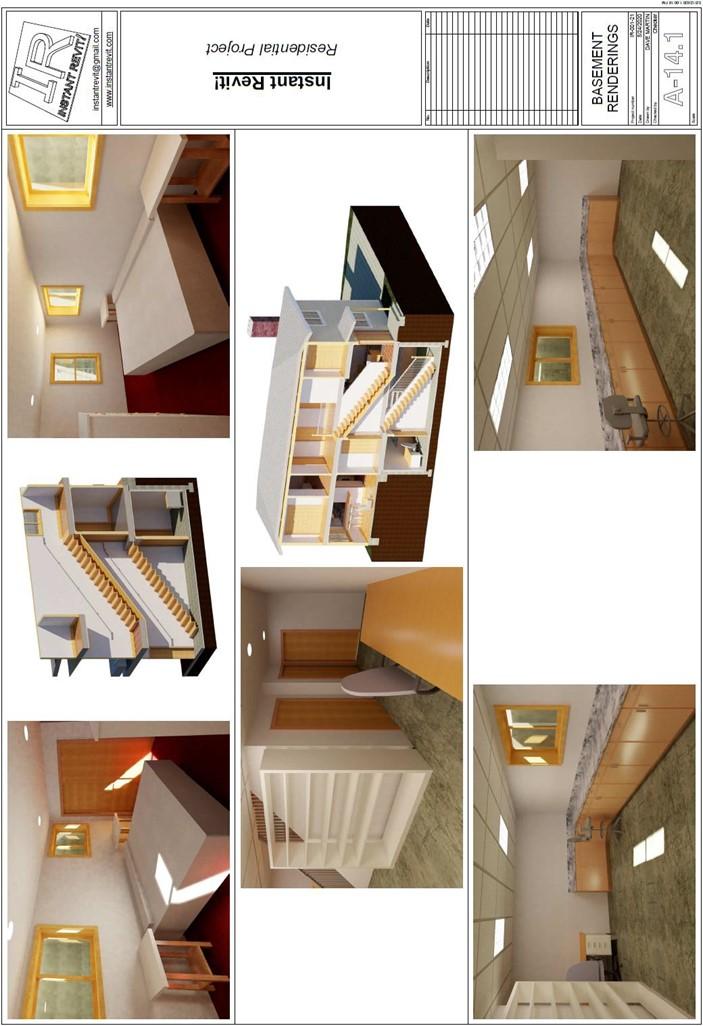
Create the A-14.1 Basement Renderings sheet.
The sheet will remain divided into three rows. There will be a 3/16″ gap above and below the renderings. This will mean that each rendering will be 7.29″ high.
Create new 3d views of the basement that show the:
- Basement Bedroom (2 Views)
- Basement Workspace Area (3 Views)
- Basement Stair Section
- Transverse Section showing Basement
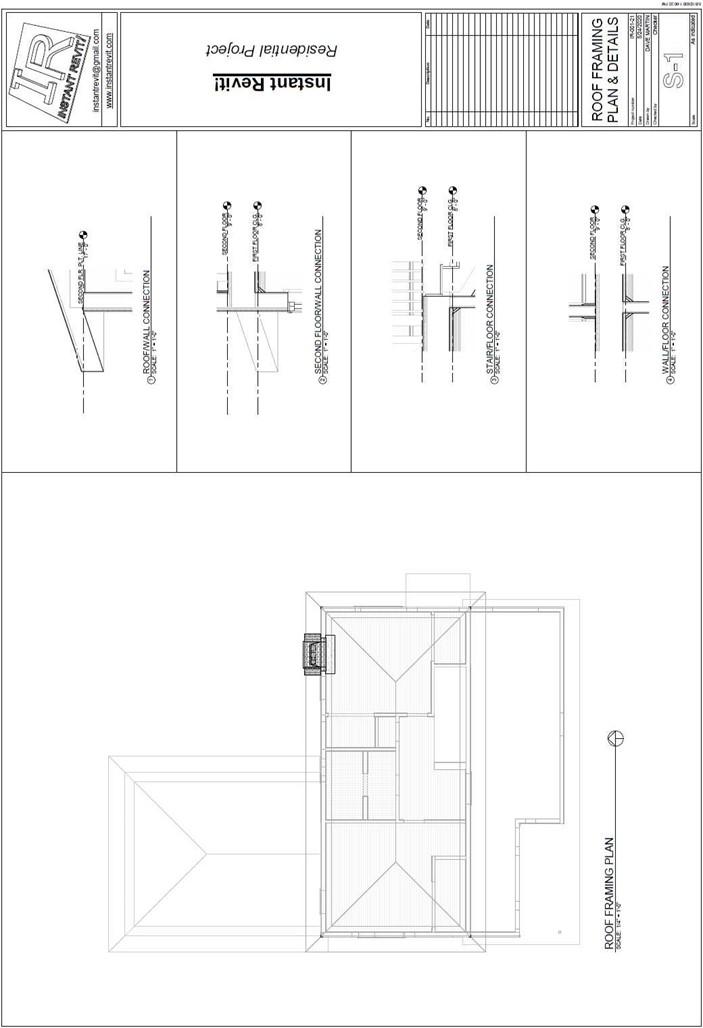
- For sheet S-1 Roof Framing Plan & Details there are no changes.
- For sheet S-2 Foundation Plans, remove the four foundation details. Create and add the Basement Foundation Plan.
- Create the S-2.1 Foundation Details sheet.
Place the four details from the original S-2 sheet. Move them to the left side of the sheet.
Add the following two details:
- Basement Wall Footer
- Window Well – North
- Update the E-1 Electrical Plans sheet.
- Create and add the Basement Floor Electrical Plan. To see the basement window wells you will need to change the bottom and view depth to -2′-0″.
- Divide the views with medium lines as you did for the color legend plan sheet.
- Copy the break lines from the second floor color legend view and paste to the second floor furniture plan view.
This is the last set of sheets and the end of Appendix A.
Once you have completed these sheets you may wish to create a PDF portfolio of the sheets as you did at the end of Tutorial Seven.
- Design Options
- Renderings
A-14.1 Basement Renderings
- Roof Framing Plan
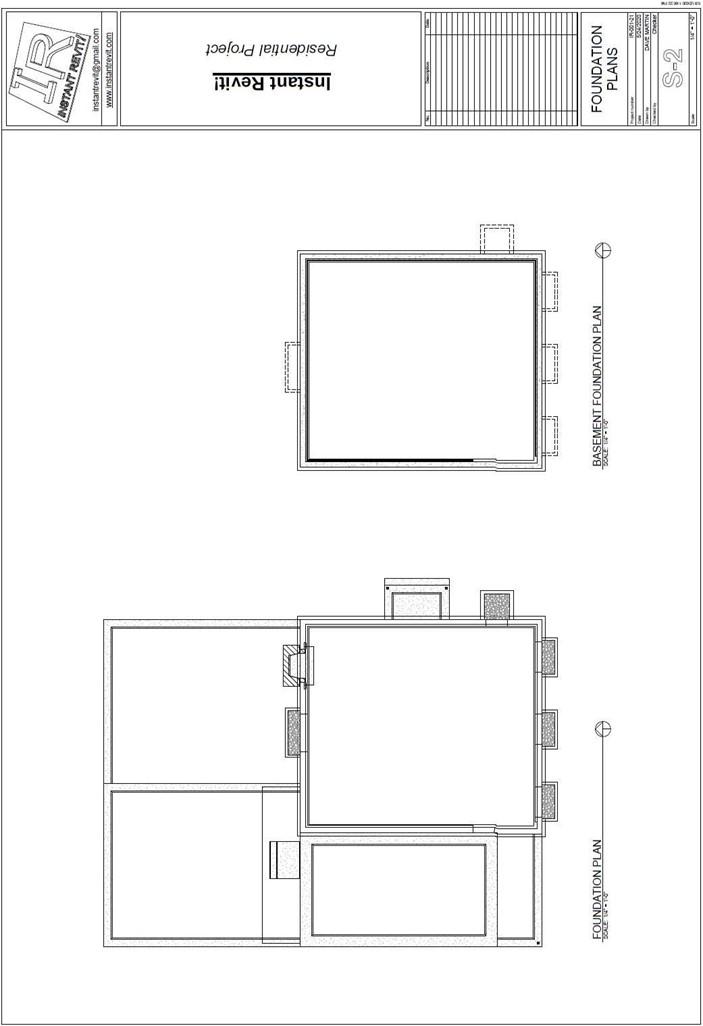
Foundation Plans
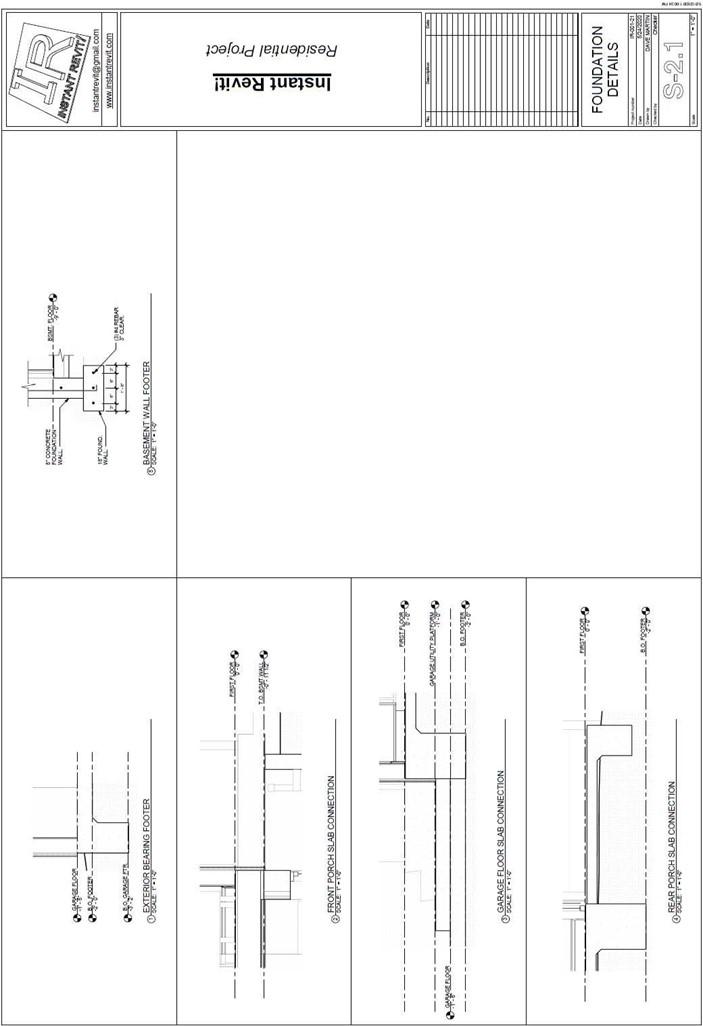
Foundation Details

Electrical Plans


