

SITE PLAN
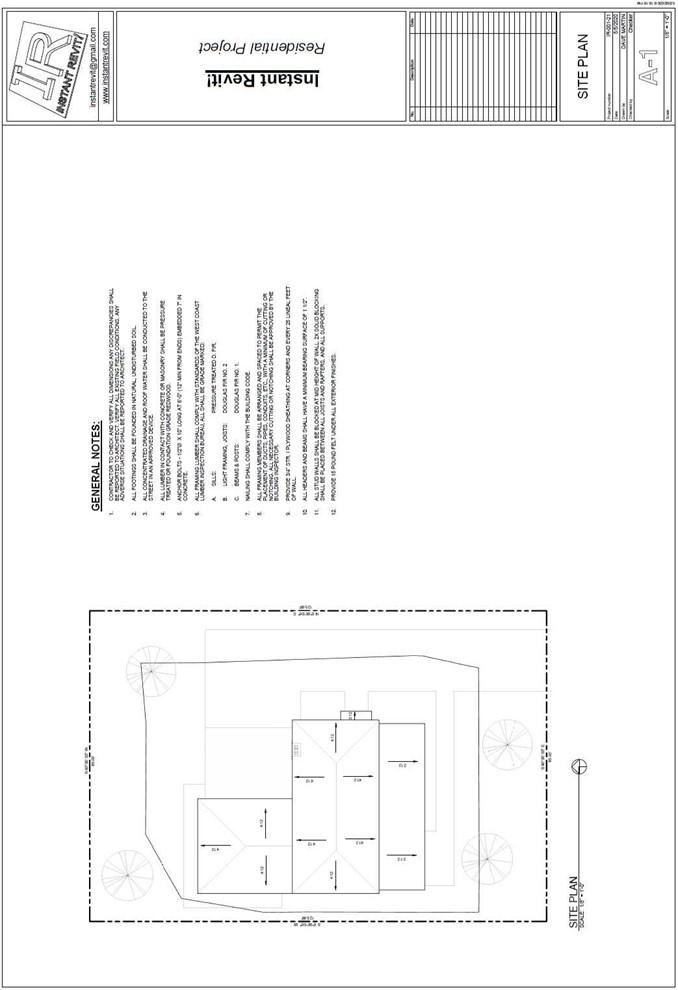
Site Plan
Creating the Sheet View
- Open the RL7-1 file. Save the file as RL7-2.
You may choose to not save the file with a new file name at the end of each part.
-
Create the sheet for the Site Plan.
- Drag and drop the Site Plan view into the sheet. The scale of the view is 1/8″ = 1′-0″.
- Hide the car and the people.
- Click on the view on the sheet.
In the properties for the Viewport, add the text SITE PLAN to the Title on Sheet parameter.
This will change the title to all caps without changing the title of the view.
You will do this for all of the sheets in the portfolio.

Title on Sheet Field Filled Out
- First, you will add the bearing and distance to the edges of the property lines.
Do this by tagging the line using the Tag by Category tool. To remove the leader, uncheck the leader checkbox.

Property Line Tag
- After placing the tags, you will need to modify it. The lines of text are too close together.
Select the tag and right-click. Choose the Edit Family choice. The family file will open.

-
Select the top text and move it up
1/32″.
Move the bottom text the same distance down.
Tag Family
- Click the Load into Project button to load the family into your project.
You do not need to save the file.
- Next, add a slope symbol to the roof surfaces.
Double-click on the view to activate the Site Plan view.
Click on the Spot Slope tool in the Annotate tab, Dimension panel.
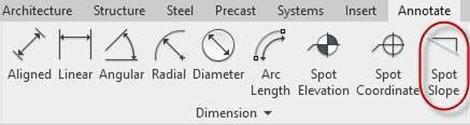
Spot Slope Tool
- Before adding the symbol, click the Edit Type button to change the properties of the symbol.
Click on the Units Format button and set the Unit symbol to :12.

Unit Symbol Setting
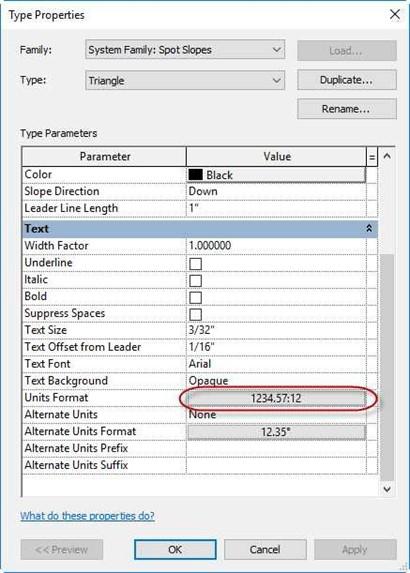
Type Properties for Spot Slope Tool
-
Click on each of the roof surfaces to add the symbol.
- Next, you will add a north arrow to the sheet.
Click on the Symbol tool at the far-right side of the Annotate ribbon.
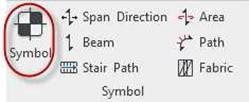
Symbol Tool
- In the Modify | Place Symbol contextual tab, click on the Load Family tool.
Select the North Arrow 1.rfa file in the Annotations folder.
North Arrow 1.rfa File
 Place the North Arrow symbol at the end of the line for the view title. Do this for all sheets that have plan views on them.
North Arrow Placed
Modifying the View Title Family
- Next you will change the text of the title to 1/4″.
You will also remove the number and the circle.
- In the Families category in the Project Browser, expand the Annotation Symbols area.
Then, right-click on the View Title family and select the Edit text.

Editing the Family
- The family file opens. Save the file as View Title – Larger Text.rfa in your drawing folder
- Click on the View Title text.
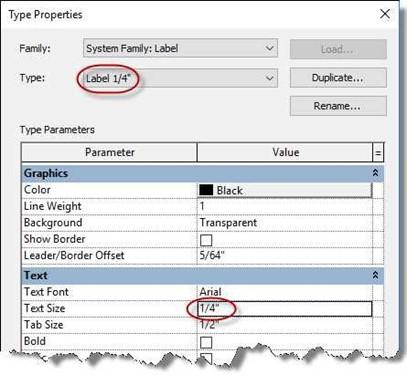 Click on the Edit type button and duplicate the family type. Name it: Label 1/4″.
Change the Text Size
parameter to 1/4″.
Family Type Created and Text Size Changed
- Click on the text and stretch it to make it wider.

Text Window Stretched
- Add the word “SCALE:” in front of the scale text. Use 1/8″ high text.
Note: Be careful not to move the original text up or down. This will change the relative text location to the line that divides the text labels.
- Save the family file and then load it into your project.

 Family Updated
-
Open your file and zoom in on the view title on the A-1 sheet.
- Click on the view title and then the Edit Type button in the Properties box.
Duplicate the Type. Name the type:
Title w Line – Plan Views.
Change the Title parameter to
View Title – Larger Text.
Use this type for the plan views on all future views.
Title w Line Family Type Changed
- The view title is updated.

View Title Updated
General Notes
The purpose of the general notes is to give general information about the project. These notes may be placed on the Title Sheet or the Site Plan. On a large project, there may be multiple pages of notes.
- To add the notes, you will need to create a new legend.
In the View tab click on the Legends pulldown and then the Legends tool in the Create panel.

Legend Tool
- Name the new legend view General Notes.
Set the Scale to 1/8″ = 1′-0″.
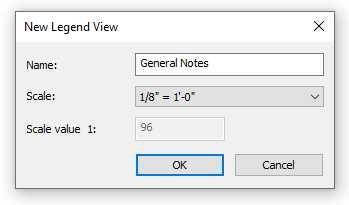
New Legend View Dialog Box
- In the Residential Families files open the text file named, General Notes Text.txt.
Select the text and copy to clipboard.
- If closed, open the General Notes legend in the project browser.

General Notes Legend
- Click on the Text tool and draw a box for the text. Paste the text from the clipboard.
- When formatting the text, remove the numbers in front of each note.
Also remove the blank lines between each note.
Add numbers in front of each note using the List: Numbers tool. This includes the sub-notes under note
#6.
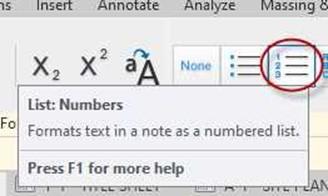
List: Numbers Tool
- This will temporarily give you 15 notes. Click in front of note #7 and indent the text, this will change the number to a letter. Repeat for the next two notes
-
Now you will have 12 notes.
- Add a blank line between each note. Click at the end of the last line of the note and hold the Shift key and press Enter.
- Remove the General Notes text at the top of the notes.
-
Add the text as separate text above the smaller text. Set the size of the text to
1/4″, Bold, Underlined.

General Notes
- Drag and drop the legend onto the sheet.
After placing, turn off the title under the notes.
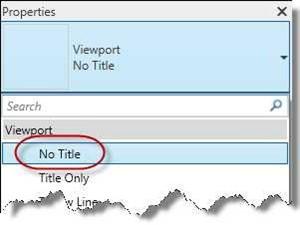
No Title Setting
- This is the end of Part 2. Save your file as RL7-2.
Sheet A-2 – FIRST FLOOR PLAN
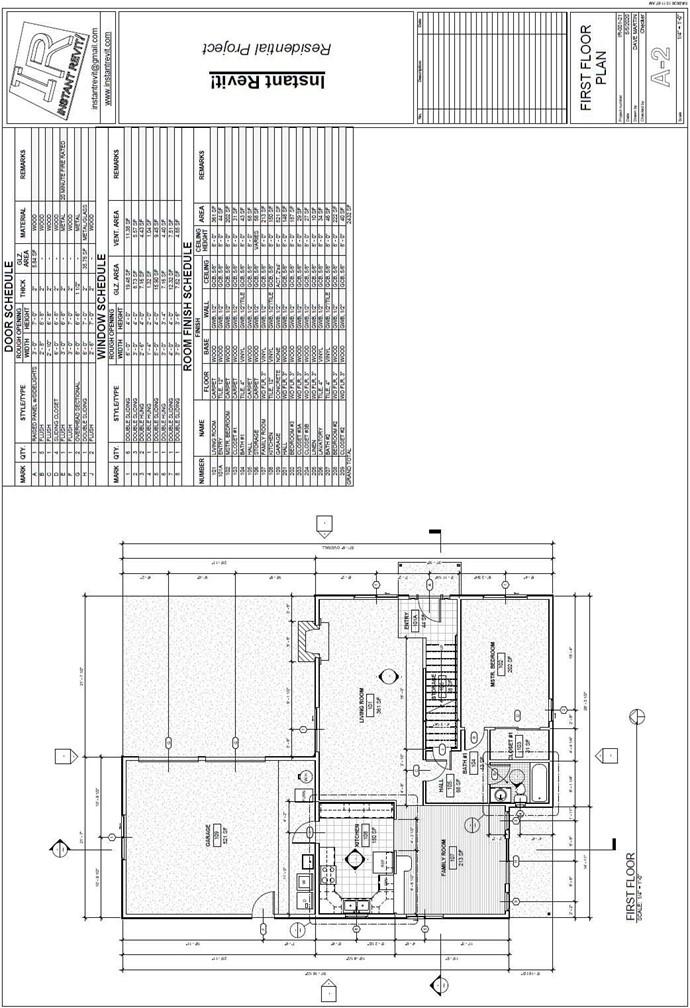
Sheet A-2 – First Floor Plan
Creating the Sheet View
- Open the RL7-2 file. Save the file as RL7-3.
- Create a sheet for the First Floor Plan.
-
The scale of the view is 1/4″ = 1′-0″.
-
Drag and drop the FIRST FLOOR view onto the sheet. Position the view on the left side.
Add a North Arrow to the plan view.
-
You might need to move the elevation markers and section marks closer to the edge of the view. Also, click on the cutting plane line and then the Gaps in Segments mark to remove the middle of the line.
- Click on each of the schedules and drag the arrows at the top of the schedule to re-size the columns.

Schedule Control Arrows
- Use the Title w Line – Larger Text type for the view labels.
- This is the end of Part 3. Save your file as RL7-3.


