
RENDERINGS
Renderings
Creating the Sheet View
- Open the RL7-12 file. Save the file as RL7-13.
- Create a sheet for the renderings.
- Add three detail lines to divide the sheet into four equal rows.
- Drag and drop the renderings from the project browser or insert them using the Image tool in the Insert tab, Import panel.
You may also drag and drop the image files from the folder directly onto the sheet.
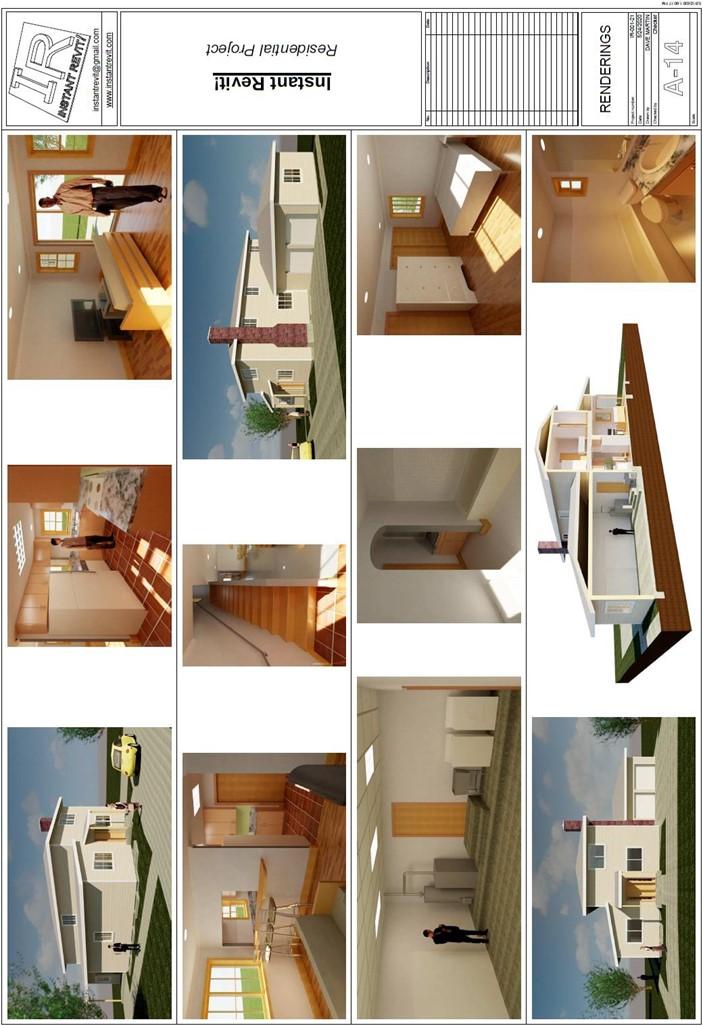
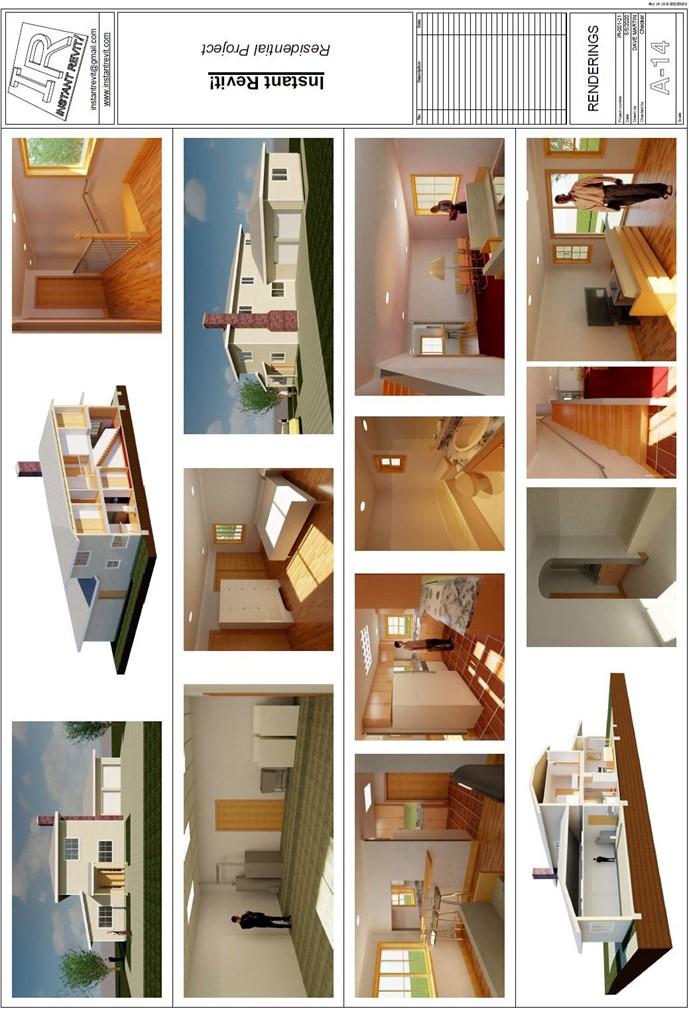
Insert all of the remaining renderings that were created.
Note: The Perspective Section and Transverse Section images have been cropped.
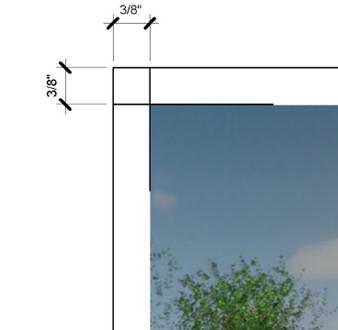
- To line up the images, first select them and change the height setting to 5″.
Since each row is 5 3/4″ high, you will place the top of the image 3/8″ down from the top of the row. This will leave a 3/8″ gap from the top and bottom of the row.
Also leave a 3/8″ gap on the left and
right sides of the sheet.

Top Alignment Line on the Sheet
- Use the Line tool to place the lines at the top of each row.
Use the Align tool to align the image on each row.
After aligning the images, delete the lines. Leave the lines that divide each row.
Also align the left and right edges of each row of images.
Setting the Height of the Image
- This is the end of Part 13. Save your file as RL7-13.


