

INTERIOR ELEVATIONS
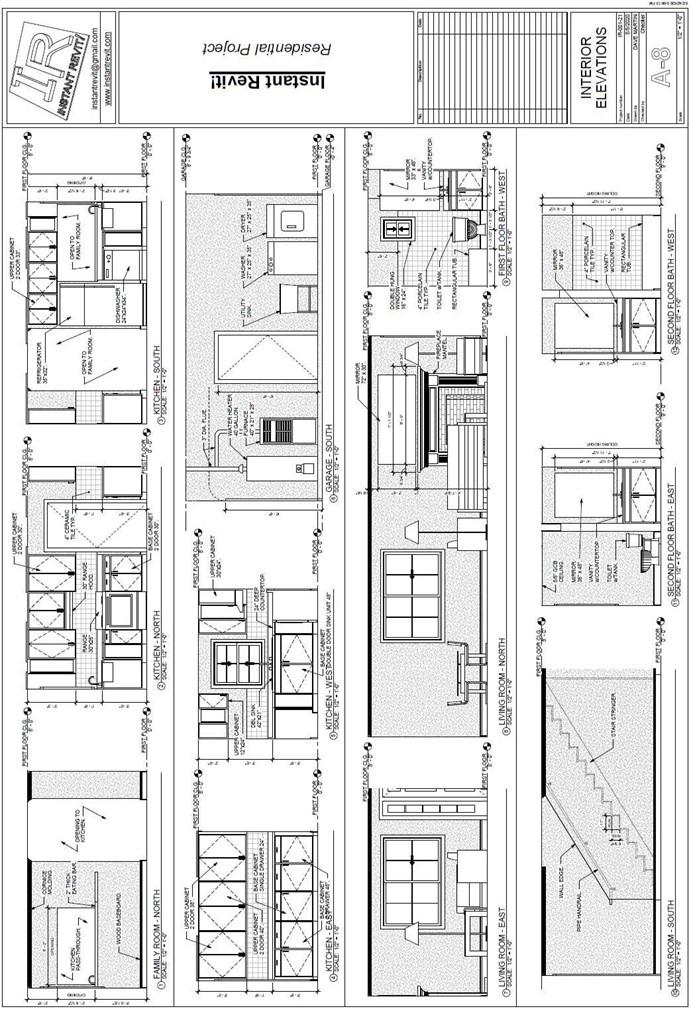
Interior Elevations
Creating the Sheet View
- Open the RL7-7 file. Save the file as RL7-8.
- Make these changes to the Garage interior elevation view.
- Add a flue for the furnace in the garage. Connect it to the water heater flue.
- Add a filled region at the top left corner of the south garage wall. You will need to create a region with a Gypsum fill. Use invisible lines for the boundary. This will cover the portion of the wall covering that is missing.
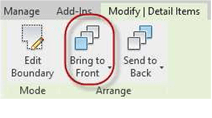
- Select the water heater flue and bring it to front.
-
 Raise the top of the crop window to the
Garage Ceiling level at 8′-9 3/4″.
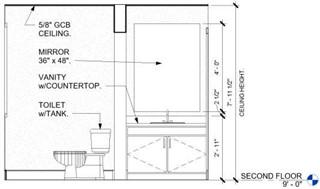
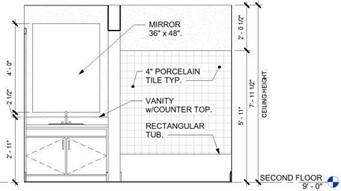
- Make these changes to the Second Floor interior elevation views.
- Label the ceiling in the Second Floor Bath – East view as 5/8″ GCB.
- Dimension the ceiling height as 7′-11 1/2″. Round the dimension style units to the nearest 1/2″, the actual ceiling height is 7′-11 3/8″.
- Dimension the ceiling height for the Second Floor Bath – West.
- Add a note for the 4″ porcelain tile.
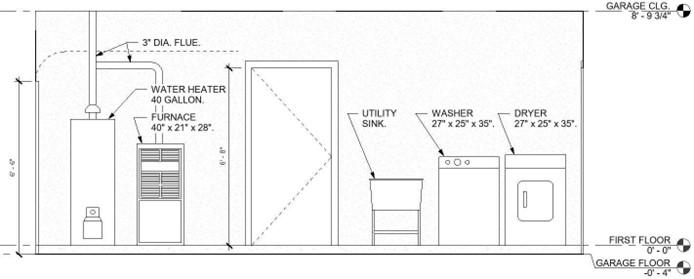
Garage – South Elevation View
- Create a sheet for the interior elevation views.
- The scale of each of the views is 1/2″ = 1′-0″.
- Drag and drop each of the views onto the sheet. You will need to create some of the views were not created during the tutorials.
List of views to be added:
- 1 – Family Room – North
- 2 – Kitchen – North
- 3 – Kitchen – South
- 4 – Kitchen – East
- 5 – Kitchen – West
- 6 – Garage – South
- 7 – Living Room – East
- 8 – Living Room – North
- 9 – First Floor Bath – West
- 10 – Living Room – South
- 11 – Second Floor Bath – East
- 12 – Second Floor Bath – West
Add the remaining notes and annotations for the views. Refer to the portfolio on the website for high resolution views of the interior elevations.
Note: Some drafters prefer to number the views from the bottom right of the sheet to the top left. In this case the views will be numbered starting at the top left to the bottom right of the sheet.
- To help in placing the views, divide the sheet into four equal horizontal sections.
Use the Detail Line tool to add lines to the sheet. Each row is 5.75″ high.
Sheet Divided into Four Sections
- Use the Title w Line – Medium Text type for the view labels.
- After placing the views line up the views in each row with one another.
- This is the end of Part 8. Save your file as RL7-8.


