
Adding the Base Cabinetry, Counter Tops, Appliances, and Fixtures
- Open the RL2-1 file. Save the file as RL2-2.
- Use the Architecture, Component tool to add the base cabinets.
Add the cabinets according to the diagram below.
If the kitchen wall dimensions match the example, there will be a 1/4″ gap between the lower corner cabinet and the edge of the gypsum board. You may add a 1/4″ to the width of the Double Door Sink Unit 48″ cabinet to close this gap. If the wall location is different, the cabinets will not fit within the space. If this is the case, move the south wall of the kitchen or resize the cabinets.
Use the Search function to make it easier to locate the specific cabinet in the list.
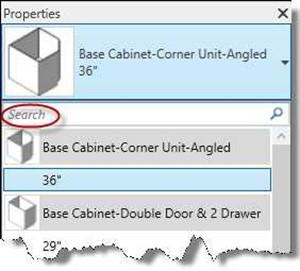
Search Function
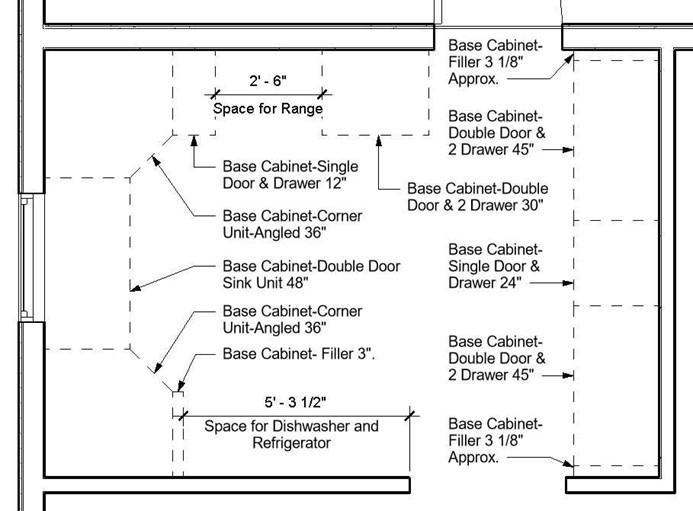
Base Cabinet Layout
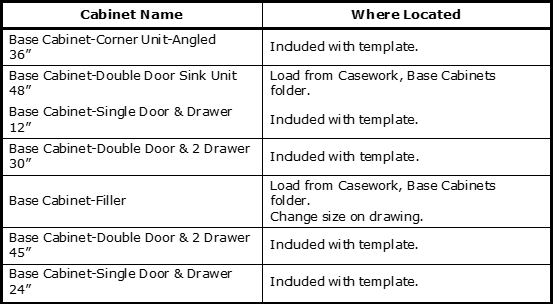
Use this chart to locate the correct family file.
- The last folder that was used was the custom families folder downloaded from the website.
To return to the US Imperial folder on the hard drive, click on the Imperial Library icon on the left side of the Load Family dialog box.
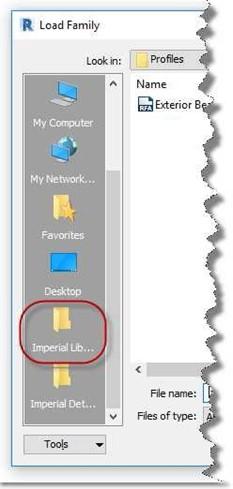
Imperial Library Icon
- When creating custom sizes, you will need to select the cabinet family and then click the Edit Type button in the Properties box.
Then, duplicate the family type and rename it to match the format for the new size. After that, modify the Dimensions for the new cabinet.
- As you place each cabinet, create an alignment lock to the wall and neighboring cabinets.
When placing the cabinets, the cursor is attached to the back side of the cabinet. You may use the space bar to rotate the cabinet before placing it against the edge of the gypsum wall.
Note: The initial handle point when adding the cabinet is on the wall side.
- Next you will add the counter tops. Unlike the cabinets, you can stretch the counter tops to size.
The dimensions given may be changed to suit your kitchen.
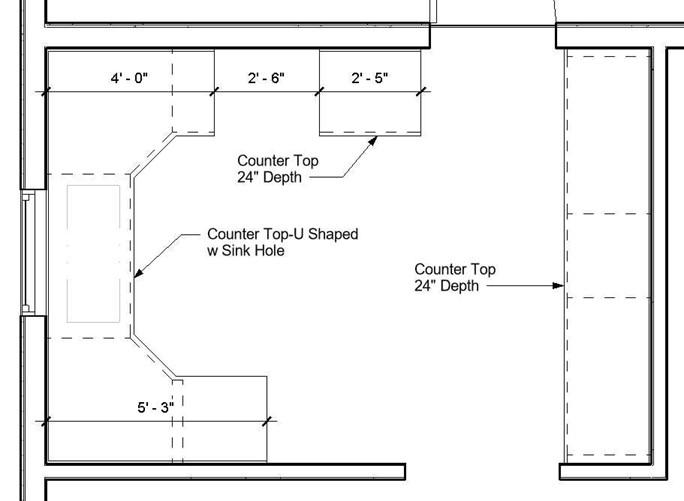
Counter top Layout
To change the size of the U-shaped countertop, click on the countertop and change the dimensions in the Properties dialog box.
- Length Leg – 1 10′-0″ (1/4″ may be added to contact the wall.)
- Length Leg – 2 5′-3″
- Length Leg – 3 4′-0″
- Depth 2 2′-1″ (Locked value, will not change)
- Sink Location 3′-4 1/2″
- Sink Location To Wall 0′-6″
- Sink Opening Depth 1′-3″
- Sink Opening Width 3′-3″
|
Counter Top Names |
Where Located |
|
Counter Top-U Shaped w Sink Hole 24″ Depth |
Custom family, load from folder on website. |
|
Counter Top 24″ Depth |
Load from Casework, Counter Tops folder. |
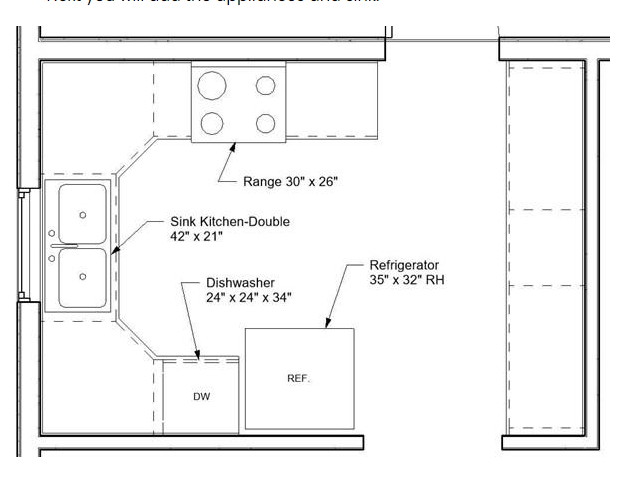
- Next you will add the appliances and sink.
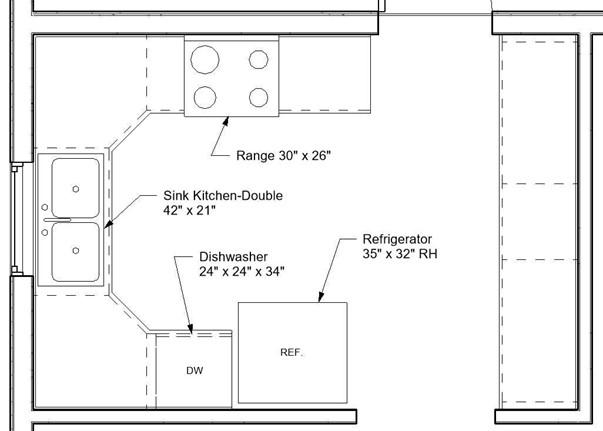
Appliance and Sink Layout
|
Appliance/Sink Name |
Where Located |
|
Sink Kitchen-Double 42″ x 21″ |
Included with template. |
|
Range 30″ x 26″ |
Included with template. |
|
Dishwasher 24″ x 24″ x 34″ |
Included with template. |
|
Refrigerator 35″ x 32″ RH |
Included with template. |
- When placing the refrigerator, you may need to rotate the family.
Click on symbol and look for a single line at the edge of the rectangular shape. Use this line to align with the wall edge.
- This is the end of Part 2. Save your file as RL2-2.
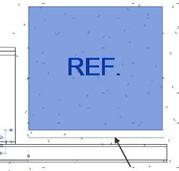
Refrigerator Alignment Line


