
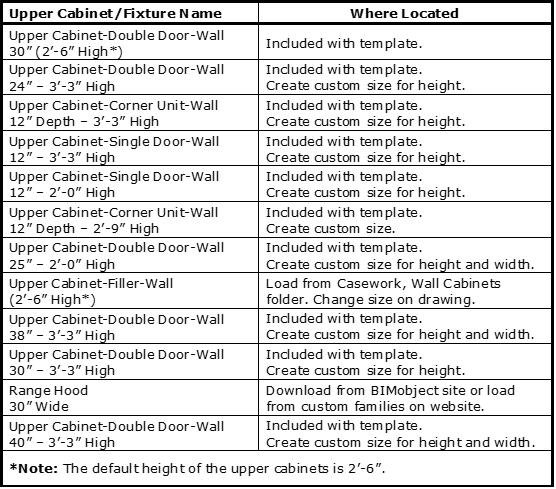
Adding the Upper Kitchen Cabinetry
- Open the RL2-2 file. Save the file as RL2-3.
- To finish up the kitchen you will add the upper cabinets and range hood.
Note: When placing the range hood, set the View Range to 6′-0″. This is done by clicking on the Edit… button next to View Range in the Properties Box.
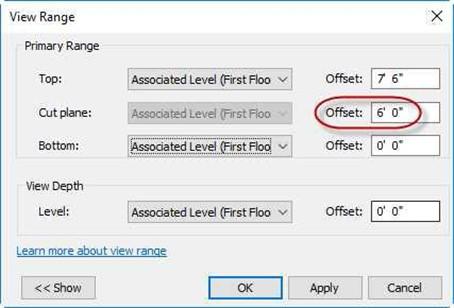
View Range Set To 6′-0″
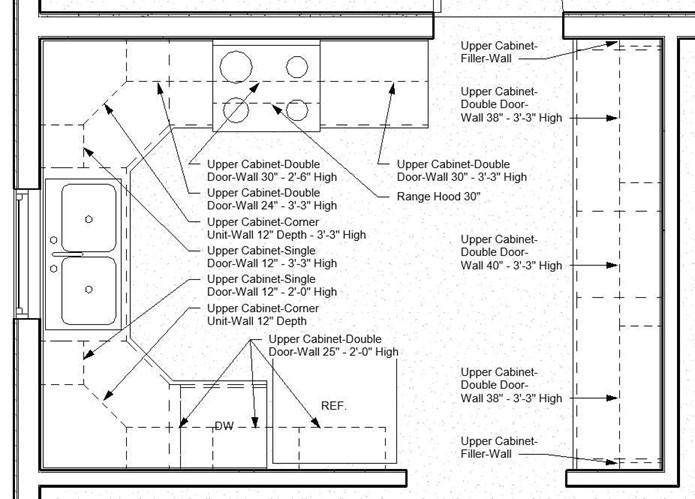
Upper Cabinet Layout
- After placing the cabinets double-click on the top arrow on the interior elevation marker to open the North Elevation view.
You will need to set the tops of the
cabinets to 8′-0″ high.
Note: When making the custom-sized cabinets, change the name of the family type to match the new size.
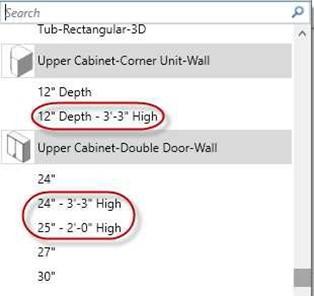
 New Family Types Created
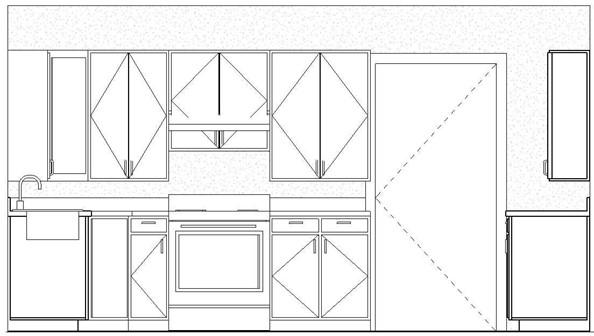
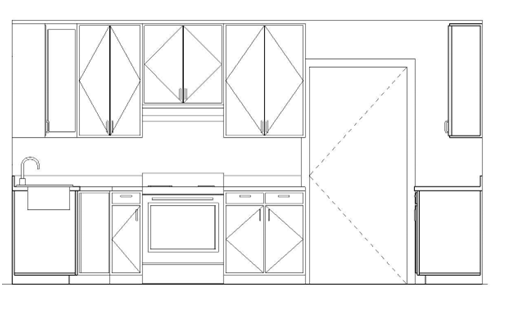
North Elevation of Kitchen (Before adjusting upper cabinets.)
-
Use the Reference Plane tool to place a reference line 8′-0″ up from the first
floor line.
You may use the Pick Line option with the offset set to 8′-0″.

Reference Plane Offset set to 8′-0″
- Use the Align tool to move the tops of the cabinets to the reference plane.
Repeat the process for the other three elevation views in the kitchen.
- In the East Elevation view, click on one of the upper fillers. Click the Edit Type
button and change the height of the filler to 3′-3″. This will change both fillers.
- You may notice in the North Elevation that the trim of the door overlaps with the lower cabinets on both sides. You will resolve this in the next few steps.
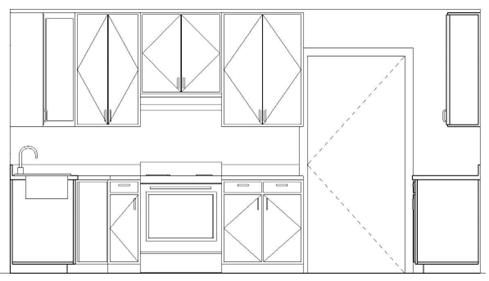
North Kitchen Elevation(After adjusting upper cabinets.)
- Switch to the First Floor view.
- Select the east wall of the kitchen as well as the upper and lower cabinetry.
- Click on the Move tool.

Walls and Cabinets Selected
-
Click a point near the selected elements and move them 6″ to the right. This
will also enlarge the opening to the south.
- Click on the door on the north side of the kitchen.
- Move the door 4″ to the right.
 The door is now centered between the cabinetry.
Door Centered
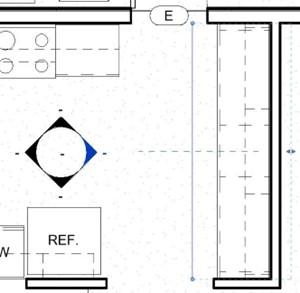
- Click on the Kitchen elevation marker then select the arrow for the east elevation.
Click on the arrows for the rear clip plane and move them into the east wall. This way you will be able to see the wall in the interior elevation view.
Also adjust the front clip plane (solid blue line) to the right of the base cabinets on the north wall.
Front and Rear Clip Planes Adjusted
-
You may also need to change the height of the kitchen window on the west
wall. The head height will be changed to 7′-0″.
Also adjust the front clip plane to the left of the refrigerator.
- This is the end of Part 3. Save your file as RL2-3.


