
Dictation, Co-authoring, and
Embedding
In this chapter, we will focus on a few more features that are new to Office 2021 and the latest versions (and revisions) of the Office 365 offering. You will learn how to access the new Transform feature to integrate amazing presentations with Microsoft Sway. You will also learn how to dictate directly within Word 2021, where we will discuss all the
options around the new Dictate feature. Although the first two chapters of this book focus on skills that have been separated for ease of reading, we often use more than a couple together in applications when working on a document.
Commenting and working in real time with others is greatly enhanced in the new version. We will also be investigating co-authoring requirements and learning about modern commenting. Finally, we will introduce several new embedding features.
The following topics will be covered in this chapter:
- Investigating the new transform feature
- Dictating enhancements in Word for the web
- Commenting and co-authoring
- Embedding and converting using Word
Technical requirements
Before you complete this chapter, you should be able to navigate the Word 2021 interface and have knowledge of different parts of the screen, such as the ribbon, groups, tabs, and icons. Being able to select the relevant ribbon icons and being familiar with using the right-click shortcut menu to access formatting options is also a prerequisite.
The examples in this chapter can be found at the following GitHub URL: https:// github.com/PacktPublishing/Learn-Microsoft-Office-2021-Second-
Edition.
Investigating the new transform feature
Microsoft Sway is located at https://sway.office.com
and has been available since August 2015 within Office 365 plans. Before 2015, it was released as a preview on iOS apps. It allows users to create exciting and engaging presentations in a couple of seconds from new or existing documents (reports, books, writing, CVs, stories, and so on) using a specific design and layout. You can edit, share, and check analytics on your sways. Animations are automatically applied alongside design elements. Three options are available for creating sways:
- Creating a sway from scratch
- Basing the new sway on an existing topic
- Creating a sway from an existing document that you must upload via the website
In the latest Word version of Office 365, we can send a document from within the application using the Transform feature. Follow these steps to transform your Word document into a Sway presentation:
- Open the document you wish to create the Sway presentation from. For this example, we will be using the Safest Solutions.docx file. You can find this document by going to the GitHub repository link mentioned in the Technical requirements section.
- Click on the File tab.
- Choose Transform from the list provided.
- The Transform to Web Page pane will open to the right of the Word document:
Figure 2.1 – The Transform to Web Page pane to the right of the Word document
- Notice the Style area at the bottom of the pane. Click through the style types using the scroll bar to the right of the style’s area to navigate through the list of styles. Click each style type to see a snapshot of how the design will modify your document’s design once applied.
- Click the Transform button to continue.
- The web browser will open and the sway will be presented:
Figure 2.2 – Browser displaying the Word document transformed into a Sway
-
Click the Edit button to make changes to the sway. Alternatively, click the Share button to allow others to view the sway via a link or send the sway to your social media channels directly.
- Once you click the Edit button, several cards will appear in the Storyline window, all of which you can customize. At the top of the screen, you will see two buttons, namely Storyline and Design.
- Click the insert content button (the green circle with a white cross inside it) to add another card.
- Once it’s created, click on the card’s background to select it. Then, use the buttons along the top of the card to apply and format accents, elements, links, and many more features:
Figure 2.3 – Sway storyline view displaying new content and card buttons to format elements
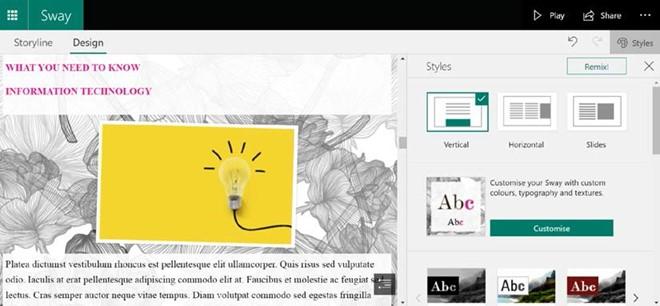
- Click on Design, then the Styles button to open the Styles pane to apply a different style set and customize colors, typography, and texture:
Figure 2.4 – The Sway Design screen displaying the Styles pane
Using the Transform to Sway feature is a great way to visually display documents creatively instead of using the normal “go-to” PowerPoint presentation. The best way to get to grips with Sway is to create a new sway from scratch and build your content using the card elements.
Access to the transform feature will differ, depending on the Office version you have installed or released through the Office 365 environment. If you cannot locate the Transform option on the File tab, then visit the Export option to locate the Transform to Web Page option:
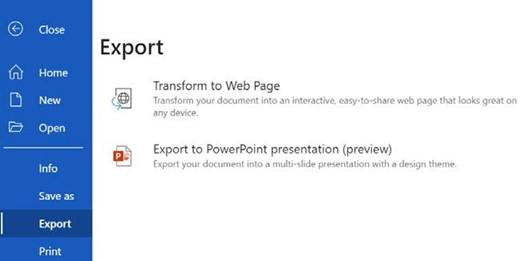
Figure 2.5 – The Transform to Web Page option on the Export menu
The following screen will appear, where you can select a Style to base the sway on. Select the Transform button to continue:
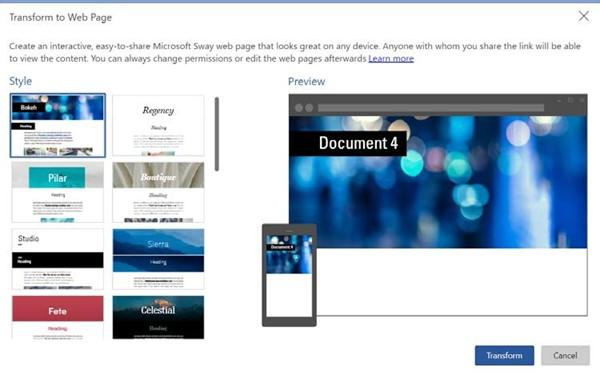
Figure 2.6 – Accessing Transform to Web Page from the Export option using Word online
The sway is then displayed in the browser, where you can edit it. We explained this previously.
Remember that there are other options for transforming a Word document into a web page. If you do not have access to the features described previously, go to the https://
sway.office.com
web page directly and click on Start from a document:
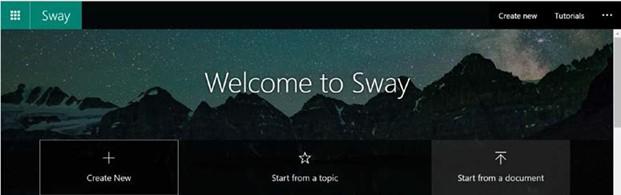
Figure 2.7 – Clicking the Start from a document button on sway.com to upload a document to transform into a web page
In the next section, we will learn how to use the Dictate feature.


