– Creating the Topography and Site Elements
Starting the Tutorial
- Start Revit 2021 by clicking on the icon on the desktop.
- Open the last file from Tutorial Three, RL3-5.
- Save the file as RL4-1.
In this tutorial you will create the topography and site elements needed for the project. The topography will be created based on a collection of points that are at various heights. Site elements will include trees, cars, and people.
Adding the Property Lines
In this part of the tutorial you will add four property lines around the edge of the site.
- Open the Site Plan view.
- If the text for the furnace, water heater, or other appliance families appears, hide the category.
- In the properties for the view, click on the Edit… button next to View Range.
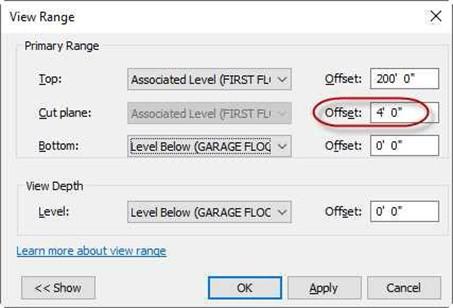 Set the Cut Plane to
4′-0″
View Range Dialog Box
- This will show the walls of the house.
Using reference planes or dimensions, make sure that the base point and survey points are 35′-6″ south and
9′-8″ west from the lower left
corner of the house.
Note: If they are not, move the base and survey points, not the walls of the house.
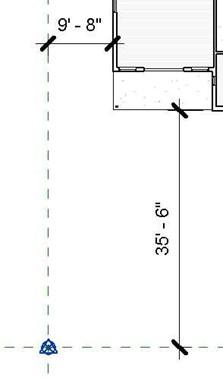
Distance from House to Base and Survey Points
 Delete the dimensions and/or reference planes used to located to points. Click on the Property Line tool in the Massing & Site tab, Model Site panel.
Property Line Tool
-
Starting at the Base Point, draw a rectangular shape 85′-0″ wide and 125′-0″ tall.
You will be using the Create by sketching option.
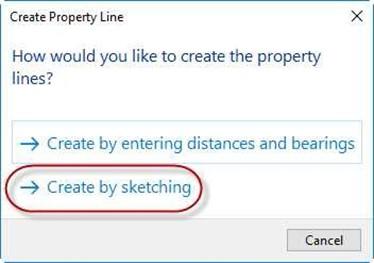
Create Property Line
- Click the Green Check when finished.
- Change the properties of the Property Lines.
Open the Visibility Graphics Overrides dialog box, click the “+” next to the Site
category, and click in the white box next to Property Lines.
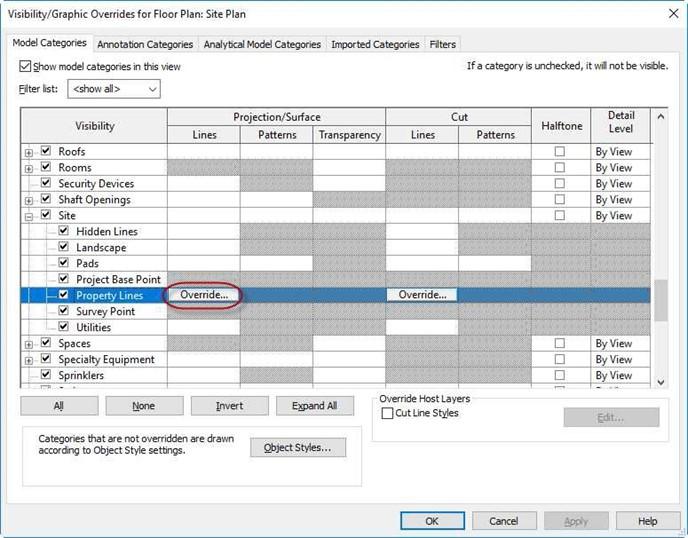
Visibility Graphics Overrides Dialog
-
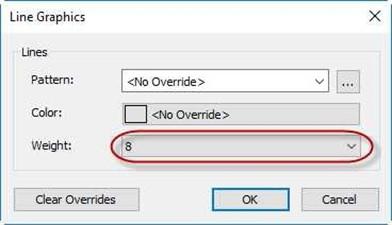 Click again on the Override…
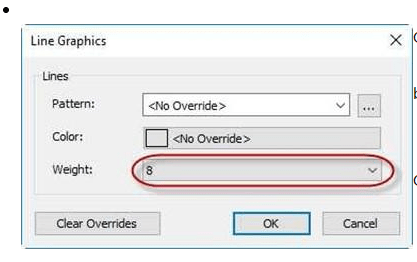
button that appears. Set the Weight to 8.
Click OK to close each dialog box.
Line Graphics Override
- You now have a Property Line placed around your house.
Hide the Base Point at the lower left corner of the property line boundary.
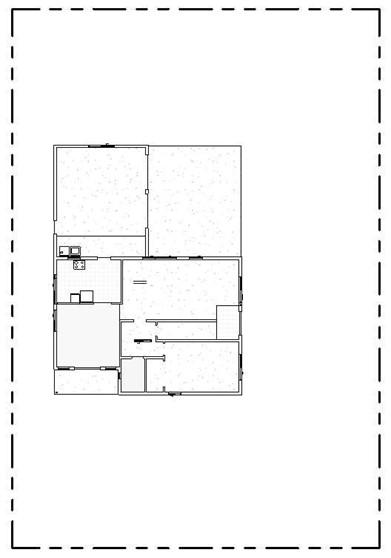
Completed Property Line
- This is the end of Part 1. Save your file as RL4-1.


