
Adding the First and Second Floor Bathroom Cabinetry and Fixtures
Now you will add the first and second floor bathroom and lavatory cabinetry and fixtures. This will finish up all the permanent elements of the house.
- Open the RL2-6 file. Save the file as RL2-7.
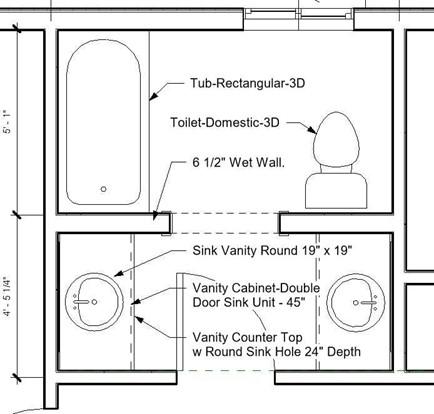
- Switch to the First Floor view (if needed) and zoom in on the restroom at the south side of the house.
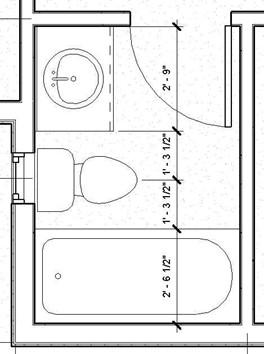
- Add the fixtures as shown. Your dimensions may differ slightly (+/- 1/2″).
Add the base cabinet for the vanity first, and then the countertop, and lastly the vanity sink.
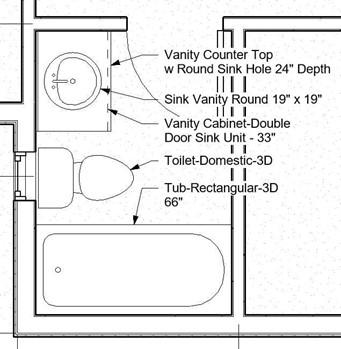
First Floor Bath Fixture Locations First Floor Bath Fixture Names
|
Bath Fixture Name |
Where Located |
|
Vanity Cabinet-Double Door Sink Unit 33″ |
Included with template. |
|
Vanity Counter Top w Round Sink Hole 24″ Depth |
Included with template. |
|
Sink Vanity-Round 19″ x 19″ |
Included with template. |
|
Toilet-Domestic-3D |
Included with template. |
|
Tub-Rectangular-3D 66″ |
Included with template. Create custom size and rename. |
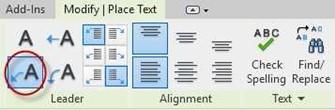
- When placing the Vanity Countertop, use the arrows to size the length of the counter top to match the cabinet below.
You will also need to relocate the sink hole to the center of the counter top.
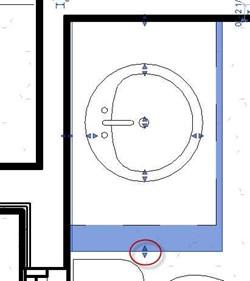
Adjustment Arrows
- When placing the tub, position the left and right edge to the edge of the framing, not the gypsum board.
- Create an Interior Elevation of the west bathroom wall.
You will need to adjust the crop window of the view so that the top of the view is 8′-0″ from the floor.
You should still have a reference plane showing from the kitchen cabinet procedure.
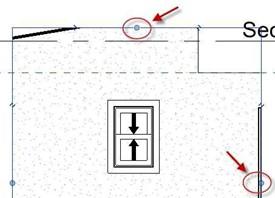
Crop Window Handle Points
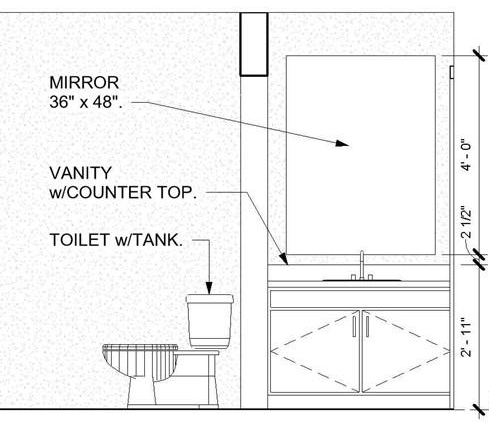
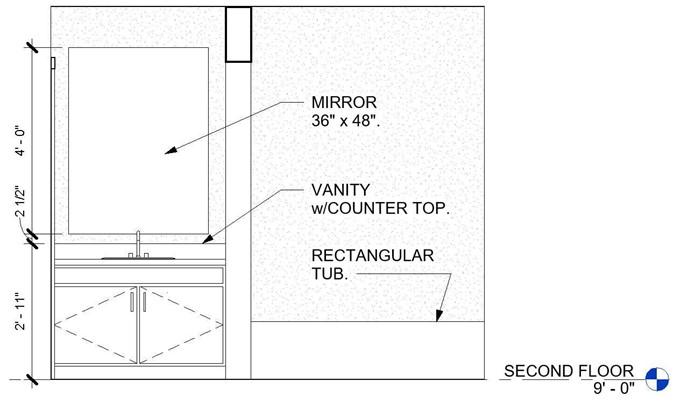
- Add a Mirror above the Vanity as shown. You may load the Mirror from the BIMobject website or from the custom family folder on the website.
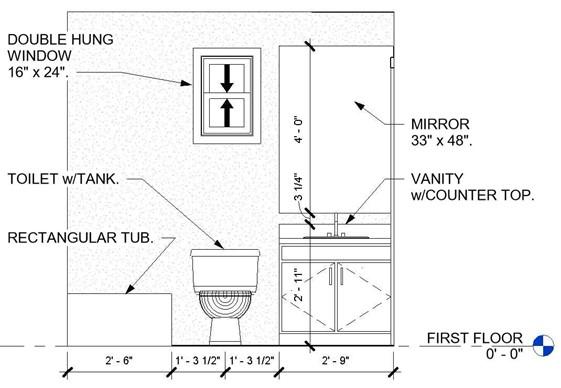
West First Floor Bathroom Elevation with Annotations
- To complete and annotate the elevation view:
- Add the dimensions using the Linear – 3/32″ Arial Dimensions Style.
- To get the darker ticks, you will need to modify the dimension style.
-
Change the Tick Mark to Diagonal 3/32″ and the Tick Mark
Line Weight to 7.
- To remove the “0” in front of dimensions less than 1 foot, click on the Units Format parameter, uncheck the Use project settings checkbox, and check the Suppress 0 feet checkbox. Also, round the dimensions to the nearest 1/4″.
- To add the Notes, use the 1/8″ Arial Text Style. Set the arrowhead to Arrow Filled 30 Degree.
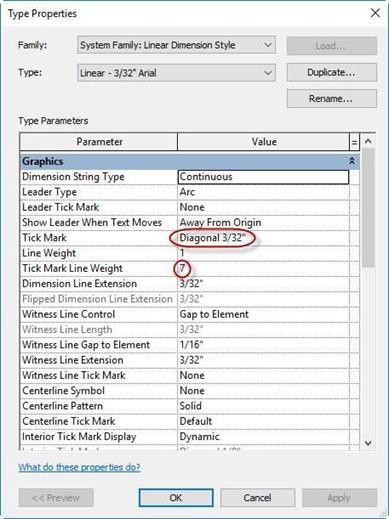
Dimension Type Properties
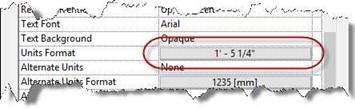
Units Format Parameter

Changing the Format Settings
Two Segments Text Option
- Switch to the Second Floor view.
- Zoom in on the second floor bathroom and lavatory.
- The toilet and the shower will require a wet wall for the plumbing that is inside the wall.
Create a new wall type called Interior – 6 1/2″ Wet Wall. The only change will be to change the interior lumber size to 2×6. The lumber will be 5 1/2″ in width.
Adjust the wall locations as shown.
- Add the cabinetry and fixtures as shown.
The floor pattern has been turned off for clarity. This will be covered later in the book.
Second Floor Bath & Lavatory Cabinetry and Fixtures
Notes:
- You will use the same fixtures and cabinetry as with the first floor bathroom.
- Use the 45″ wide vanity cabinet. Reposition the south wall so that the gypsum board is against the edge of the cabinet.
- Use the standard size tub (5′-0″ width). Move the interior walls if necessary.
- Create interior elevations for both sides of the bathroom and lavatory. Use 1/2″ = 1′-0″ scale, fine detail.
- You will need to adjust the front and rear clip planes and the left and right edges of the crop window to see both spaces. To see the planes, click on the arrow on the interior elevation mark in the plan view.
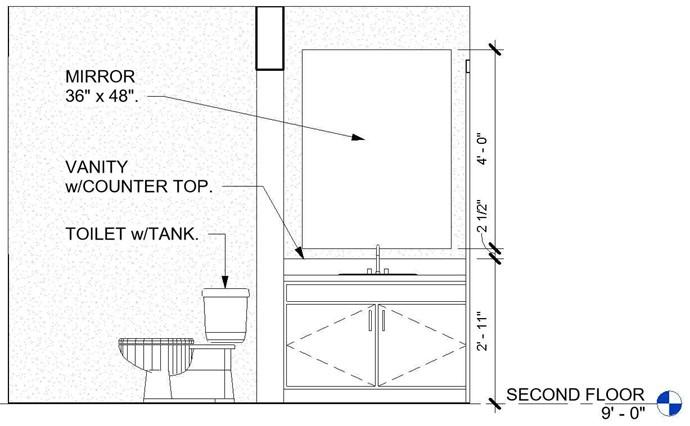
- Add a mirror above each of the lavatories. You will need to create a custom size.

Front and Rear Clip Planes
West Second Floor Bathroom/Lavatory Elevation
East Second Floor Bathroom/Lavatory Elevation
- This is the end of Part 7. Save your file as RL2-7.


