
Single Story House
This project is a drawing of a roof plan for a single story house with an elevation view. In the 3D portion of the Revit software you will use specific tools for the walls, doors, windows, and roof. In this project, the student will get practice with the line tool, trim tool, and adding dimensions and text.
Starting the Tutorial
- If needed, Start Revit 2021 by clicking on the icon on the desktop.
- Open the last version of the Warm Up project, WU2-5.
- Save the file as WU3-1.
Setting Up the File, Creating the House Perimeter and the Roof
Overhang
- Click on the Drafting View tool in the View tab, Create panel.
- Name the New Drafting View, SINGLE STORY HOUSE and set the scale to 1/8″
= 1′-0″.
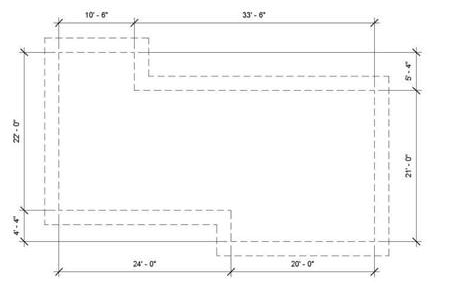
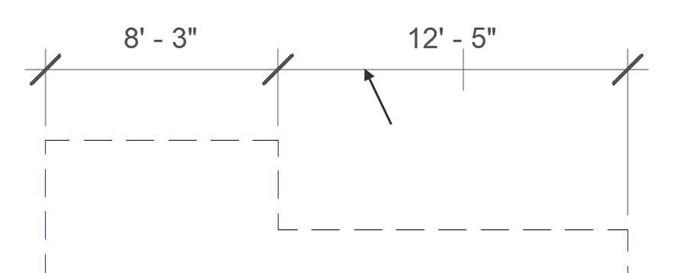
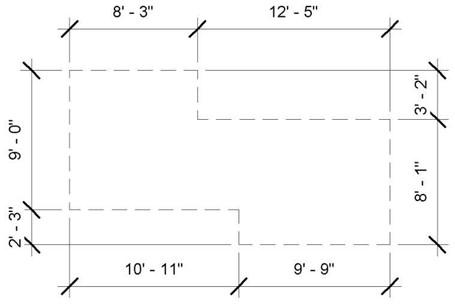
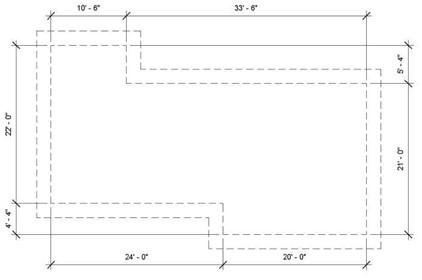
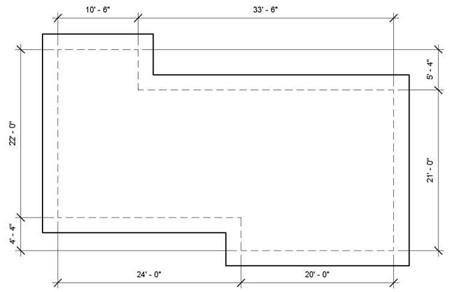
- You will begin by drawing the plan view of the house. Use these dimensions to help you to size the drawing elements.
The dashed lines indicate the edge of the exterior walls.
Completed Plan View of House
- Start by drawing the outline of the walls. Click on the Detail Line tool in the Annotate tab, Detail panel.
- Set the Line Style to hidden lines in the drop-down menu.
Pick the version with the brackets
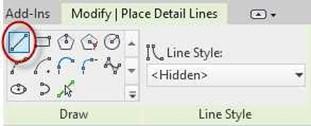
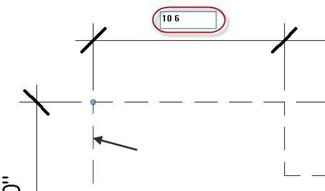
- Click on the line tool in the Draw panel. Start at the top left corner and draw your first line at 10′-6″.
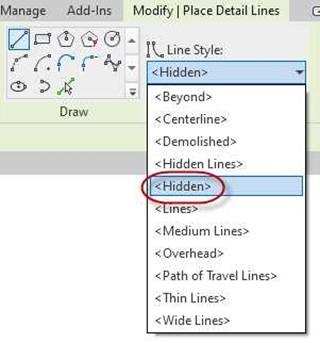
 Hidden Line Style
- When drawing the line, you may type in the distance.
Line Tool
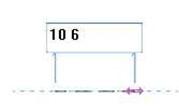 You do not need to type in the feet and inches symbols. You only need to type in the numbers only with a space in between (10 6).
Note: This is optional. Later, you will use the
dimensions to control the length of each of the lines. Length Key-in
- Draw additional lines to form the perimeter of the house until you have completed the all the hidden lines. The lines do not need to be drawn at the exact length.
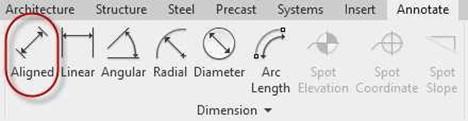
- Add dimension lines to the perimeter.
Use the Aligned Dimension tool in the Annotate tab, Dimension panel.
Linear Dimension Tool
- When adding the dimensions; begin by clicking on the far left vertical line, then the next vertical line, then the last vertical line, and finish by clicking at the location of your dimension line.
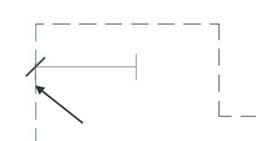
First Line Selected Second Line Selected

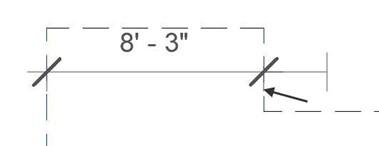
Third Line Selected (Far Right Side)
Last Point Selected (Anywhere Along Dimension Line)
- Your dimension chain is now placed.
Dimensions Added and Hidden Lines Completed (Your dimensions may be different.)
- To change the length of the lines, click on one of the vertical lines of the perimeter. The dimension text associated with the line with become smaller and change to blue. Click on the text and type the correct value.
Value Changed to 10′-6″
- Repeat the process for the remaining lines. Reposition the dimension lines after the sizes are correct.
Note: The line that you click will be the line that moves after the value is changed.
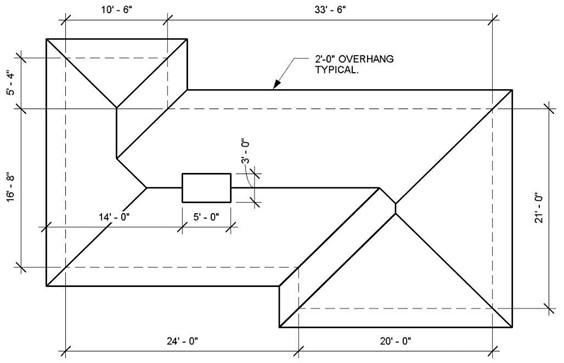
Adding the Roof Overhang
Next you will draw the edge of the room overhang. The overhang distance is 2′-0″
around the entire perimeter.
- You will use the Offset tool to add the next set of lines. The tool is in the Modify tab, Modify panel.

Offset Tool
- Click on the Offset tool and set the Offset distance to 2′ 0″ in the Options Bar.

Options Bar
- Click on one of the hidden lines, move the mouse slightly in the direction of the new line.
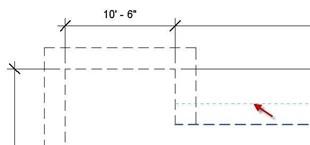
Line is Offset 2′-0″
- Continue around the perimeter. Some of the lines will automatically trim and extend to the corners. The rest of these will need to be joined.
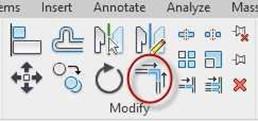
Trim/Extend to Corner Tool
- Click on the Trim/Extend to Corner tool in the Modify tab, Modify panel.
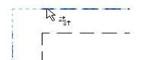
- Click on the ends of each of the lines to be trimmed. Click on the portion of the line that you wish to remain.
You will see a blue dashed line appear indicating where the trim/extend will occur.
-
At this point the lines are joined together.
 Lines Joined
Preview of Trim/Extend
- An alternate way of offsetting the wall lines is to mouse over one of the lines and press your tab key once. All the lines will turn blue. Move your mouse towards the outside edge without taking it off the hidden line and you will see all the lines offsetting at once.
If you change the offset distance during this process, you will need to click the offset tool again before offsetting the lines.
- Change the outside lines from hidden to wide lines.
Click on the Modify tool and then mouse over one of the outside lines (don’t click), press the tab key once on your keyboard, and then click the line. All the lines on the outside perimeter will be turn blue. This indicates that they are selected. Click to complete the selection.
- In the Contextual tab (Green tab) for the selected lines, change the line style to Wide Lines.
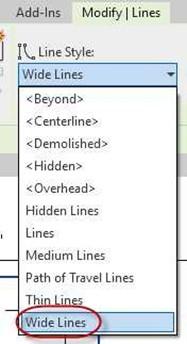
Wide Lines Selected
- The outside lines will now be thick and dark.
Exterior Perimeter Set to Wide Lines
- This is the end of Part 1. Save your file as WU3-1.


