

Thickening the Edges of the Four Slabs
Loading the Profile Family and Creating the Slab Family Type
In this tutorial part you will add thickened edges around the exterior edges of the four slabs of the project. These thickened edges are known as footers and are used in building construction to support the weight of exterior walls, floors, and roofs. The details of these footers would typically be shown on a Foundation Plan and Foundation Details.
- Open the RL1-9 file. Save the file as RL1-10.
- Before adding the slab edge, you will need to load the profile family file from the Families folder.
This file is available on the website in the Residential Families Files.
- Go to the Insert tab, Load Family tool in the Load from Library panel.
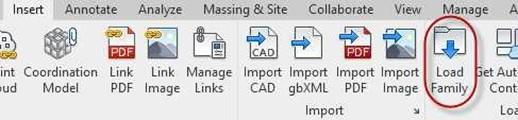
Load Family Tool
- You will be looking for the “Exterior Bearing Footer Profile.rfa” file.
- In the Load Family dialog, navigate to the custom families folder or the folder that contains the downloaded family files.
This file is located in the Profile subfolder in the Families folder.
- Select the file and click the Open button.
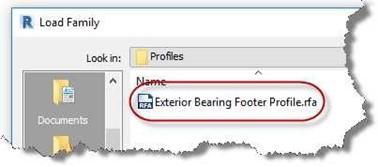
Profile Family File
Creating the Two Story Footer Type and Placing the First Floor Footer
- Open the 3D view, tilt the view so that you can see the bottom of the first floor slab.
- Hide the Porch, Garage, and Driveway Slabs.
This will make it easier to pick the edges of the first floor slab.
- Click on the arrow beneath the Floor tool. Select the Floor: Slab Edge tool.
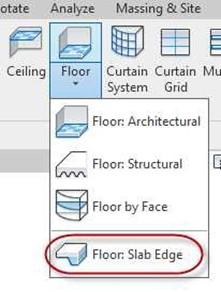
Floor: Slab Edge Tool
- Click on the type selector in the Properties box and select Slab Edge.
Click on the Edit Type button to open the Type Properties dialog box
- Click on the Duplicate… button and duplicate the type.
Name the new type Two Story Footer.
- Click on the word Default next to the Profile area.
- Select the profile named Exterior Bearing Footer Profile: 2 Story.
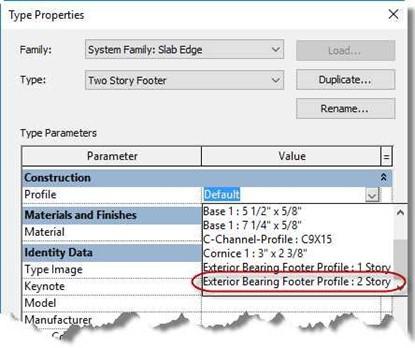
Exterior Bearing Footer Profile:2 Story Selected
-
Next to the Material parameter click on the <By Category> text and then the
small box to the right with “…” inside it.
-
When the Material Browser dialog opens, change the material of the footer to
“Concrete, Cast-in-Place gray”.
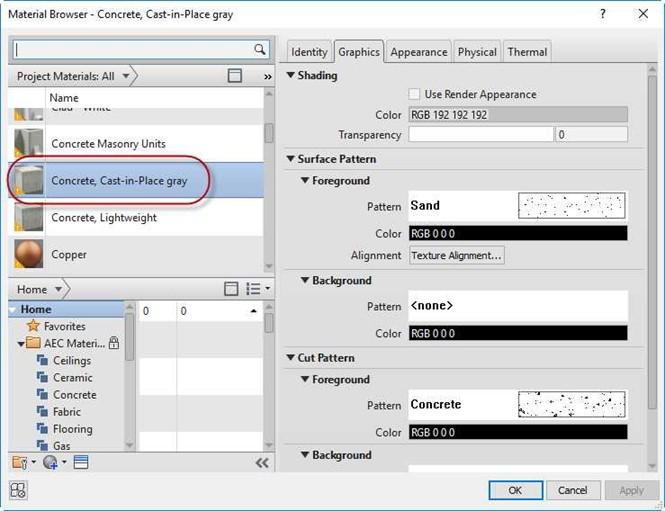
Material Browser Dialog Box (Cast-In-Place Concrete)
- Press the OK button to assign the material and close the box.
- Then click on each of the lines for the perimeter of the slab at the lower corners.
- Click in open space to finish adding footers.
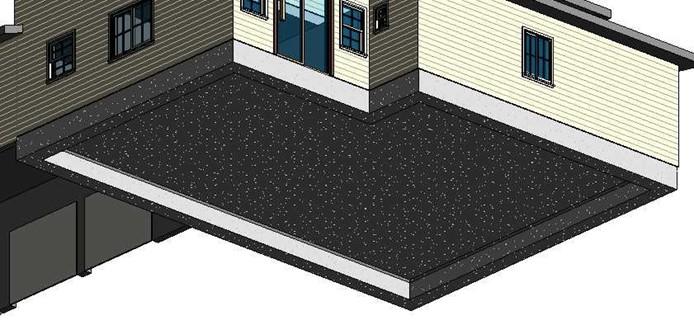
First Floor Slab Edge Added
- Unhide the Garage and Porch slabs.
Creating the Porch and Garage Footer
-
Next you will add the Porch slab edge. Click on the Slab Edge tool.
Starting with the Two Story Footer slab type, create another Slab type called
“Porch/Garage Footer”.
- Change the profile to “Exterior Bearing Footer Profile: 1 Story”.
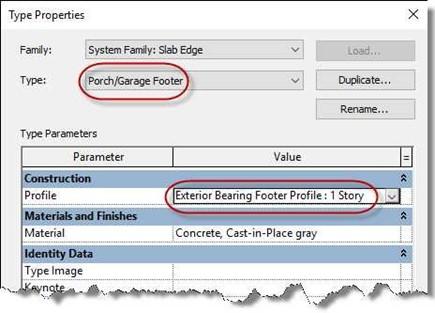
Porch/Garage Footer Type Created
- Click the OK button to close the box.
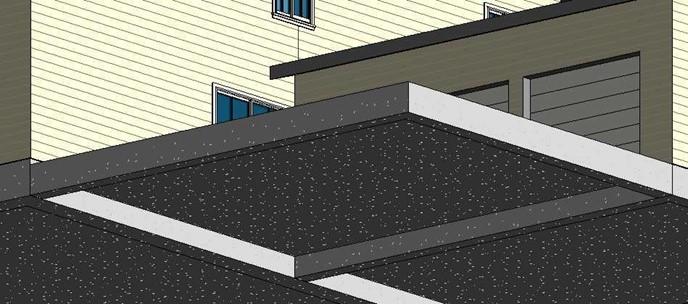
- Click on the two exposed corners of the Porch Slab and click in open space a couple of times.
Then add the footer to the three outside corners of the Garage slab.

Garage and Porch Slab Edges Completed
- Unhide the driveway slab.
Add a footer to the bottom edge of the driveway slab. Use the Porch/Garage Slab type.
3D View of Driveway Slab
- This is the end of Part 10 and Tutorial One. Save your file as RL1-10.


