
Creating the Window Schedule
Next you will add the Window Schedule.
- Open the RL3-1 file. Save the file as RL3-2.
- Delete the original Window Schedule from the Project Browser.
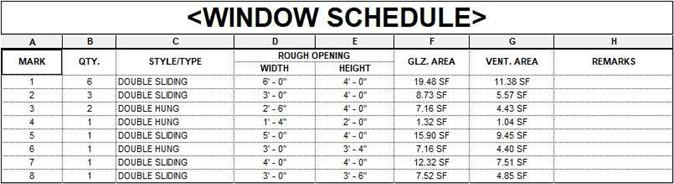
Completed Window Schedule
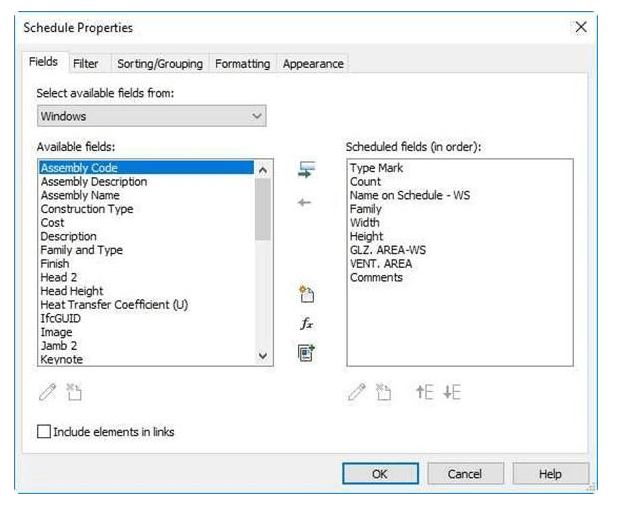
- Use the same techniques to create the new Window Schedule that were used to create the Door Schedule.
- Select the Windows Category in the New Schedule dialog box.
- Fill in the Name on Schedule – WS column and hide the original Family column.
- The values for the Glazed Area and Ventilation Area are not calculated. Create the two values as Text entries and type in the numbers.
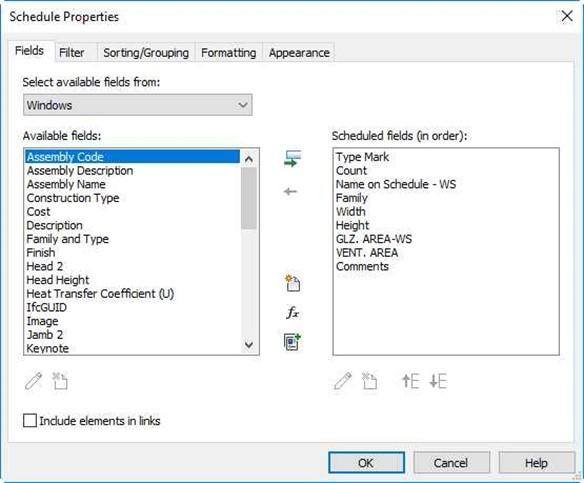
Schedule Properties
- Format the text the same as for the Door Schedule.
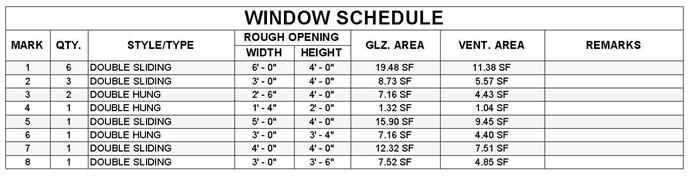 Drag And drop the Window Schedule to the same sheet as the Door Schedule. Adjust the column widths so that each row is one line of text in height.
Window Schedule Complete
- This is the end of Part 2. Save your file as RL3-2.


