
Collaborating and file sharing
In this section, we will explore the collaborative side of the Teams app. We will learn how to upload and work with files in the Teams environment and understand the difference between default views and the New Sheet View feature in Excel. Finally, we will touch on version control document history.
Uploading files to channels
When we want to collaborate on documents, we can add them to a Channel. Any files that are shared via Outlook or attached to conversations are visible in the Files area of the channel. Follow these steps:
- Click on a Channel within the Teams environment.
- Click the Files option at the top of the channel.
- Choose Upload | Files or Upload | Folder to browse your computer and collect documents or folders to upload:
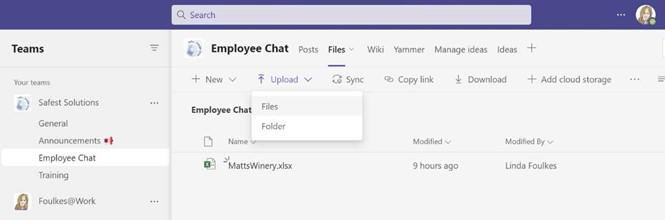
Figure 17.21 – Uploading files to a Channel
- Choose the relevant file location, then select the file or files to upload.
- Click the Open button to add the files to the Teams Channel.
- To open the file and begin collaborating with others, simply click on the file within the Files area of the channel.
- We can share comments and conversations, and see who is editing the document in real time with others. Note that every time you open, update, save, and close a document, a new version is created. Versions will be explained later in this chapter.
- When we collaborate in real time on a shared workbook, we will see amendments that have been made by others immediately. Look out for the user marker in the document (shown in the following screenshot) to indicate that the collaborator is amending the file:
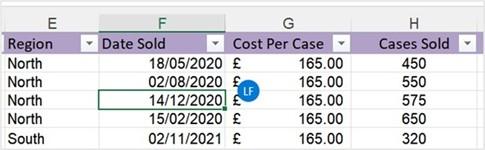
Figure 17.22 – Collaborating in real time
- The Open in Desktop App option may present itself in the notification area just below the ribbon. When you’re working in the full version of the app (the desktop app), and before any amendments can be actioned, we need to click on Edit Workbook at the top of the screen:

Figure 17.23 – Edit Workbook
- After the amendments have been made, click the Save button to update the copy in the Channel. The Save button is a web save button that’s located at the top left of the Excel environment:
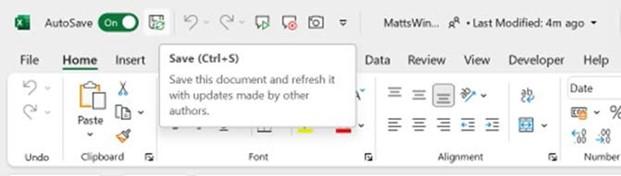
Figure 17.24 – Using the Save button to update author amendments
- There are several buttons at the top right of the document. These buttons allow you to copy a link to the document, add/view comments, catch up on colleague amendments, start a conversation, download the document, or view the document in your browser:
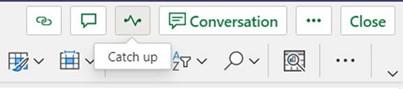
Figure 17.25 – Buttons located at the top right of the workbook
- Click through each of these buttons to see how they can support your collaborative workflow.
In the next section, we will explore the New Sheet View feature in Excel.
Working with New Sheet View
When we are working collaboratively, it could become frustrating when, for example, filters are applied to workbooks. Every time you access the file, it could be filtered or manipulated by others who have access to the collaborative workflow. There is a solution named Sheet View. Sheet View allows each collaborator to set up custom views that contain, for instance, a filtered set of data that’s only applicable to you. So, you can sort and filter to your heart’s content without disrupting the original dataset.
Note that the normal cell edits will update the original data. We can only use Sheet View when a document is filed to OneDrive or SharePoint. Everyone collaborating on the file can access your Sheet Views, so they are not locked to one individual.
Follow these steps to create a New Sheet View:
- Open the file you wish to work on using either SharePoint or OneDrive.
- Click on the View tab, then select New Sheet View from the Sheet View group:
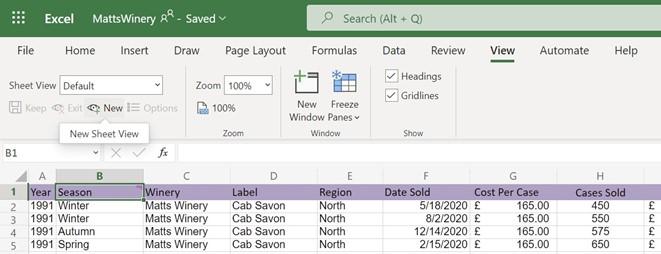
Figure 17.26 – New Sheet View
- Notice that the border (rows and columns) of the workbook have changed to the black fill to indicate you are now working in a New Sheet View. Filter and sort the workbook to meet your requirements, then click the Keep button in the Sheet View group to save the view so that you can view the customized filter and sort it at any time. Notice that the default name for the view is Temporary View. You can rename this to suit the sort and filter that’s been applied:
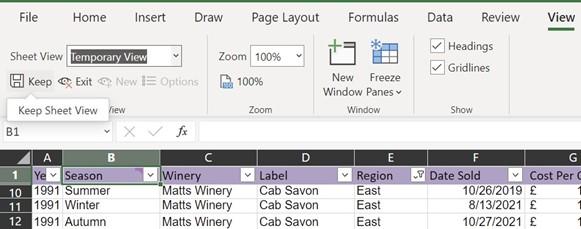
Figure 17.27 – Keep Sheet View
- To return to the default view, and exit the New Sheet View feature, click the drop- down arrow next to Sheet View and select Default:
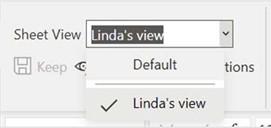
Figure 17.28 – Default workbook view
- To return to your custom view, simply repeat this process. In the next section, we’ll look at document versions.
Working with versions
Versions are the history of document amendments that have built up over time. Each time amendments are made by the same or different individuals, the document is updated to reflect the latest version. We can revisit or restore previous versions of a file over time. Follow these steps:
- Every time we open, update, save, and close a file, a new version is created.
- To access the version history of a document, open a document in SharePoint. To do so, select the file, then click on the ellipsis to show the drop-down list of options. Then, click Open in SharePoint:
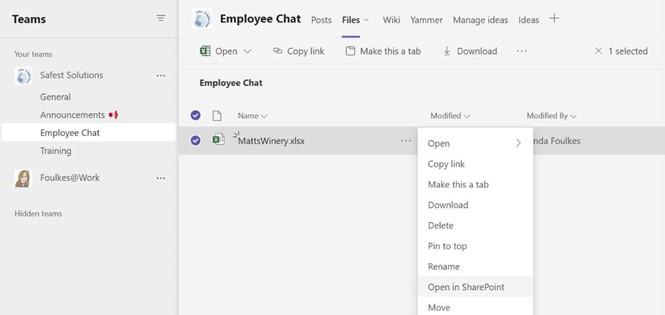
Figure 17.29 – Open in SharePoint
- When in SharePoint, use the ellipsis to show the Version history properties of a document:
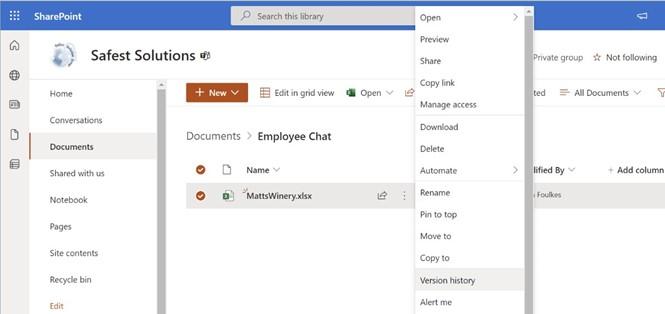
Figure 17.30 – Version history
- Version history will populate in a separate window. Next to each version, we can click on the drop-down arrow and choose to Delete, View, or Restore a version:
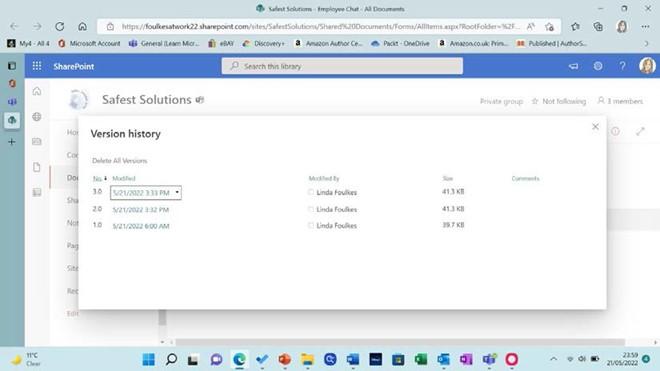
Figure 17.31 – The Version history pan
There are a few things to take into consideration when working with versions in SharePoint, as shown in the following table:
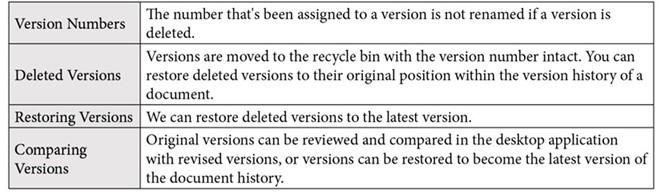
Table 17.4 – Working with versions
Follow these steps to learn how to delete and restore versions:
- Open a document in SharePoint and make sure you are viewing its Version history. Refer to the previous section for instructions, if required.
-
Click the drop-down arrow next to the version you wish to remove, then click the
Delete button:
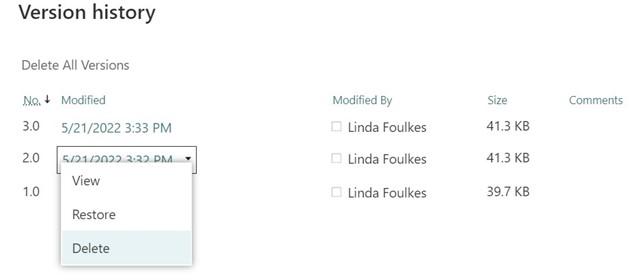
Figure 17.32 – The Delete button in the drop-down list
- The Version history window will now update to reflect only two versions. Notice that the version numbers are still intact, namely 3.0 and 1.0, and that version 2.0 is now in the recycle bin:
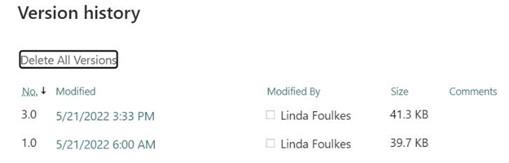
Figure 17.33 – The Version history pane has been updated
-
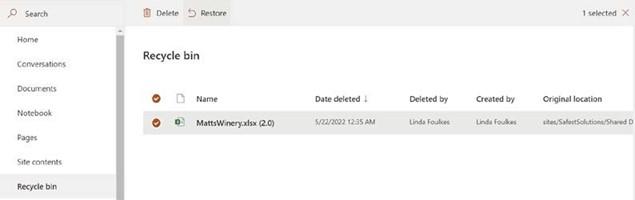
The deleted version will move to the SharePoint Recycle bin. Click the Recycle bin
icon to the left of the window to access it:
Figure 17.34 – Recycle bin
-
Notice that the version number is still intact at the end of the filename – that is,
MattsWinery.xlsx (2.0).
- To restore the version so that it becomes part of the version history, click the file you wish to restore, then select the Restore button at the top of the window.
- The version will be restored to its original position in the version history.
We hope that this chapter has touched on enough content to stimulate interest and helped you explore the host of available features – they all have so much more to offer.
Summary
In this chapter, you learned how to present and collaborate using Microsoft Teams. We hope that you now understand the difference between OneDrive and SharePoint for saving files and that you have an overview of Teams apps. You learned how to share PowerPoint slides using PowerPoint Live and apply Presenter modes. We also investigated several features in the Teams meeting space and learned how to upload files to Teams Channels to collaborate in real time, as well as how to work with version control and the New Sheet View feature.
As this is the last chapter of this book, we hope that you have learned a wealth of knowledge that you can apply to all aspects of your professional and personal life.


