
Creating and managing Channels
A Team is a group of people (called members) who gather to collaborate on a project, a specialist area, or within a department, to name a few examples. Within a team, we can create Channels. Channels are created within a specific Team. We use Channels to have conversations with others, work on project tasks and milestones, take meeting notes, collaborate on a specific part of a project, and invite only those members. The list of possibilities is endless.
Creating Channels
We can set up teams in the Teams area within the Teams app. For instance, we could create a Team for our business, named Safest Solutions. Channels can be created within the Teams app on a remote desktop connection or local area. Normally, we would collaborate using the remote desktop (RDS) as this is our daily workspace, but there are some constraints. One is the ability to use our camera when in meetings, while another is that our audio is affected by feedback or breaking up. We can work on teams inside and outside of an RDS since any updates sync automatically. Follow these steps:
- Open the Teams app.
- Navigate to the Teams button on the left-hand side of the navigation pane.
- At the bottom of the window, click on Join or create a team:

Figure 16.31 – Join or create a team
-
Click Create a team or enter a code to join an existing team. When using Join a team with a code, you will receive the code via email or can send a code via Settings when managing a channel.
- When we choose the Create team option, two options will appear – to create From a group or team or create From scratch. You can also Select from a template, which is a great way to start from a skeleton template where you can build a team. Depending on the template chosen, you will see several custom apps and Channels that have been automatically created for you. We have selected Onboard Employees as an example. Click Next to continue.
- Choose whether the team will be Private or Public, then enter the details related to your Team and check the Channel’s details:
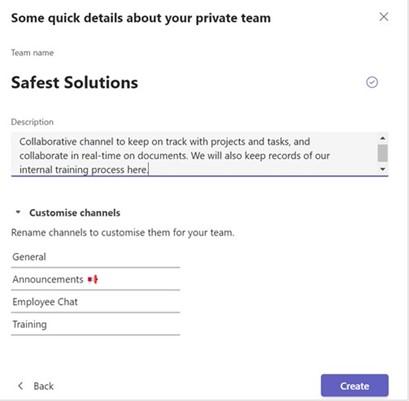
Figure 16.32 – Entering details about your private team
- Click Create to populate the team once you have filled out the required information. A few moments later, the team will appear.
- Directly under the Team name, you will see a few Channels. The first is General. The General channel’s name cannot be amended, but other channel names can be changed.
Now that we know how to create a Channel, let’s learn how to customize the Team and the Channels within it.
Managing Channels
In this section, you will learn how to manage Channels by investigating some of their options.
Channel activity
If a Channel is in bold, this means that there is an activity in the Channel that you have not looked at yet:
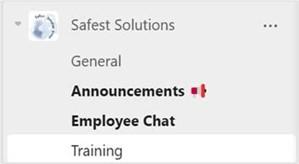
Figure 16.33 – Channels in bold mean new activity
Click the Channel’s name to see any new activity.
Channel notifications
It could become quite annoying if you keep receiving notifications while you work, so knowing where to customize this activity is beneficial.
The main notification customization area is at the top right of the Teams app (profile picture). Follow these steps:
- Click your profile image, then select the drop-down arrow next to Available to see a list of status defaults that can be amended to suit your requirements:
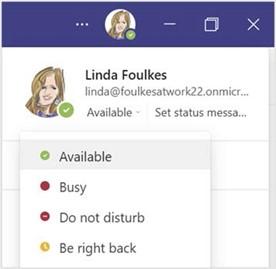
Figure 16.34 – Status within the Teams app
- To set further customizations, you can click the ellipsis to the left of your profile image, then access Settings:
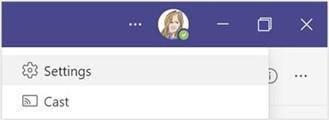
Figure 16.35 – The Settings option
We will highlight some of the main features that are available in the Settings area in the following sections.
Setting an out-of-office greeting
When you’re on annual leave or away from your Teams space, you can set an out-of-office greeting (just like we can in Outlook). Anyone trying to contact you will see the out-of- office notification in the Chat area, for example. This works in conjunction with your Out of Office setting in Outlook, so make sure that is set before you select this option. Follow these steps:
- Make sure you are on the General category on the left of the Settings screen.
- Scroll down to select Calls on the left. Then, locate the Voicemail heading and select Configure voicemail.
- Scroll down to Out of office greeting, then click the checkbox next to When I have an Outlook auto reply:
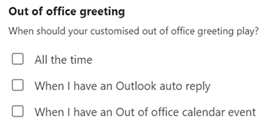
Figure 16.36 – Out of office greeting options
- At the top of the screen, you can Record a greeting to play when someone tries to call you through the Teams app.
You can also set notifications for Teams within the Settings area, or customize notifications on each Channel separately if required.
Setting Teams and Channel notifications
Let’s look at where we can find Teams notifications settings:
- Click on Settings | Notifications. Then, scroll to Teams and channels and customize your notifications using the options provided:
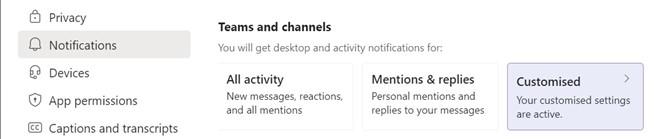
Figure 16.37 – Notification settings for Teams and Channels
- To set individual channel notifications, select the ellipsis to the right of the channel name, then select Channel notifications. Choose an option from the list provided:
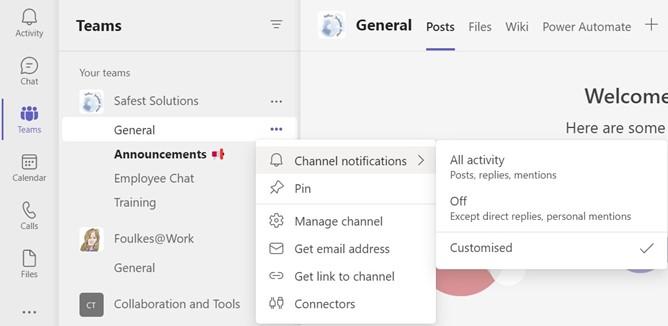
Figure 16.38 – Setting Channel notifications
- We can turn notifications Off completely, see All activity, or select Customised to set mentions, including all replies and post activity.
In the next section, you will learn how to add members to your Team.
Adding Team members
Follow these steps:
-
Click on a Team, then select the ellipsis to the right of the team’s name. Choose
Manage Team or Add member:
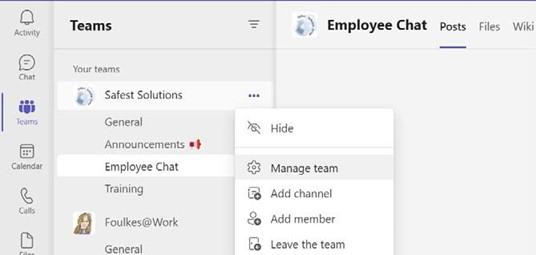
Figure 16.39 – Adding team members to a Team
- Start typing the colleague’s name – their address should auto-populate for you. Click on Add:
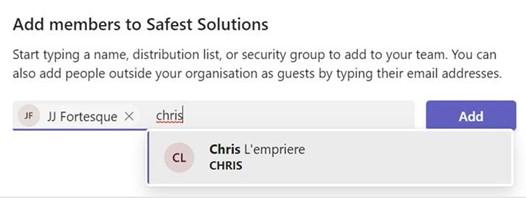
Figure 16.40 – Adding members to a Team
- When adding members to a team, you can add the email address of someone outside your organization to add them as a guest, after which a request will be sent to them:

Figure 16.41 – Adding external people to a Team
-
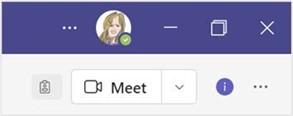
External guests will show as an icon at the top right of the Team or to the left of the Channel Meet button, indicating that you have included members that are not part of your organization:
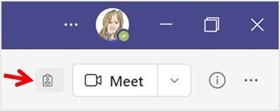
Figure 16.42 – Icon displaying that individuals have been included from outside the business
At times, it is easier to send a code to individuals to join the team directly. The next section will take you through the steps to do so.
Sending a Team code to individuals
Follow these steps:
- We can also send a code to individuals to request that they join the Team.
- Click on the three dots (ellipsis) next to the Team name, then choose Manage Team.
-
Select Settings from the options provided. Choose an option to customize, such as
Team code:
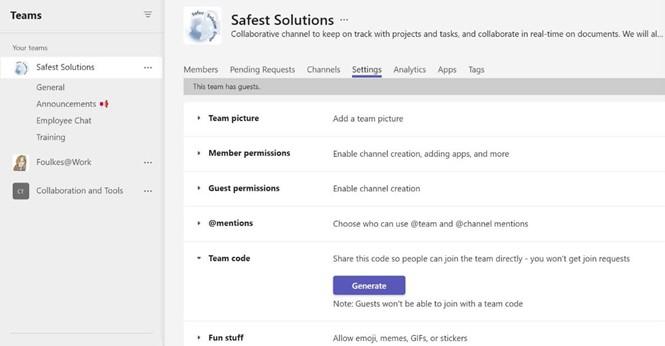
Figure 16.43 – Generating a Team code
- Click on Generate to access the code. Note that guests outside the business cannot join via this code.
-
Send the code via email, chat, or verbally. The recipient will enter the code into the
Join or create a team area, as explained previously.
You won’t see any join requests when you share a Team code. Now, let’s look at how to move Teams.
Reordering Teams
To change the order in which Teams are presented in the Teams pane, simply click on a Team name, then drag it to another position (either up or down the list). Once you let go of your mouse, the Team will be reordered
Hiding and showing teams
If you have been invited to a few teams and have started creating your own teams, then you may find that the environment becomes a little busy.
Once a Team is hidden, it will become part of the Hidden teams list at the bottom of the Teams panel:
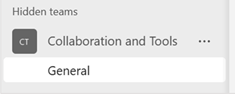
Figure 16.44 – The Hidden teams list
- Click on the ellipsis to the right of the Team name, then select Hide.
- To remove the team from the hidden list so that it appears in the Teams list once again, simply choose Show from the ellipsis options.
Meeting with Channel members
Instead of sending a Teams Outlook calendar invite, you can set meetings or meet directly from within a created Team or Channel.
Click the drop-down list to the right of the Meet button (just below your profile) to access the Meet Now or Schedule a meeting option:
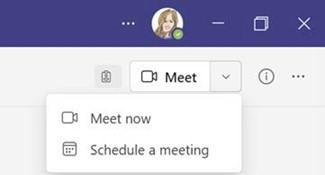
Figure 16.45 – The Meet now and Schedule a meeting options
When setting a meeting within a Channel or Team, it will be visible to all within the channel.

Quick ways to communicate or set options
Time is everything, so the Search bar at the top of the Teams app is fantastic for reaching colleagues by calling and chatting, as well as for quickly amending settings. Have a look at the list that’s available by typing a backslash to view the commands in a drop-down list within the Search bar:
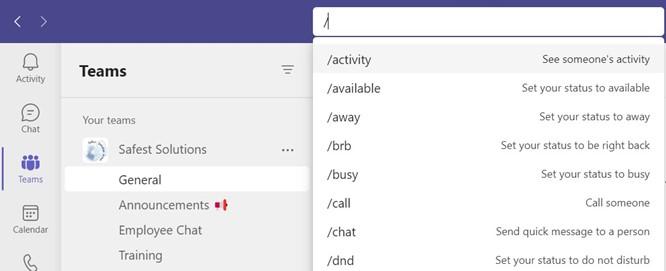
Figure 16.46 – Search bar commands
Instead of selecting a Channel, or initiating a Chat, we can call a colleague directly using the /call command, after which you can start typing the name of the colleague you wish to reach. However, note that on pressing the Send button, Microsoft Teams will launch an active call immediately:
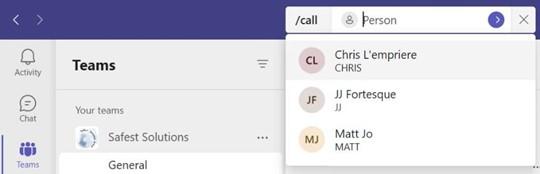
Figure 16.47 – The /call feature
We can also use @mention to start a chat with someone, instead of trying to locate a Chat from the left-hand side of the Teams pane:
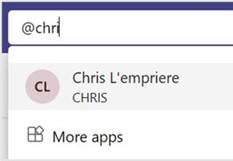
Figure 16.48 – @mention
Now, let’s learn how to create custom tags so that we can @mention more than one colleague at a time.
Creating Channel Tags
Channel Tags are useful when you need to use the @mention feature to notify a group of colleagues at the same time, such as a team at a specific office within a business Channel such as SSOxford, or a couple of individuals in a specific department, such as SSMarketing:

Figure 16.49 – Tags
To use the Tag, simply type @SSOxford into a chat, conversation, or meeting detail, or just type the @ sign to bring up the list of available Suggestions to select from:
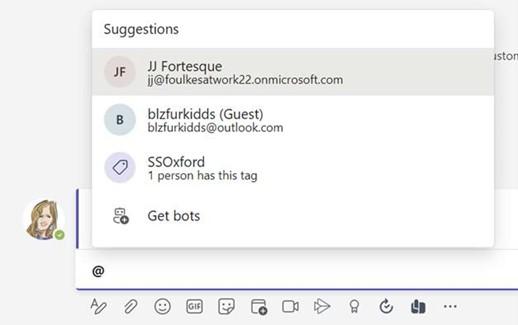
Figure 16.50 – Suggestions

In the next section, we will explore all the functionality chats have to offer.
All about Teams Chats
A good habit is to try to keep Chats within the team, but not general Chats as you don’t want to manage both. There are so many features available within the Teams conversation area (General Channel, for example). When a Chat message is sent, you will see a circle with a tick icon, indicating that the message has been sent. Once the message has been read by the recipient, the icon will turn into an eye icon:

Figure 16.51 – The Sent and Read icons
The following screenshot shows the options that are available along the bottom of the New Conversation area:
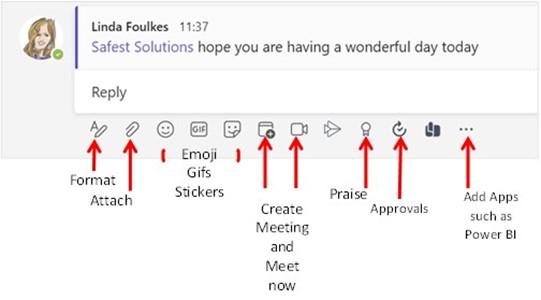
Figure 16.52 – Chat features in Teams
Let’s look at some of these features.
Using the Praise icon
This icon needs to be managed through Teams Admin. The Praise icon is situated at the end of the Chat icons. It is a great way to encourage teamwork by giving praise to individuals.
Using New conversation
Instead of typing a quick message using the New conversation button, the Format button opens numerous options in the Chat. This is especially useful if you want to create a professional chat or announcement.
Click on New conversation, then select the Format icon (the first icon beneath the chat) to set various options, such as limiting replies and Post in multiple channels. We can add tables and so much more:
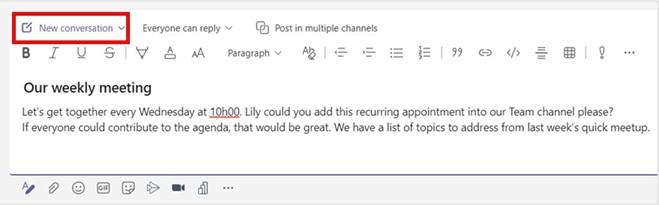
Figure 16.53 – Creating a professional chat or conversation
In the next section, we will look at other formatting options.
Creating announcements
We can turn a chat into an Announcement with more prominent features. You can also give it a headline and add color. After sending the message, it will appear in the Channel with the notification icon to the right of the message:
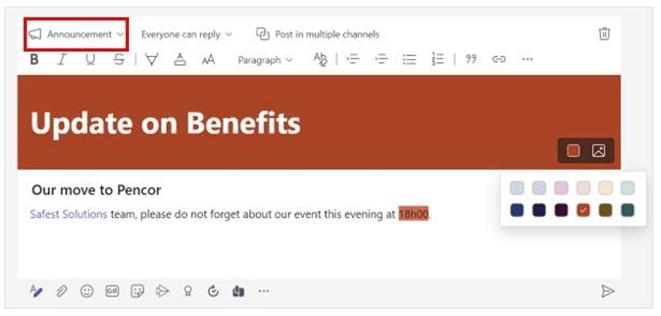
Figure 16.54 – The Announcement feature
At times, we need to mark a message as Important. We’ll go through this in the next section.
Marking a message as Important
Using the Mark as important option by clicking on the ellipsis at the end of the ribbon allows you to assign importance. The border of the message will turn red and some text stating IMPORTANT in red will appear as the message’s subject line.
Pinning messages
Use the ellipsis to the right of a conversation to Pin the conversation. Doing so will make it more visible with a green border and green icon. Note that everyone who is part of the Channel can view pinned messages:
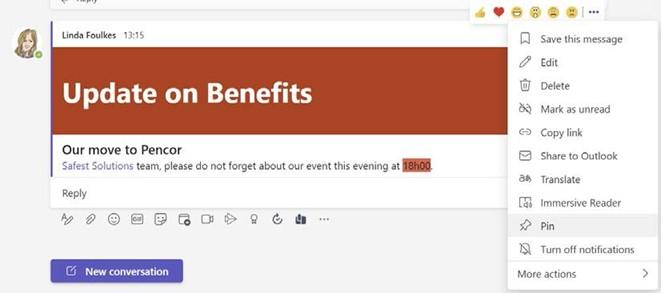
Figure 16.55 – The Pin feature
Pinned messages, however, will get lost as the Channel Chat builds. If this happens, you can click on the Information icon to Show channel info at the top right of the window to see any pinned posts down the right-hand side panel. The Channel info pane displays more activity regarding members and updates:
Figure 16.56 – The Show channel info button
The Pinned posts area will now appear in the right-hand information pane:

Figure 16.57 – Pinned posts
Pinned posts will display within the Chat with a green pin icon at the top right of the post.
Sharing posts to Outlook
The option to Share to Outlook can be set up by your Admin team if it’s missing from the ellipsis drop-down menu. This option is extremely useful for sending chats to Outlook
directly from within Teams. This alleviates you from having to copy and paste the contents of an email:
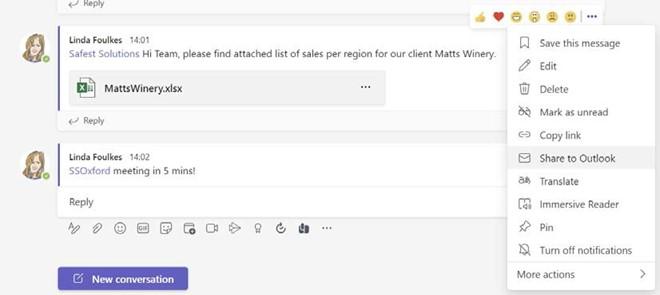
Figure 16.58 – Share to Outlook
After clicking the Share to Outlook option, the email will populate the necessary fields. Then, click the Send button.
Investigating the Immersive Reader feature
Immersive Reader is a feature that was added to all the Office apps. It aids accessibility by adding a range of features such as Translate, Read aloud, Reading by line focus, and so much more. The Read aloud feature aids those who would like to sit back and listen to correspondence, including additional accessibility options. To access the feature, use the ellipsis to the right of a Chat, then select Immersive Reader.
Amending the Sticker options
You can add emojis, gifs, and stickers to a Chat. You can even customize the text on the images! Select Stickers, then choose a category. Edit the text, then click Done to post it to the Chat:
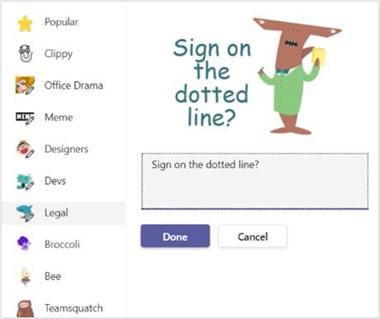
Figure 16.59 – The Sticker feature
Let’s look at another fantastic app for adding value to productivity in the workplace.
Approving requests
The Approvals app is a great workflow to add to your Chat or Teams environment. We can use this tool to approve leave requests, sick notes, community hours, training, or workflows, such as a training checklist or project plan. To add Approvals to the Teams environment, simply add the tool as an app. For example, click the ellipsis to the right of the Chat, then search for Approvals to add it to the Chat. The respective icon will appear at the bottom of a conversation, along with all the other default options:
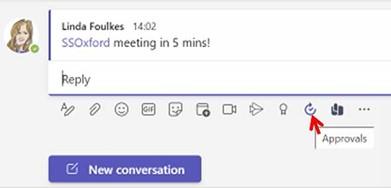
Figure 16.60 – The Approvals feature
Click the Approvals button to create a New approval request. Choose from the Basic request, e-Sign, and Template options. Fill out the details of the request, attach any supporting documentation, and then press Send to forward it to the approver.
We can add the Approvals app to the sidebar of the Teams environment so that we can
Approve or Reject requests from teammates and see an overview of the process:
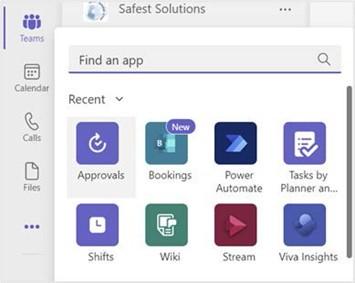
Figure 16.61 – Adding the Approvals app to Teams
The approver will be notified of the new request via the Activity bell in Teams, or a desktop notification popup. The approver can also navigate to the Approvals app on the Teams sidebar, then click on the request and select either Accept or Reject:
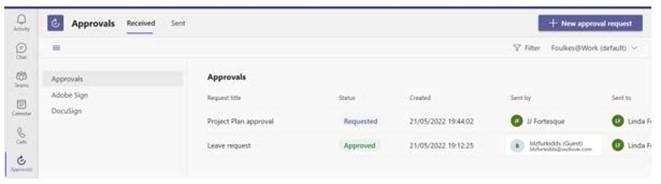
Figure 16.62 – The Approvals app
Here, you can see all the Sent and Received approvals and the Status details of each in the Approvals app.
Now, let’s learn how to send an email from Outlook directly to a Teams Channel in Microsoft Teams using the Get email address feature. This feature needs to be activated within the admin portal to push to the organization if it’s not available in your Teams app.
Locating Chat files
Any files that are shared in a Chat will be available in the Files section of your Team Channel, as well as in the Files app to the left of the Teams pane. We will look at this later in this chapter.
Hiding Chats
You can hide chats and bring them back when required by following these steps:
- To hide a chat, click the ellipsis icon and select Hide.
- Use the Search feature at the top of the window to unhide chats by searching for the individual’s name or anything else to do with the Chat discussion. The results of the search will display as a drop-down list at the top of the Teams window. Select the applicable Chat to unhide it and open it in the Chat area.
Saving important Chats
We can use the Pin feature to pin Chats so that we can revisit them. The only issue with this is that the pinned items move down, and we tend to forget about them. Using the Save this message feature is a better alternative since the important messages are added to the Saved area of the Teams environment. Follow these steps:
- Save your important chats to go back to at a later stage by selecting Save this message from the ellipsis drop-down to the right of the chat:

Figure 16.63 – Save this message
- The Chat message will now be saved in the Saved area of Teams.
- Click your profile picture at the top right of the Teams app.
- Select Saved from the drop-down list:
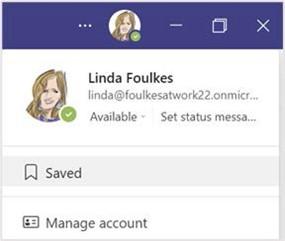
Figure 16.64 – The Saved option
- All the saved important messages will appear to the left of the window:
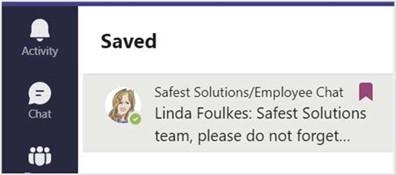
Figure 16.65 – The Saved area in Teams
- Click the maroon marker to remove the item from the Saved list.
Emailing a Teams Channel from Outlook
A great feature within Teams is being able to send an email to a Teams Channel for discussion. Follow these steps:
- Select the Channel you wish to email.
- Use the ellipsis to the right of the channel’s name, then click on Get email address:
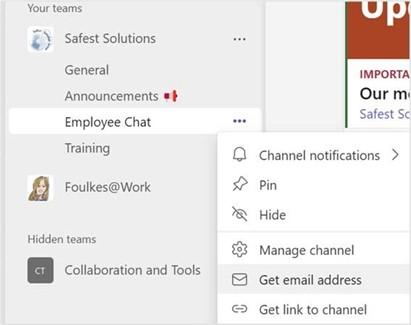
Figure 16.66 – The Get email address feature
-
Click Copy to place the email address on the clipboard or visit Advanced settings
to customize the link’s settings:
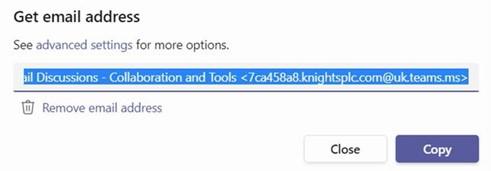
Figure 16.67 – The Get email address feature
- Navigate to Outlook 2021, then create a New Email message.
-
Use the right-click and paste method or Ctrl + V to paste the email address for the channel into the To field. Add a Subject and message body and attach the relevant documents, if required:
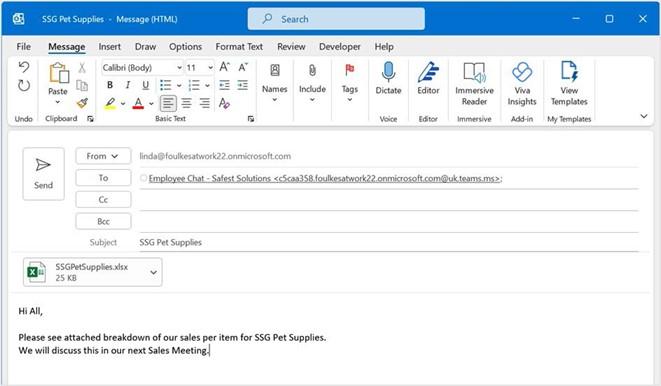
Figure 16.68 – New email message in Outlook
- Send the email to the Channel. The email will appear in the Channel, along with the attachment.
All files and their associated emails are stored in the SharePoint Files folder within the Teams app. Each Team has a SharePoint folder. Files in groups or private chats are stored in OneDrive.
Summary
In this chapter, you learned how to communicate and collaborate using Microsoft Teams and Zoom. You learned how to set up, join, and manage meetings. We also investigated add-ins and how to troubleshoot issues that may arise.
At this point, you should be confident in making decisions regarding presenting content using the Share icon within Teams and Zoom, as well as all the Presenter modes. We also learned the best way to work with meeting notes.
In addition, you went through the Teams app and learned some top tips for using it and how to create and manage Channels. You also learned about brilliant tools such as OneNote and Tasks by Planner, Bookings, and Approvals, to name just a few. You also
explored all the functionality within Teams meetings. You can now collaborate in real time and work with version control and the New Sheet View feature.
In the final chapter, we will see how to present and collaborate with our teams online.


