
Turning off email notifications
When managing our mail and our working environment, we may (or may not) want email notifications to constantly distract us, especially if we have an extremely busy mailbox. In addition, when meeting with clients remotely in a Teams meeting, email notifications— either through sound or banners—when sharing screens could be sensitive in their nature.
To customize such notifications, we would need to visit the Settings option on our Windows environment. If you are not sure where to locate such settings, simply search for Settings using the magnifying glass on your Windows taskbar. In the screenshot that follows, you will notice that Outlook is set to display Banners, Sounds. Click the slider to change the option to Off, or customize settings individually by clicking on the arrow to the right of the button:
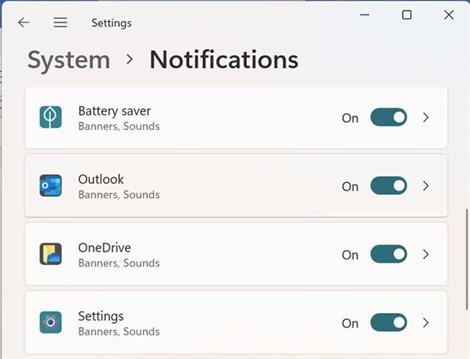
Figure 13.12 – Outlook notification settings on Windows 11
It is also possible to customize these settings with the Outlook application by navigating to
File | Options | Mail | Message arrival.
Another method to alleviate emails coming through when you are trying to get other tasks completed during the day would be to turn your Outlook 2021 mail to Offline, just while you attend to your other tasks—no distractions. Click on the Send / Receive tab and then select Work Offline, as illustrated in the following screenshot:

Figure 13.13 – Work Offline feature
Let’s take a look at how we would categorize mail items using color coding in the next section.
Manipulating item tags
In this section, you will learn how to categorize items by adding a color, as well as go through the options to rename, assign categories to items, and remove a category from an Outlook item. You will also be able to set a Quick Click, work with flags, mark items as read or unread, and view message properties.
Categorizing items using Quick Click
To understand what categorizing items means, you would need to understand the following:
- What is meant by an item?: An item is an email message, a task, a calendar entry, a contact, or a note.
- What is meant by categorizing?: Categories are keywords assigned by a color that help you keep track of items.
Categorizing using color
Categorizing items allows you to filter, sort, and group with ease according to categories. The most efficient method to add a category color to an email item would be to do the following:
- Click into the outlined square block placeholder to the left of the Categories
column for an email in the mailbox, as illustrated in the following screenshot:
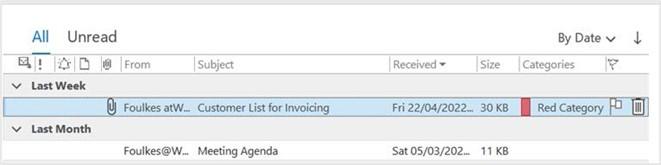
Figure 13.14 – Inbox showing the Red Category applied to an email
- Double-click to open the email in order to change the category color or to amend the category name.
- Right-click on the Red Category name, then choose a different category to assign to the email. To clear the existing category, click on Clear “Red Category” from the drop-down list, as illustrated in the following screenshot:
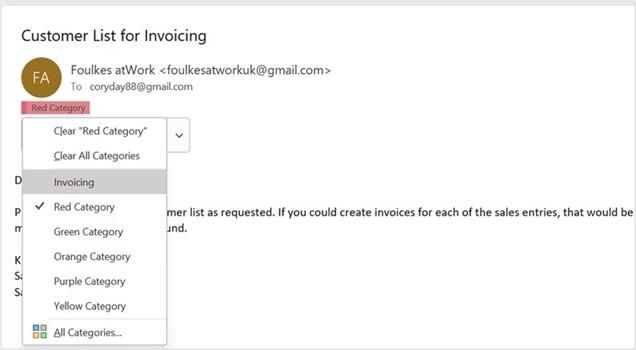
Figure 13.15 – Assigning new categories to an email
- To amend category names and colors, click on the All Categories… option.
- Click on the New… button to create a brand-new category and color, or select an existing category on the left and click the Rename button on the right to change the name of the category.
- To change a category’s color, select the category to amend, then visit the drop-down list under the Color: heading and select a new color, as illustrated in the following screenshot:
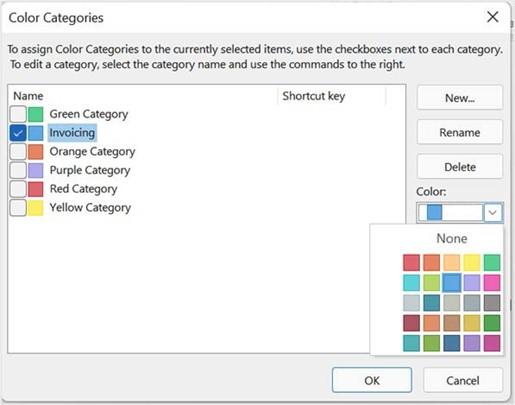
Figure 13.16 – Color Categories dialog box
- Click on the OK button to confirm.
-
Note that we can assign shortcut keys to categories. This makes it easier to add a category to an email message using the shortcut keys on the keyboard. Use the Shortcut Key: drop-down list to assign a shortcut key to a selected category. Once assigned, simply select an email, then press the associated keyboard shortcut
to assign a category. Be careful with this option, though. If you have keyboard shortcuts already assigned with the same keystrokes, or existing program shortcuts, they will be replaced. The process is illustrated in the following screenshot:
3
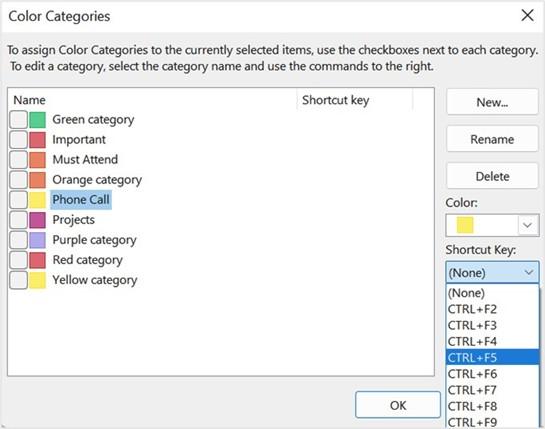
Figure 13.17 – Category shortcut key
Category names can be changed to suit your working environment and the nature of the emails you deal with daily. Here’s how you can do this:
-
Click on OK to return to the email. Note that the email message now has a category color assigned in the message header section.
-
You can assi333gn more than one category to one email message. Remember to click on a category to remove it from the email message if you decide to change to a different category color.
- Color categories can also be applied to calendar events in Outlook web. Once you have entered details relating to your event, click the Categorise drop-down list at the top of the window. Select a color category to assign to the item, as illustrated in the following screenshot:
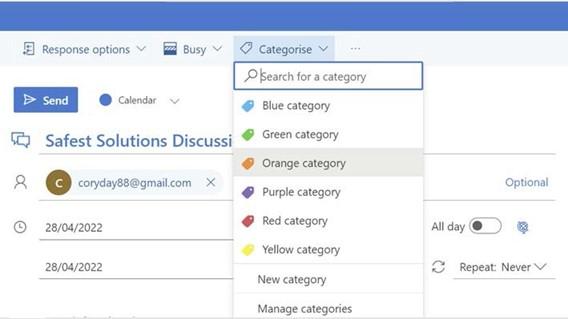
Figure 13.18 – Assigning categories to calendar appointments
- By adding calendar category colors this way, we can focus on important—or urgent—must-attend events in our calendar.
Searching for specific categories
We can use the new Instant Search feature to locate items by category. This is a great tool to use to locate items in your mailbox or commands you regularly use. Here’s how to start using this new feature:
- At the top of the Outlook screen, in the title bar, click into the Instant Search field.
- Notice that the Search tab automatically appears on the ribbon.
- Click on the Search tab.
- Locate the Categorized drop-down list, then select a category to search by, as illustrated in the following screenshot:
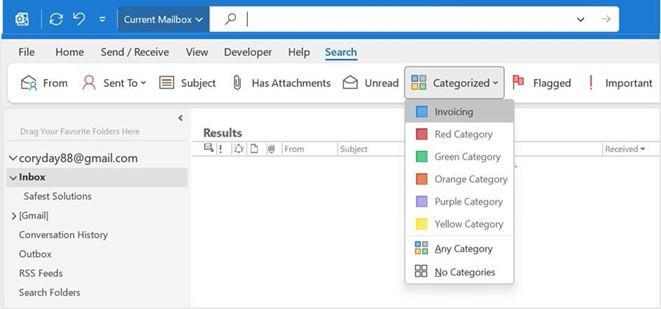
Figure 13.19 – Drop-down list of categorized items using Instant Search
- All mail assigned with the category is displayed as a search result.
- Notice in the following screenshot that the Instant Search fi ld now contains code for the search you performed. Th s is stored in the drop-down list so that when you click into the Instant Search fi ld again, it will remember the search command for you:
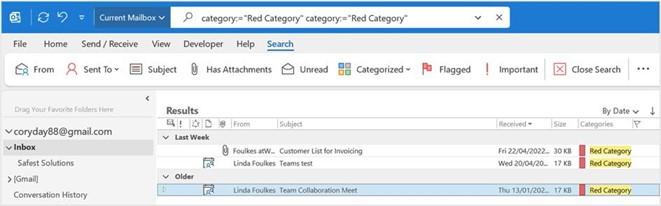
Figure 13.20 – Instant Search field displaying code
- Click on the Close Search button along the ribbon to exit the search results and return to your mailbox.
Setting flags
A flag is a visual reminder to follow up on a contact, a task, or a message in Outlook. You are able to customize your flags with specific dates. Once a flag is assigned, it appears in the email view, the To-Do Bar, the Daily Calendar Task List, and the Tasks View. The default flag color is red and, when assigned, it will appear next to the Categories icon to the right of the email message. In the following screenshot, the flag is seen in the email and in the task list (located to the right of the screen positioned under the calendar):
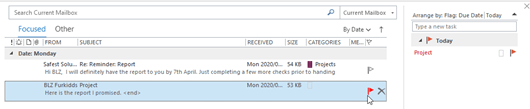
Figure 13.21 – Red flag assigned to an email and in the task list
If you assign a flag to an email message that must follow up on a task on the same day, then the time that the reminder will pop up on your screen will depend on the workday default settings in Outlook.
Consult the Outlook Help feature for an explanation of how default dates work for follow-ups.
Click on the Help tab, then select Help again, after which the Help pane will open to the right of the Outlook window. Type the following into the search area provided: how do dates work for follow ups. Press the Enter key on the keyboard to display information on follow-up default reminder settings.
In the next section, we will look at options to add flags to messages and contacts.
Adding a flag to a message and contact
To add a flag to a message and contact, proceed as follows:
- To the right of an email message (in the Message pane), you will notice little white flag outlines. Click on the flag to add a reminder to the message for a follow-up.
- By default, the flag is assigned for Today and will remind you an hour before the end of the working day (as set in Outlook). The flag turns red once assigned.
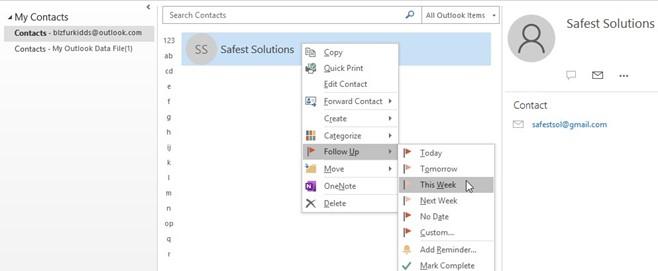
- To add a flag to a contact, open the Contacts pane located at the bottom left-hand corner of the Outlook window.
- Click to select a contact, as illustrated in the following screenshot:
Figure 13.22 – Adding a follow-up reminder to a contact
- Right-click on the contact to add a follow-up reminder using the Follow Up option.
Marking mail items as read/unread
At times, you may read an email, or click on it to open it, and would like to refer to it later. Until you refer to it again, you might want it to appear in your Inbox as unread. This option gives the user information at a glance, as new email messages are always highlighted in bold text. Here’s how we do this:
-
Click on a message you wish to mark as unread. Locate the Tags group on the
Home tab. Click on the Unread/Read icon.
- This icon is a toggle icon; press once for unread and once again for read.

Checking for new messages
To check for new messages, proceed as follows:
-
Click on the Send/Receive All Folders icon on the Quick Access Toolbar, located in the very top-left corner of the Outlook environment, to check for new mail, as illustrated in the following screenshot:
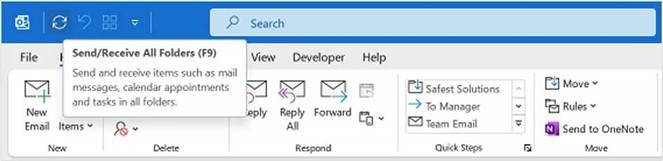
Figure 13.23 – Send/Receive All Folders icon
- You can also use the F9 function key to refresh the Inbox to bring through any new messages. In the following topic, we will learn how to work with content views, as well as the filtering and printing of Outlook items.
The next topic will cover content on the content page—such as changing the view type— and we will also take a look at the Reminders Window.


