Inserting and formatting lists
How you would like to insert and format lists on slides in PowerPoint is a personal preference. Either insert the text first and then apply the list or apply the list and then enter the text:
- Open the presentation called ProductGrpSSG.pptx.
- Locate the slide that contains the text you wish to apply a bullet or numbered list to. Then, select the text.
- Choose your desired option from the Paragraph group by clicking on either the bullet icon or the numbers icon.
- To change the bullet or number type, click on the drop-down arrow next to the bullet or numbering icon.
- Select Bullets and Numbering from the bottom of the list.
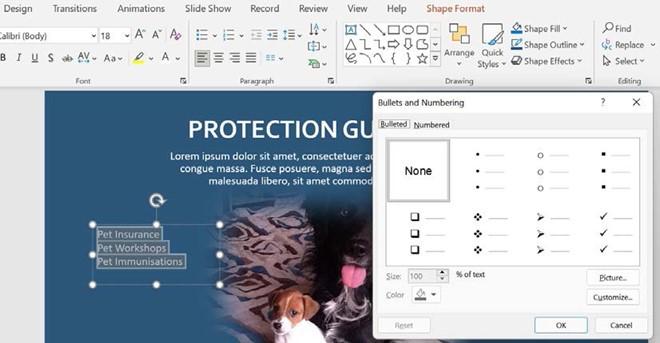
- A dialog box will open, offering various options that you can choose from to customize the numbered or bulleted list:

Figure 6.8 – The Bullets and Numbering dialog box
- You can change the color of the bullet or the number using the Color fill bucket.
- The Customize… button is also available if you need to browse for a different symbol from the huge range available.
- Adjust the spin controls of the % of text area (Size:). If you are using symbols as a bullet, then this option works really well to maximize the symbol.
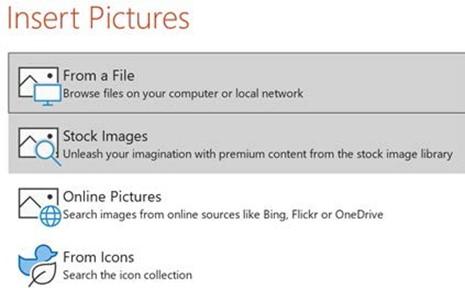
- Change the bullet to a picture of your choice by clicking on the Picture… button and selecting a source in order to insert a bullet. Note that there is also a new Stock Images feature where you can access a huge range of exciting new graphics to use:

Figure 6.9 – The Insert Pictures dialog box showing new options that are available in Office 2021
- Once you have selected a picture, it will appear as a bullet type in the Bullets and Numbering dialog box. Note that the numbering option works in the same way as the bullet icon.
-
If you wish to number items from a specific starting number point, use the Start At:
position to control this.
- To change the distance between the number or bullet and the text, first, select the text, then use the indent markers along the ribbon to increase (or decrease) the distance between the number and the text. If the ruler is not visible on the screen, click on View | Ruler to display it:

Figure 6.10 – Use the indent markers along the ribbon to increase the distance between the number and the text
With that, we have inserted bullet lists and numbered lists and learned how to customize them. Now, we will learn how to set up slide headers and footers.


