
Using Microsoft Forms
In addition to creating forms within the desktop Office 2021 apps, we can also visit the Microsoft Forms online app from within the Office 365 environment, or by visiting http://forms.microsoft.com/.
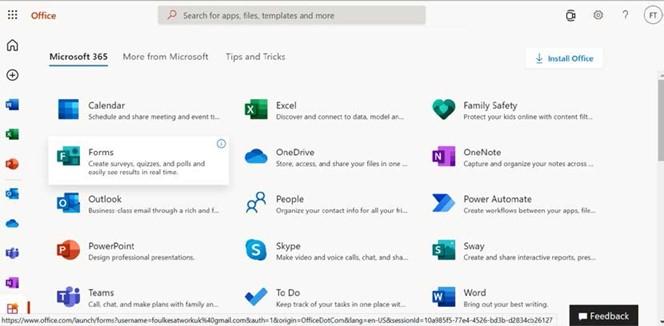
Figure 4.22 – Microsoft Forms access through Office 365
We will now use the Forms app within our Microsoft account, and learn how to create and publish an online form:
- Locate the Forms option on the Microsoft 365 screen, or type the http:// forms.microsoft.com/
URL into the browser to navigate to the Forms app. Remember to sign in using your credentials, if required. - From the Forms home screen, click to create New Form or New Quiz, or use one of the existing templates available.
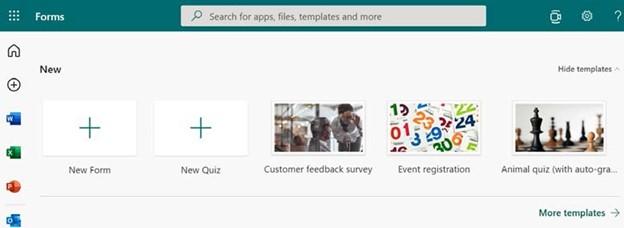
Figure 4.23 – Forms home screen displaying the New Form, New Quiz, and templates options
- Let’s use the Event registration template to learn more about adding or amending form elements. Click to select the Event registration option.
- Notice that, at the top of the editable form, there are two tabs, namely, Questions and Responses. Use the Questions tab to amend or add questions to your form. We will investigate this option first:
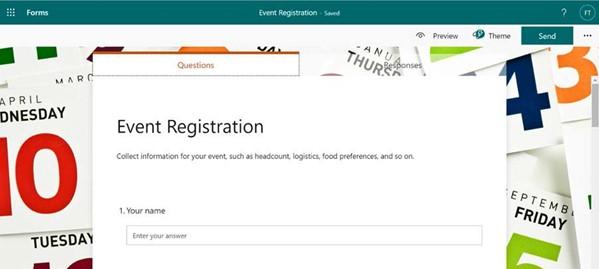
Figure 4.24 – Event Registration form with the Questions and Responses tabs at the top
- Editing a form is really easy, as you simply click on the part of the form you wish to amend. For instance, click anywhere in the first question to amend it. The question will present itself in edit mode. At the top of the question, you will see four buttons:
- Copy question
- Delete question
- Move question up
- Move question down:
- Copy question
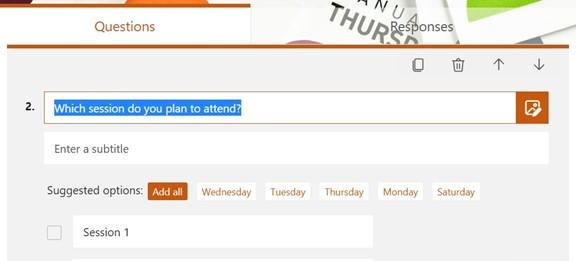
Figure 4.25 – Form options
- The options available on text questions will differ from those of multiple-choice question types, for example. To add a new question type, click on the Add New button at the bottom of any question you are currently editing, or scroll down to the bottom of the form. Once you have clicked on the Add New button, the list of question types will be presented.
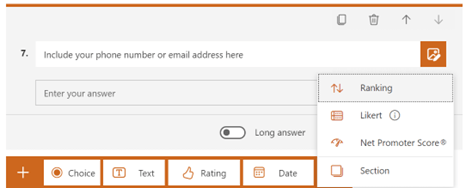
Figure 4.26 – Question types available after clicking the Add New button
- Choose a question type by clicking on the relevant option. For this example, let’s choose Rating. Add the question, then specify the level and whether you would like the symbol to be displayed as stars or numbers as the rating options. You can also choose to fix the question so that it requires user input prior to moving to the next question on the form. Click on the Required button to set this option.
- Edit the question text by amending the detail as you would normally. There are Suggested options: options below question types to guide you. These options offer the user efficient ways of adding multiple relevant question keywords in one go, which saves time.
- We can insert media by clicking on the Insert media button to the right of the question. This will take you to media locations, such as Image Search, OneDrive, or Upload. Reminder to always consider copyright when making the best selection, and to cite sources, where required.
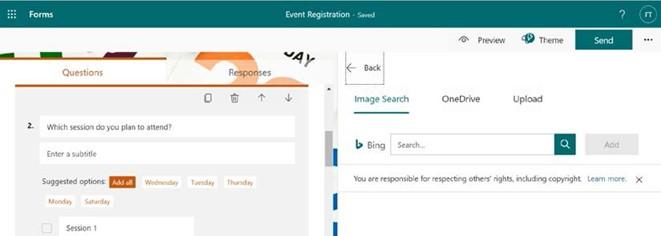
Figure 4.27 – Image search and upload options for media on a form question
- You may wish to edit the Theme form. To do this, click on the Theme button at the top right-hand side of the form, as shown in the previous screenshot.
- Theme ideas, colors, and images will be presented to the right side of the form. After you have selected a new theme, use the Preview button at the top of the form to see how the form will present to users of the form.
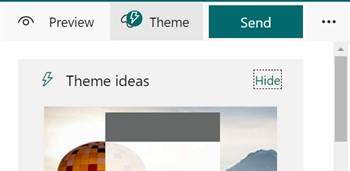
Figure 4.28 – Form buttons are located at the top in order to change the Theme and Preview the result
- There are a few more options to consider when designing online forms. We can add a question Subtitle, set Restrictions, and add Branching. Click to edit a question. Select the three dots to the right of the question to view the options. The options displayed here are determined by the question type.
-
On choosing the Subtitle option, this will add an extra row under the question so that you can add any additional instruction or text to the question. To remove the subtitle, simply choose it again from the … menu.
- If you add the Restrictions option, you will need to specify a number constraint.
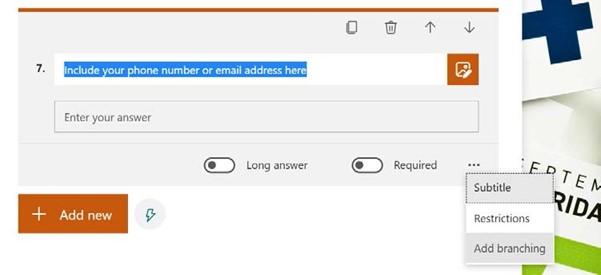
Figure 4.29 – Click on the three dots to the right of a question to display more options
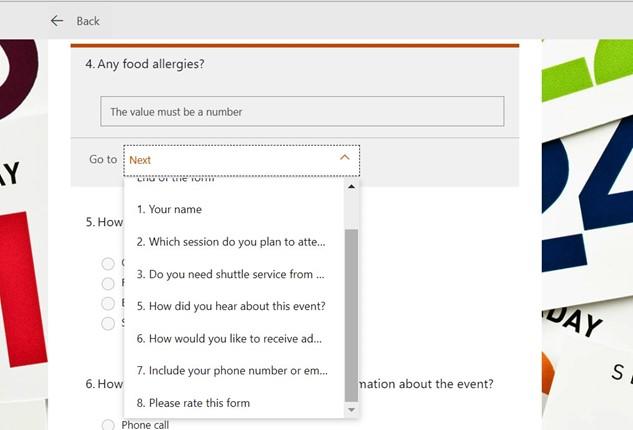
- We use branching to extend a question based on the answer provided from the source question. For instance, if the user indicated that they have food allergies, they will be taken directly to the branching question to fill out details about their allergies and add any medical information. Select Add branching, and the Go to drop-down list will appear just under the source question. Notice that you have been directed to the Branching options screen.
- Choose an option from the list to branch to the next action based on user input.
Figure 4.30 – The drop-down options on the Go to branching screen
- When you are happy with the branching options, navigate back to the form layout by clicking on the Back button at the top left of the form.
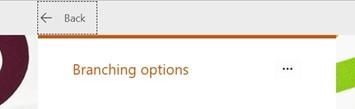
Figure 4.31 – Click on the Back button to return to the form
- Once the form is complete and you are ready to distribute the form to others, click on the Send button. Here you will find all the options with regard to sharing and collecting responses.
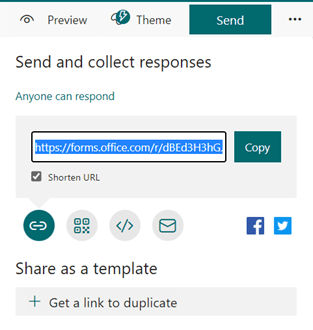
Figure 4.32 – Send and collect responses displaying the Shorten URL option
- Before copying the form link, click on the Shorten URL checkbox to ensure that the link is reduced to fewer characters and symbols, making it easier to share.
- There are a number of mediums we can use to share a form. These icons are located just beneath the form link. The first icon is the Link icon (the default), followed by QR Code, Embed, and Email.
- Once you have sent out the link using one of the methods explained here, the form responses are collected. To view the results of the survey, navigate back to the form, then click on the Responses tab at the top of the form. From this screen, you can view responses and/or open the results in Excel.
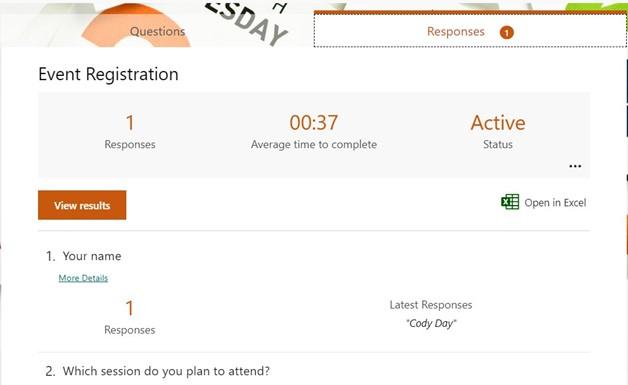
Figure 4.33 – Responses tab showing first form response and the Open in Excel option
In this section, we learned how to work with forms using Microsoft Word 2021, as well as using the online tool, Microsoft Forms. In the next section, we will learn how to create a macro to automate tasks when using Microsoft Word.


