The Polar Array tool
The Polar Array tool is used to create an arrangement of objects around a point in circular form. The
following example shows you to create a polar array.
Create two concentric circles of 180 and 70 diameters.

Type C in the command line and press ENTER.
Press and hold the Ctrl key, right-click and select Quadrant from the shortcut menu.
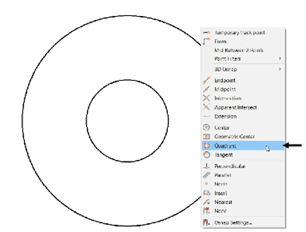
Select the quadrant point of the circle as shown below.
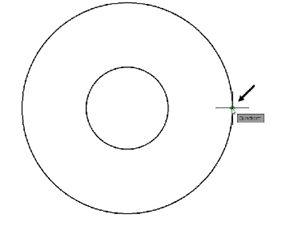
Type 30 as radius and press ENTER, as shown.
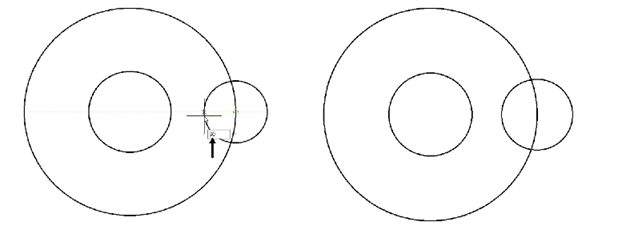
Click Home > Modify > Trim on the ribbon.
Select the large circle as the cutting edge and right-click.
Select the circle on the quadrant as the object to be trimmed.

Right-click and select Enter.
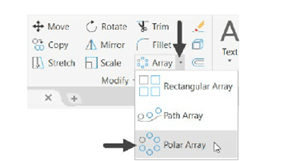
Click Home > Modify > Array > Polar Array on the ribbon or ARRAYPOLAR in the command line.
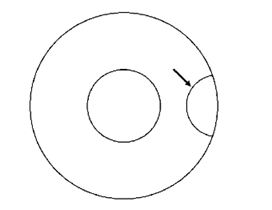
Select the arc created after trimming the circle. Next, right-click to accept the selection.
 Make sure that the Object Snap is activated.
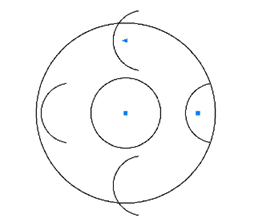
Select the center of the large circle as the center of the array; the Array Creation tab
appears in the ribbon.

In the Items panel of the Array Creation tab, set the Items value to 4.
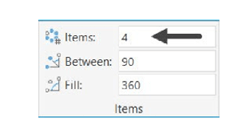
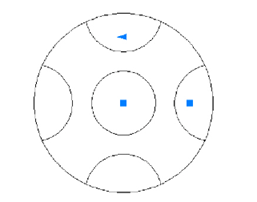
Note that the Rotate Items button is active in the Properties panel of the Array Creation tab. As a
result, the array objects are rotated. If you deactivate this button, the polar array is created without
rotating the objects as shown in figure.
Also, the Associative button is active by default. This ensures that you can edit the array after creating it.
Make sure that the Associative and the Rotate Items buttons are active. Next, click the
Close Array button on the ribbon.
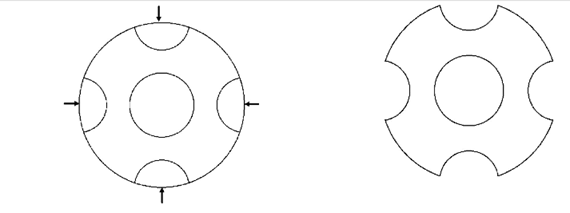
Click the Trim button on the Modify panel.
Press ENTER to select all objects as cutting edges.
Trim the unwanted portions as shown below.
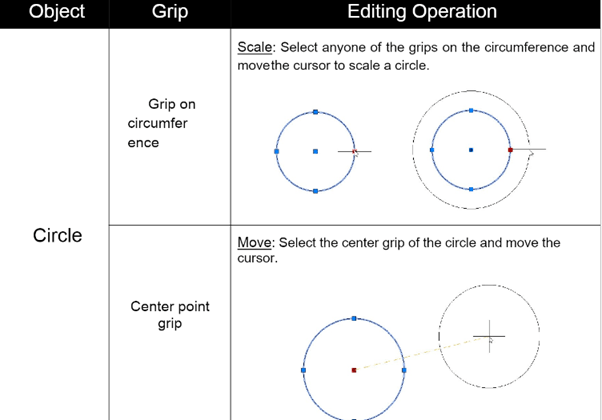
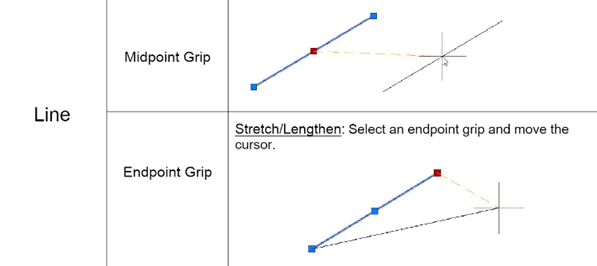
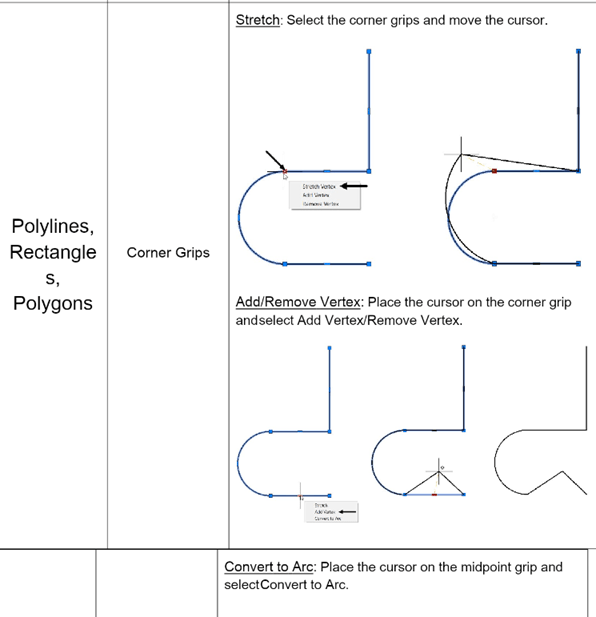
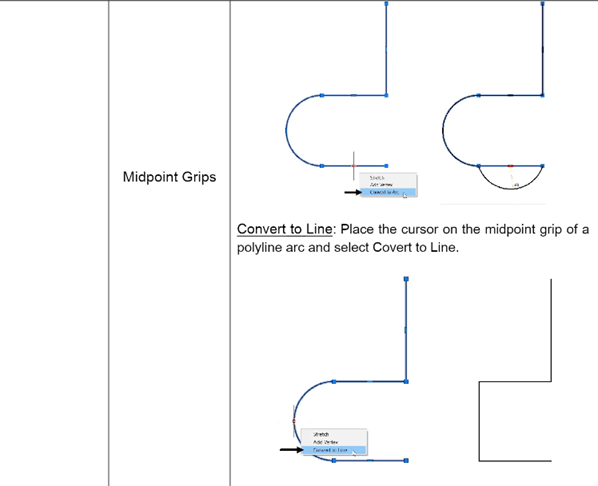
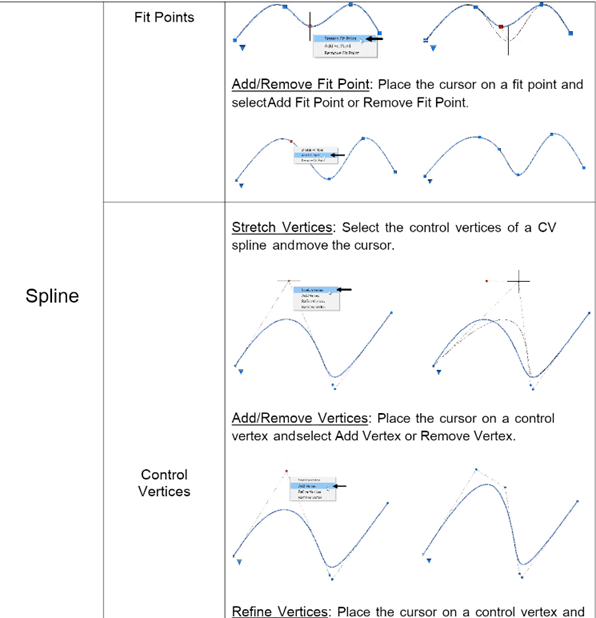
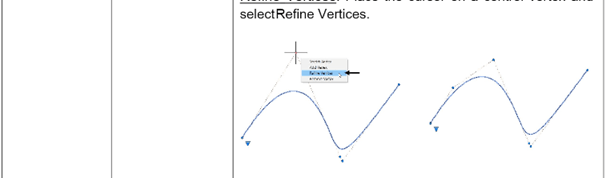
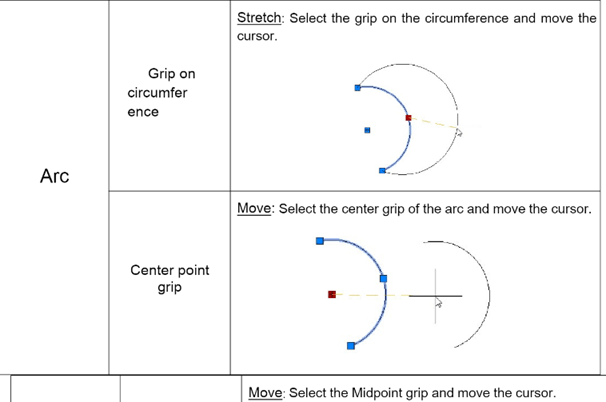
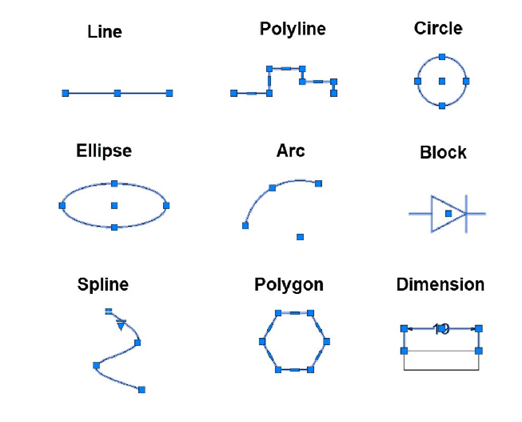
 Editing Using Grips
When you select objects from the drawing window, small squares are displayed on them. These
squares are called grips. You can use these grips to stretch, move, rotate, scale, and mirror objects,
change properties, and perform other editing operations. Grips displayed on selecting different
objects are shown below.
The following table gives you the details of the editing operations that can be performed when you select and drag grips.