The Trim tool
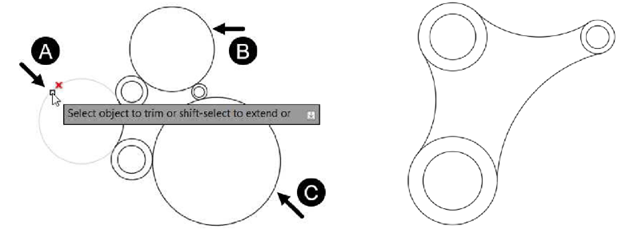
When an object intersects with another object, you can remove its unwanted portion by using the Trim tool. To trim an object, you need to first invoke the Trim tool, and then select the cutting edge (intersecting object) and the portion to be removed. If there are multiple intersection points in a drawing, you can simply select the select all option from the command line; all the objects in the drawing objects will act as ‘cutting edges’.
Click Home > Modify > Trim on the ribbon or enter TR in the command line. Now, you need to select the cutting edges.
Press ENTER to select all the objects as the cutting edges. Now, you need to select the objects to be trimmed.
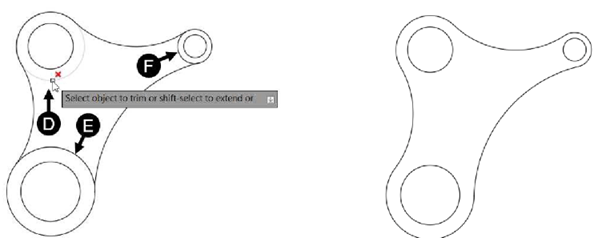
Click on the outer portion of the large circles one by one; the circles will be trimmed.
Similarly, trim the other circles as shown below.
Save and close the drawing.
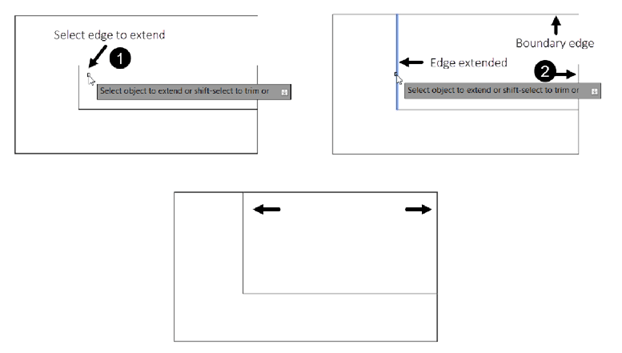
The Extend tool
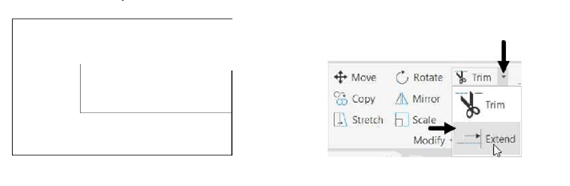
The Extend tool is similar to the Trim tool but its use is opposite of it. This tool is used to extend lines, arcs and other open entities to connect to other objects. To do so, you need to select the boundary up to which you want to extend the objects, and then select the objects to be extended.
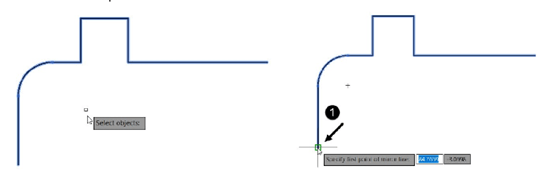
Start a new drawing.
Create a sketch as shown below using the Line tool.
Click Home > Modify > Trim > Extend on the ribbon or enter EX in the command line.
Editing Tools in AutoCAD 101
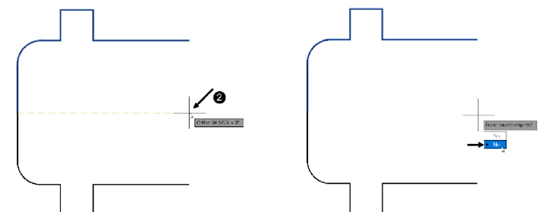
Select the left vertical line/edge to extend it and display the preview of its extension
upto the boundary edge, as shown.
Similarly, select and extend the right vertical line, as shown.
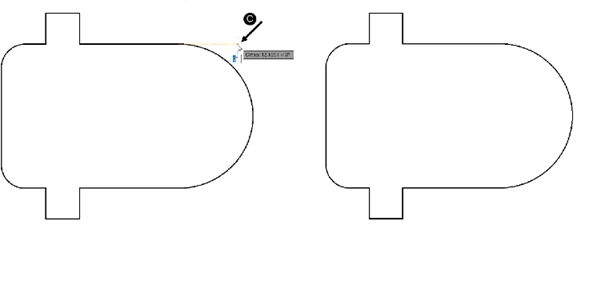
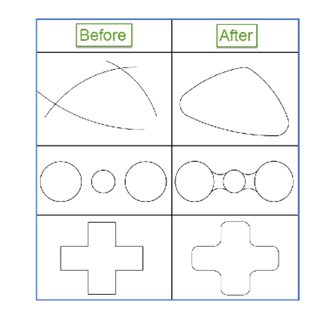
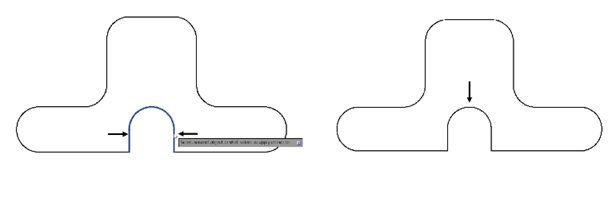
The Fillet tool
The Fillet tool is used to convert the sharp corners into round corners. To do so, you need to specify the radius and select the objects to be filleted. The following figure shows some examples of rounding the corners.
Start a new drawing.
Type Limmax in the command line and press ENTER.
Set the maximum limit to 100,100 and press ENTER.
Click Zoom All on the Navigation Bar.
Alternatively, you can press Z + ENTER and then A + ENTER.
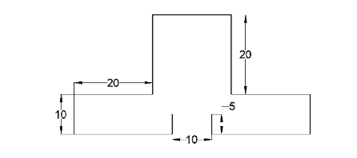
Click Home > Draw > Polyline on the ribbon.
Specify the start point as 50, 50.
Draw the lines as shown below.
Right-click and select Enter.
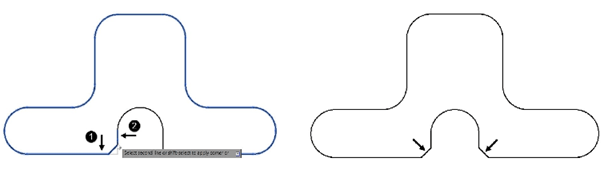
Click Home > Modify > Fillet on the ribbon or enter F in the command line.
Select the Radius option from the command line.
Type 5 and press ENTER.
Select all the close edges to create fillet, shown below.
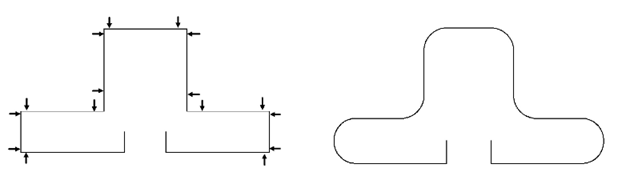
Now, select the open vertical line to create fillet between them, as shown.
The Chamfer tool
The Chamfer tool is used to replace the sharp corners with an angled line. This tool is similar to the Fillet tool, except that an angled line is placed at the corners instead of rounds.
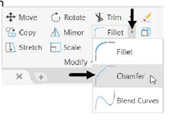
Click Home > Modify > Fillet > Chamfer on the ribbon or enter
CHA in the command line.
Follow the prompt sequence given next:
Select first line or [Undo Polyline Distance Angle Trim mEthod Multiple]: Select the
Distance option from the command line.
Specify first chamfer distance <0.0000>: Enter 3 as the first chamfer distance and press
ENTER. Specify second chamfer distance <3.0000>: Press ENTER to accept 3 as the
second chamfer distance
Select first line or [Undo Polyline Distance Angle Trim mEthod Multiple]: Select the bottom
left horizontal line, as shown.
Select second line or shift-select to apply corner or [Distance Angle Method]: Select the vertical
line connected to it.
Similarly, create chamfer to another corner on the right side, as shown.
The Mirror tool
The Mirror tool is used to create a mirror image of objects. You can create symmetrical
drawings using this tool. To mirror objects, you need to select the objects and
specify the ‘mirror line’ about which the objects will be mirrored. You can specify the mirror line either by creating a line or selecting an existing line.
Click Home > Modify > Mirror on the ribbon or enter MI in the command line.
Select the drawing by clicking on it. Next, right-click.
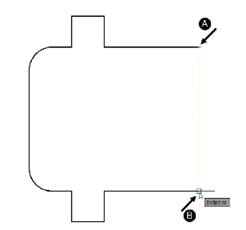
Select the first point of the mirror line as shown below.
Make sure that the Ortho Mode is active.
Move the cursor toward right and click, as shown.
Select the No option from the command line to retain the source objects.
Click Home > Draw > Arc > Start, End, Direction on the ribbon.
Select the end point of top horizontal line and bottom horizontal line to create fillet both
sides, as shown.
Select the end point of the arc as shown below.
Make sure that the Ortho Mode is active.
Move the cursor toward right and click.