
Refreshing Content
So far, we have spent quite a bit of time in the Power BI service working with reports, dashboards, apps, and security. Throughout this book, we have learned how to create data models and reports and then publish and share our work using the Power BI service.
However, it is the nature of data to change over time. New data gets added or existing rows are deleted or changed. Hence, once our work is in the Power BI service, how do we keep our work up to date with new data without having to manually refresh the data on the desktop and republish it? Luckily, the Power BI service contains even more functionality that allows us to keep our data refreshed.
In this chapter, we will cover how to install and confi e data gateways, which can keep our data up to date. Then, we will learn how to confi e our datasets to use these gateways.
The following topics will be covered in this chapter:
- Installing and using data gateways
- Refreshing datasets
Technical requirements
You will need the following to complete this chapter:
- An internet connection.
- An Office 365 account or Power BI trial.
- If you have skipped any of the previous chapters, you can download LearnPowerBI.pbix from GitHub at https://github.com/ PacktPublishing/Learn-Power-BI-second-edition.
- If you have skipped any of the previous chapters, you can download LearnPowerBI.pbix from GitHub at https://github.com/ PacktPublishing/Learn-Power-BI-second-edition.
- Check out the following video to see the Code in Action: https://bit. ly/3mXfB52
Installing and using data gateways
Th on-premises data gateway, or simply data gateway, is a piece of software that’s installed on an on-premises computer that provides a secure connection between local, on-premises data, and a variety of services that reside in Microsoft Azure cloud, including the Power
BI service. Once installed, the Power BI service can use this gateway to refresh datasets that have been published to the Power BI service, as shown in the following diagram:
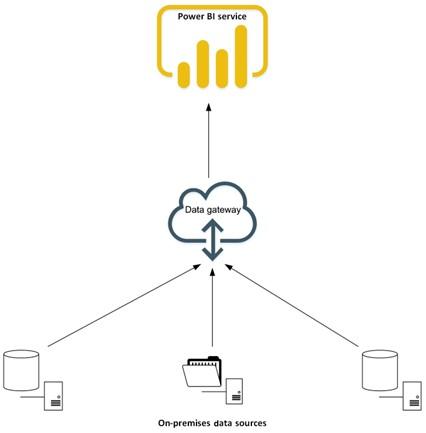
Figure 11.1 – Data gateway
There are two ways the gateway can operate, as follows:
- Standard
- Personal
The reason to install a gateway in one mode versus the other comes down to the scenario in which you plan to use the gateway. You will want to use the standard mode if the following applies:
- You want other users within the organization to use a single, centralized gateway.
- You need DirectQuery, as well as import mode datasets.
- You wish to use the gateway for Power Apps, Azure Logic Apps, Microsoft Flow, Azure Analysis Services, and dataflows, as well as for Power BI.
- You can run the installation as an administrator.
- The computer that you are installing the gateway on is not a domain controller.
Many end users often start by installing the gateway in personal mode because they are often not administrators of their local computer. In this scenario, they can only use import mode and only use the gateway with Power BI. For these users, it is advisable to get the Information Technology (IT) department involved to install the gateway in standard or enterprise mode if additional functionality is required.
Downloading and installing a data gateway
To install a data gateway in either mode, follow these steps:
- Log into the Power BI service.
- In the header area, click the down arrow icon or the ellipses. Choose Download and then Data Gateway. This is a link that takes you to Microsoft’s data gateway home page, https://powerbi.microsoft.com/gateway/, which should look similar to the following:

Figure 11.2 –Power BI gateway page
- Click either the Download standard mode or Download personal mode button. The file that’s downloaded is GatewayInstall.exe for standard mode and
On-premises data gateway (personal mode).exe for personal mode.
- Save the file to your Downloads directory or another location on your local computer. Once the file has finished downloading, open the folder on your computer where you downloaded the file.
Next, we will learn how to install the gateway in personal mode.
Personal mode installation
To install the gateway in personal mode, follow these steps:
-
Right-click the On-premises data gateway (personal mode).exe file and choose Open. The installation splash screen will be displayed, as shown in the following screenshot:
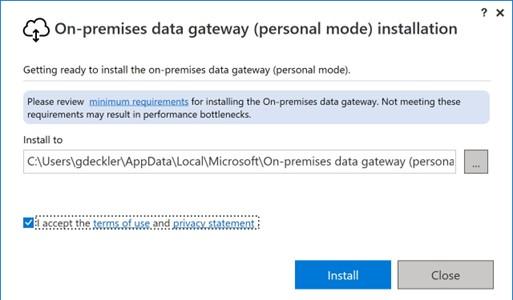
Figure 11.3 – Data gateway installer splash screen (personal mode)
- Accept the terms and conditions and click the Install button.
-
Enter the email address that you use to log into the Power BI service and click the
Sign in button:
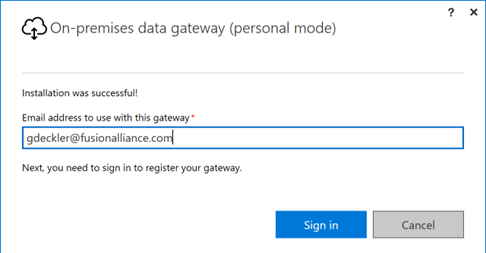
Figure 11.4 – Data gateway email address (personal mode)
- Sign into the Power BI service to register the gateway.
- Once you’ve successfully signed in, the gateway will be installed and ready to use:
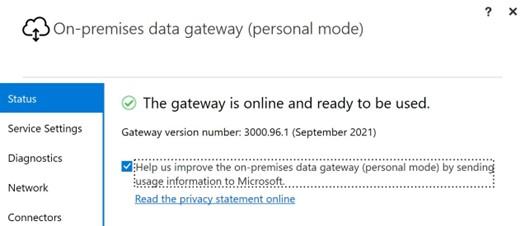
Figure 11.5 – Data gateway administration screen (personal mode)
Now, let’s look at how to install the gateway in standard mode.
Standard mode installation
To install the gateway in standard mode, follow these steps:
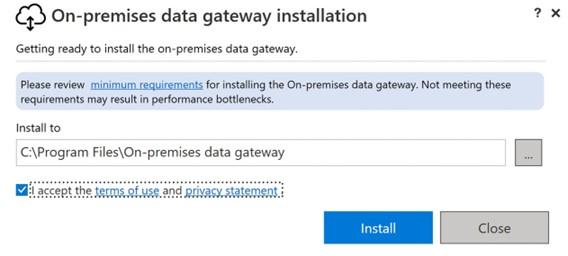
- Right-click the GatewayInstall.exe file and choose Run as administrator. Th installation splash screen will be displayed, as shown in the following screenshot:
Figure 11.6 – Data gateway installer splash screen (standard mode)
- Edit the Install to directory if desired, accept the terms and conditions, and click the Install button.
- Enter the email address that you use to log into the Power BI service and click the Sign in button. This screen is the same as the one you will see when installing personal mode; please refer to Figure 11.4.
- Sign into the Power BI service.
- Choose whether you wish to register a new gateway or migrate/restore/takeover an existing gateway. We will choose Register a new gateway on this computer and click the Next button, as shown in the following screenshot:
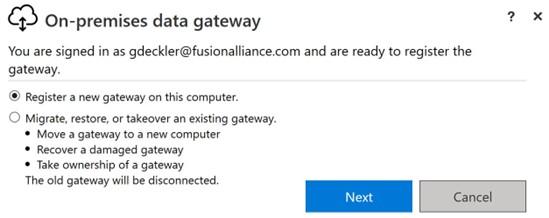
Figure 11.7 – Register gateway (standard mode)
-
Enter a name for the gateway, provide a recovery key, and click the Confi ure button.
This recovery key is needed if you need to restore the gateway or wish to add additional gateways to the gateway cluster, so make sure that you record this recovery key in a safe place. You have the option to add a gateway to an existing cluster. Only do this if you have already installed a gateway and wish to enable redundancy. In addition, at the bottom of the screen, you have the option to change the region that your gateway operates in. Only do this if you understand what you are doing. The gateway’s region is based on the Power BI tenant that’s tied to your login. If you install the gateway for another region, it will not operate correctly with that tenant’s region. This is shown in the following screenshot:

Figure 11.8 – Gateway name and recovery key (standard mode)
- The data gateway should now be installed and ready to use, as shown in the following screenshot:
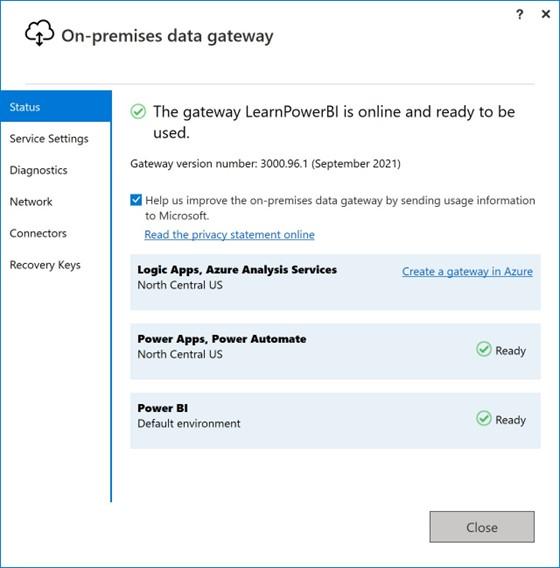
Figure 11.9 – Data gateway administration screen (standard mode)
Now that you have installed a gateway, we will learn how to operate and use it.
Running a data gateway
The data gateway runs as either an application or service on the computer that the installation was run on, depending on which mode – either personal or standard – was used for the installation.
Personal mode
When installed in personal mode, the gateway runs as a background process called Microsoft.PowerBI.DataMovement.PersonalGateway. This background process continues to run even if you close the gateway administration screen that appears at the end of the installation. This administration screen is the PersonalGatewayConfigurator application. The PersonalGatewayConfigurator application is enabled to start automatically by default. To get the gateway to not start automatically after rebooting, follow these steps:
- Use the Windows Start menu to launch Task Manager. The Power BI gateway background process can be found on the Processes tab, under Background processes, as shown here:
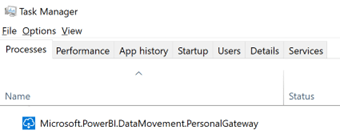
Figure 11.10 – Task Manager
-
If desired, you can select Microsoft.PowerBI.DataMovement.PersonalGateway
and click the End task button to stop the gateway.
- In the Task Manager window, switch to the Startup tab, as shown in the following screenshot, to view your startup tasks:
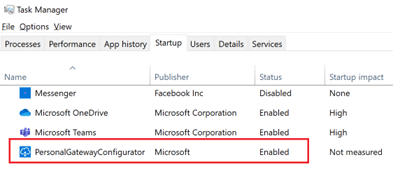
Figure 11.11 – Task Manager – the Startup tab
-
If you do not want the personal gateway to start automatically, right-click
PersonalGatewayConfigurator and choose Disable.
Now that we have explored running the data gateway in personal mode, let’s look at standard mode.
Standard mode
When installed in standard mode, the gateway runs as a Windows service, which is why you need to run the installation as an administrator. Th s service’s name is PBIEgwService with a Description of On-premises data gateway service and the background process is called Microsoft.PowerBI.EnterpriseGateway. Once installed, this service is set to automatically start when the computer is rebooted. Th s Windows service continues to run even if you close the gateway administration screen that appears at the end of the installation. Th s administration screen is the EnterpriseGatewayConfi urator application. If you close the administration application, you can bring the administration screen back up by fi ding and running On-premises data gateway in the Windows Start menu.
Configuring a data gateway
The data gateway has some additional configuration settings that are worth understanding. These configuration settings are available from the gateway administration application that appears at the end of the installation. We already saw the Status page of the application at the end of the Downloading and installing a data gateway section. The additional pages are as follows:
- Service Settings
- Diagnostics
- Network
- Connectors
Let’s look at these pages in detail.
Service Settings
The Power BI service Settings page is shown in the following screenshot:
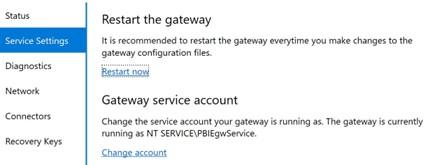
Figure 11.12 –Service Settings page
Both the personal mode and standard mode configurators allow you to restart the gateway by clicking the Restart now link. It is advisable to restart the gateway any time a configuration setting is changed. Standard mode also allows you to change the account that’s used to run the Windows service. You can do so by clicking the Change account link. By default, the Power BI service runs as the internal account known as
NT SERVICE\PBIEgwService. This can be changed if you wish to run the Power BI service as an Active Directory domain account.
Diagnostics
The Diagnostics page, as shown in the following screenshot, is the same for both modes of the gateway. If you are having an issue with your gateway, then this is a good place
to start troubleshooting. This page allows you to enable detailed logging by moving the Additional logging slider to the right. These logs can be used for troubleshooting
purposes but should not be enabled unless you are experiencing issues with the gateway. This is because enabling added logging can cause performance issues. These logs can be exported to a single .zip file by selecting the Export logs link under the Gateway logs heading. Finally, you can ensure that the communication pathways are open between the gateway and the Power BI service by selecting the Start new test link under the Network ports test heading. This is useful if you wish to see whether there might be something such as a firewall blocking communication:
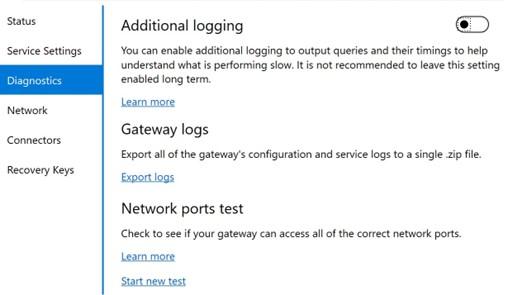
Figure 11.13 – Diagnostics page
Now, let’s look at the Network page.
Network
The Network page, as shown in the following screenshot, is the same for both modes of the gateway. Here, you can see the status of the network connectivity between the gateway and the Power BI service. In addition, you can turn HTTPS mode on or off to force the gateway to use either HyperText Transfer Protocol Secure (HTTPS) or Transmission Control Protocol (TCP) as the network communication protocol. In either mode, network traffic is encrypted. It is recommended that you leave HTTPS mode with its default settings. If HTTPS mode is off, the gateway will still automatically switch to using HTTPS mode if it is unable to communicate via direct TCP. This setting always reflects the current network communication protocol being used by the gateway:
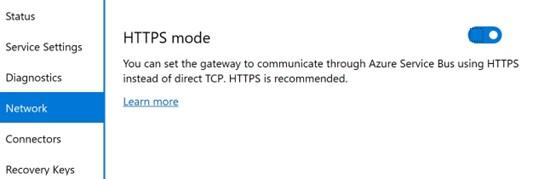
Figure 11.14 – Network page
Now, let’s look at the Connectors page.
Connectors
The Connectors page, as shown in the following screenshot, is nearly identical for both modes of the gateway. Power BI is an extremely extensible platform and this is also true of the data gateway. The Connectors page specifies the file location where custom data connectors can be installed. Custom data connectors allow developers to create data connectors to applications, services, and data sources that aren’t currently supported:
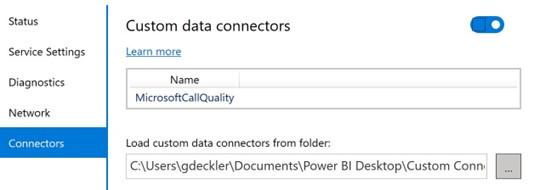
Figure 11.15 – Connectors page
Now that we have investigated the additional configuration settings for the data gateway, let’s look at managing gateways in the Power BI service.


