
Merging, copying, and appending queries
Now that we have cleaned up our data, we still require some additional data and transformations to occur to prepare our data for analysis. Specifically, we need to add our additional month data around hours billed to customers, as well as some additional transformations.
In the following sections, we will be performing more advanced transformations of our data, including merging queries, expanding tables, and appending queries.
Merging queries
Note that in the January query, there is a column called TaskID. The values in this column match the values in the TaskID column from our Tasks query. This Tasks query has additional information about each of these tasks regarding whether or not the task is Billable, or some other category, such as PTO, Int Admin, Sales Support, and Training. It would be good to have this information included in our January table. To accomplish this, we will merge the two queries by performing the following steps:
- In Power Query Editor, start by selecting the January query in the Queries pane.
- Select the Home tab from the ribbon and then, in the Combine section of the ribbon, choose Merge Queries.
- The Merge dialog will be displayed, as shown in the following screenshot:
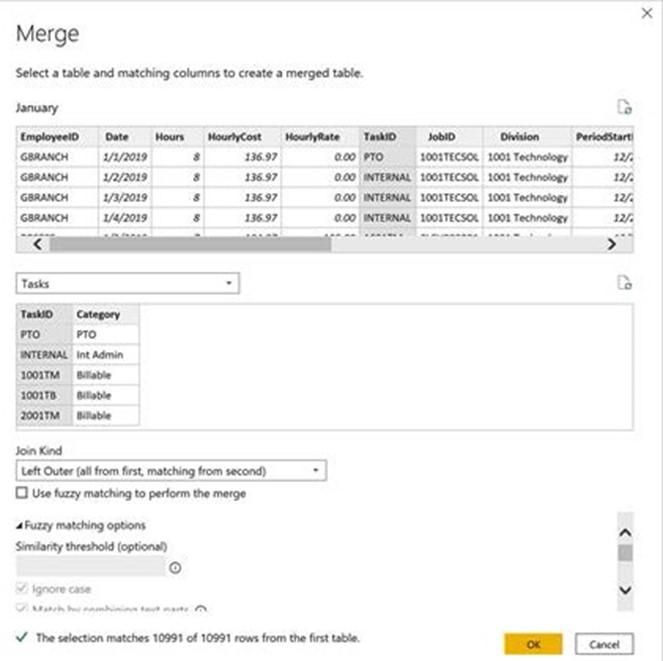
Figure 4.14 – Merge dialog
- The January query is listed at the top of the dialog, along with a preview of the columns and rows returned by that query. In the drop-down box just below this table, use the drop-down arrow and choose the Tasks query, as shown in the preceding screenshot. Again, a preview of the columns and rows returned by the Tasks query will be displayed. This is the query that we will be merging with our January query.
- As shown in the preceding screenshot, select the TaskID column of both tables and note that the OK button becomes active.
- Also, be aware that, at the bottom of the Merge dialog, information is displayed indicating The selection matches 10991 out of 10991 rows from the first table.
-
The Join Kind dialog displays Left Outer (all from first, matching from second). Other types of joins are listed in the dropdown, including the following:
- Left Outer (all from first table, matching from second)
- Right Outer (all from second table, matching from first)
- Full Outer (all rows from both)
- Inner (only matching rows)
- Left Anti (rows only in first)
- Right Anti (rows only in second)
Leave this as Left Outer (all from first, matching from second).
- Left Outer (all from first table, matching from second)
-
Below Join Kind, there is a checkbox for Use fuzzy matching to perform the merge and an area for Fuzzy matching options.
A fuzzy merge allows similar but not identical items to be matched during a merge. Options include a Similarity threshold, which is optional. The similarity threshold is a number between 0.00 and 1.00. A value of 0.00 causes all values to match, while a value of 1.00 causes only exact values to match. The default is a value of 0.80.
Additional options include the ability to Ignore case, as well as the ability to Match by combining text parts. For example, by ignoring case, mIcrOSoft could match Microsoft, and by combining text parts, Micro and soft could be combined to match Microsoft. When performing fuzzy merges, it is possible to have multiple values match. You can use the optional Maximum number of matches setting to control how many matching rows are returned for each input row. This is a number that can range from 1 to 2,147,483,647 (the default). Finally, there is an option to use a Transformation table. This allows you to specify a table of values with From and To columns that can be used during the merge process. For example, the merge table might contain a value in the From column for USA that maps to a To column of United States.
- Leave the Use fuzzy matching to perform the merge checkbox unchecked and press the OK button to exit the Merge dialog and perform the merge.
Now that you have learned how to merge queries, we will move on to expanding tables.
Expanding tables
Back in Power Query Editor, note that an additional step has been added to this query called Merged Queries, as shown in the following screenshot. In addition, an additional column has been added called Tasks. This column’s row values say Table in yellow text. We wish to expand this table. To do this, perform the following steps:
-
Click the diverging arrows icon to the far right of the column header for the Tasks
column. This icon can be used to expand the columns that contain table information.
- Uncheck the checkbox next to TaskID and uncheck the checkbox for Use original column name as prefix, as shown in the following screenshot:

- Click the OK button.
Figure 4.15 – Column expansion dialog
- Note that the Tasks column changes to Category and that our task category values are listed in each row. Also, a step has been added to our query: Expanded Tasks.
With that, we have expanded the tables. Next, we will explore disabling queries from being loaded.
Disabling queries from being loaded
Now that we have merged our Tasks query with our January query, we don’t need to load the Tasks query into a separate table in our data model. However, the Tasks query is still required to ingest the data. To disable loading the Tasks query, perform these steps:
- Select the Tasks query in the Queries pane.
- Right-click on the Tasks query and note that several options are presented.
- Uncheck Enable load.
-
A warning dialog will appear, informing us that this operation will not load data from this query into its own table and remove the table from our data model if it exists. This warning dialog is shown in the following screenshot:
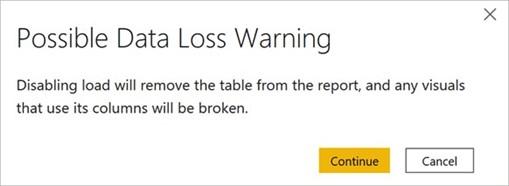
Figure 4.16 – Possible Data Loss Warning dialog
- Click the Continue button.
Back in Power Query Editor, note that the Tasks query name is now italicized. By disabling the loading of this query, our January query will still load the data using the Merge queries operation, but the Tasks query itself will not load into a separate table in our data model.
Copying queries
Now that we have modified our January query to merge in our Tasks information, we still need to bring in February and March data. We can do this easily by copying our January query and then changing the source. To copy the January query, do the following:
- In Power Query Editor, select the January query in the Queries pane.
- Right-click the January query and choose Copy.
- Right-click in a blank section of the Queries pane and choose Paste. Two new queries will be created called January (2) and Tasks (2).
- Right-click in a blank section of the Queries pane again and choose Paste. Two additional queries will be created called January (3) and Tasks (3).
-
Click on the January (2) query in the Queries pane. Note that the Applied Steps section is identical to our original January query, including the Merged Queries and Expanded Tasks steps.
- Click the gear icon next to the Merged Queries step.
- The Merge dialog will be displayed. Note that the two tables being merged are January (2) and Tasks (2). Change the Tasks (2) query to the Tasks query, reselect the TaskID column, and click the OK button.
- Repeat the same procedure that we followed in Step 7 for the January (3) query.
- Delete the Tasks (2) and Tasks (3) queries by right-clicking each query and choosing Delete.
- In the Delete Query dialog, choose the Delete button each time.
Now that we have copies of our January query, we want to change the data sources for our January (2) and January (3) queries to load data for February and March instead, respectively.
Changing sources
To change the sources for our queries, perform the following steps:
- Click on the January (2) query.
- In the APPLIED STEPS area of the Query Settings pane, click the gear icon next to the Navigation step.
- In the Navigation dialog, click February.
- Click the OK button.
Note that there is a yellow warning icon next to the January (2) query in the Queries pane. Also, note that two additional steps have been added to our query, just below the Navigation step: Promoted Headers1 and Changed Type1. If we click on the Expanded Tasks step in our query, we will see that an error message has been displayed. To fix this, perform the following steps:
- Use the X icon to delete the Promoted Headers1 and Changed Type1 steps of our query.
- In the Delete Step dialog that is displayed, choose the Delete button each time. After deleting these steps, all the warnings and errors will be removed.
-
Finally, under the PROPERTIES section of the Query Settings pane, change the
Name property of the query from January (2) to February.
The preceding method is one way of changing the source for a query. But there is another way to change the source: by editing the underlying M code. To use this method, perform the following steps:
- Click on the January (3) query in the Queries pane.
- Click the Navigation step.
-
This time, edit the formula bar and replace the word January with the word March
so that the formula for this step appears as follows:
= Source{[Item=”March”,Kind=”Sheet”]}[Data]
- Press the Enter key to complete the formula. This time, no additional steps were added to our query.
- Rename the query to March using the Name setting in the PROPERTIES area of the Query Settings pane.
With that, we have finished changing the sources for our copied queries. Next, we will append the three queries to a single data table.
Appending queries
We now have three separate tables for hours data reported by employees, one of each for January, February, and March. However, what we need is for all of this data to reside in a single table. We can accomplish this by using an Append Queries step, as follows:
- In Power Query Editor, start by clicking on the Home tab of the Ribbon.
-
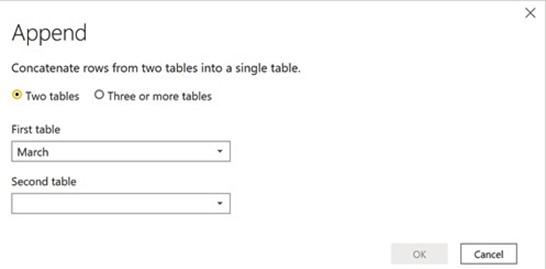
In the Combine section at the far right of the Ribbon, choose the Append Queries dropdown and choose Append Queries as New. This displays the Append dialog, as shown in the following screenshot:
Figure 4.17 – Append dialog
- In the Append dialog, select the radio button for Three or more tables.
-
Use the Add >> button to add the January, February, and March queries to Tables to append, as shown in the following screenshot. The order does not matter:
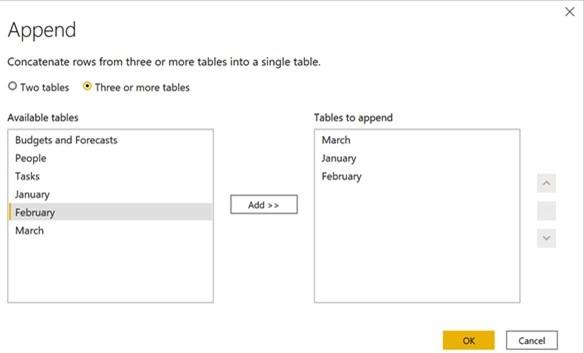
Figure 4.18 – Appending three or more tables
- When finished, click the OK button.
This procedure creates a query called Append1. Note that the Append1 query consists of a single step called Source. The formula that’s displayed in the Formula bar for this step is as follows:
= Table.Combine({January, February, March})
Again, the order of the queries does not matter. We will now put some finishing touches on this query by performing a few additional steps, as follows:
- Select the Append1 query in the Queries pane.
- Right-click the query and choose Rename. Rename this query Hours.
The Hours query now contains all of the information from the January, February, and March queries. This means that we can disable loads on each of these queries. To do this, perform the following steps:
-
In the Queries pane, right-click on each of the January, February, and March
queries and uncheck Enable load.
- A warning dialog will appear, informing us that this operation will not load data from this query into its own table and will remove the table from our data model if it exists. Click the Continue button.
We have used multiple pages in a single Excel workbook for the Hours query. In a production scenario, this would likely involve multiple Excel workbooks, one for each month. In this case, if you have many files in the same format, consider using a Combine Binaries (Folder) query: https://docs.microsoft.com/en-us/power-bi/ desktop-combine-binaries.
Now that we have transformed our data, in the next section, we will verify the data and then load it into Power BI Desktop.


