
Creating and manipulating notes and journal entries
In this section, you will learn how to create a note, change the current view, and categorize notes.
Creating a note
A note is a useful space in which to jot down thoughts and ideas within Outlook 2021. You can drag notes from Outlook 2021 to your Windows desktop so that they are always visible, even when you are not in the Outlook application. Notes can be categorized in the same way as any other item within Outlook. OneNote is the master application that we can use, as this integrates with all of the Microsoft applications—we will concentrate on the OneNote features in the following chapters of this book:
-
Click on the three dots at the bottom of the Navigation Pane to access the
Notes option:
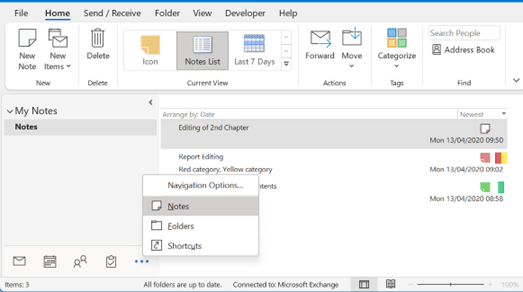
Figure 15.38 – The Notes window
- The Notes window will open. Click on the New Note icon to create a new note.
- The New Note icon opens at the top of the Outlook window in a separate window and can be moved to the desktop while Outlook is open:
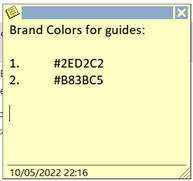
Figure 15.39 – Creating a new note
- Once you have typed some text into your new note, close the note using the X symbol in the upper-right corner of the screen. The note is added to the Notes pane. The first line of the note’s text becomes its title.
Changing the current view
Notes can be viewed in icons, lists, and the last 7 days’ view. Click on the Icon view to change the view in the Current View group.
Categorizing notes
Notes are categorized just like other items in Outlook. To do so, perform the following steps:
- Select the note you want to categorize.
- Click on the Categorize icon under the Home tab.
- Select an existing category or click on All Categories… to assign a different category to the new note.
Working with journal entries
In this section, we will look at how to manipulate journal entries by recording Outlook items and folders and how to edit a journal entry. A journal records actions you choose that relate to different contacts and enters the information into a timeline. The journal can track meetings and email messages, along with other Office program files. The timeline shows all the items that have been sent, received, created, saved, or opened, as well as items that you have made changes to.
Tracking Outlook items and files
- Click on the three dots in the lower-right corner of the Navigation Pane.
- Choose Folders and then locate Journal. In this view, you will see any previously tracked items, and you will be able to create new ones:
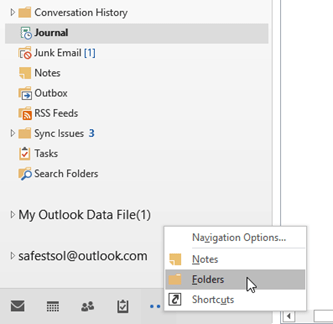
Figure 15.40 – Navigating to the journal using the Folders button
-
Click on the Home tab. Then, select Journal Entry from the New group to create a new entry. Enter a subject for the journal entry. Add details about the journal entry, such as Entry type and Start time.
- Start Timer is a very useful tool to track the amount of time a task takes—for example, you might track a client business call so that you can bill the client for your time:
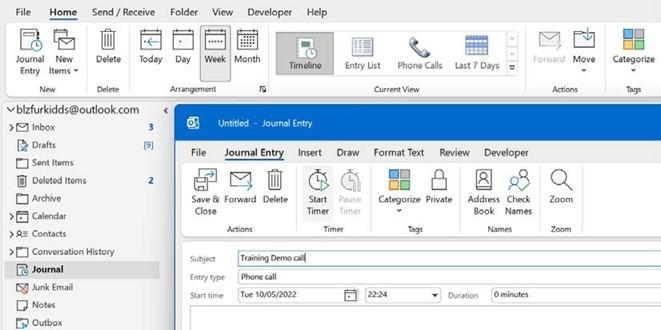
Figure 15.41 – Journal Entry
- Click on Save & Close to view the entry in the timeline. You can change the view to display the entries in a list by clicking on the Entry List icon under the Current View group:
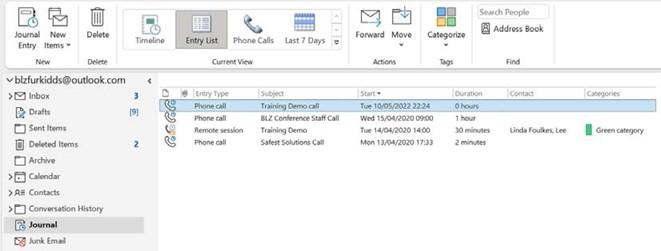
Figure 15.42 – The Journal Entry List view
-
To edit a journal entry, simply double-click on the entry in the Timeline view or the Entry List view. Make changes to the entry and then click on the Save & Close icon again to update it.
Setting out-of-office options
If you are going to be away from your desk or office for a long period of time (for example, if you are going on holiday or to a conference), you can set up an automatic reply that notifies others that you are unable to respond to incoming email messages. To do so, perform the following steps:
- Click on File. Then, choose Automatic Replies from the Backstage view.
- In the Automatic Replies dialog box, click on Send automatic replies. Make sure that Only send during this time range: is selected if you are only going to be out of the office for a set amount of time—for example, for annual leave or maternity leave.
- Enter the Start time and End time criteria. Then, add an explanatory note in the space provided under the Automatic replies section. Note that you can format your message using the formatting options located on the Automatic replies tab. Click on OK to set the automatic reply:
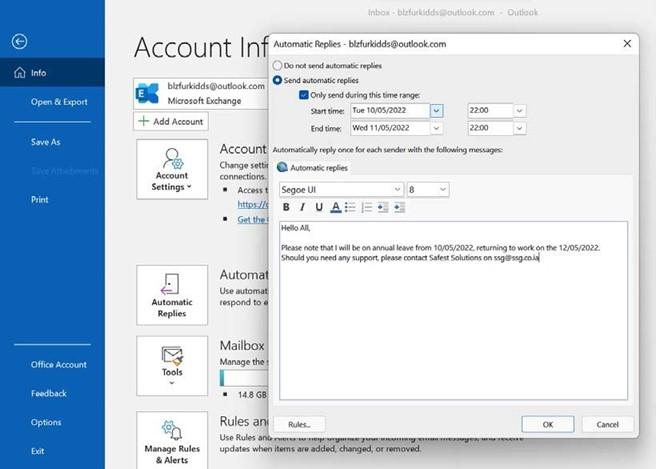
Figure 15.43 – Setting an out-of-office reply
The automatic reply is set and all messages that you receive are automatically responded to with this message, highlighting that you are away from the office and for how long.
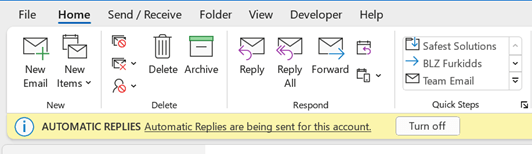
- When you visit your inbox, you will see a yellow notification, just under the ribbon, indicating that you have an automatic reply set on your mailbox:
Figure 15.44 – Automatic Replies set on the mailbox
- Click on Turn off to remove the setting from your mailbox so others no longer receive the out-of-office return email. The out-of-office message is stored in the Automatic Replies area if you wish to use the same message again in the future— just remember to change the dates, times, and message.
In a later chapter of this book, we will look at the same feature in the Teams app. This feature is actioned when an automatic reply is set in the Outlook application and will pull through to the Teams environment.
Summary
In this fi al chapter, you mastered working with notes, tasks, the calendar, and the journal in Outlook 2021. You should now feel confi t in creating and managing these items and working with the different views and options that are available. Now when you are out of the offi , you understand how to set up the option to send automatic replies to recipients and how to turn this setting off on your return. You have learned how to manipulate calendar views, change the calendar color, and set up a calendar group. Additionally, you should now be profi t with how to create and categorize notes and change the Notes view.
In the next chapter, we will concentrate on online meetings. We will learn all about the Teams application and discover top tips when working with Teams channels, learn how to collaborate with others, and learn how to work with files within the Teams environment. Additionally, we will concentrate on the remote meeting space and learn how to present with PowerPoint in a Teams meeting.


