

Setting up slides and working with files
In this section, you will master slide size and orientation options, use compatibility mode, add tags to a presentation, embed fonts so that you do not lose formats when presenting on different devices, and learn how to save a presentation in the required format.
Setting slide size
There are a number of different slide sizes available, depending on your design output. Widescreen (16:9) is commonly the default. To set the slide size, proceed as follows:
- Click on Design | Slide Size.
- You will be presented with two default slide sizes, Standard and Widescreen, as illustrated in the following screenshot
Figure 5.9 – Setting the slide size
- Click on Custom Slide Size…, and once the dialog box has opened, choose a slide size from the Slides sized for: drop-down list. Some options will present further options, where you can maximize the size of the content or fit the content.
- You can select Custom if you wish to enter your own measurements in terms of the width and height of the slides in the presentation, as illustrated in the following screenshot:
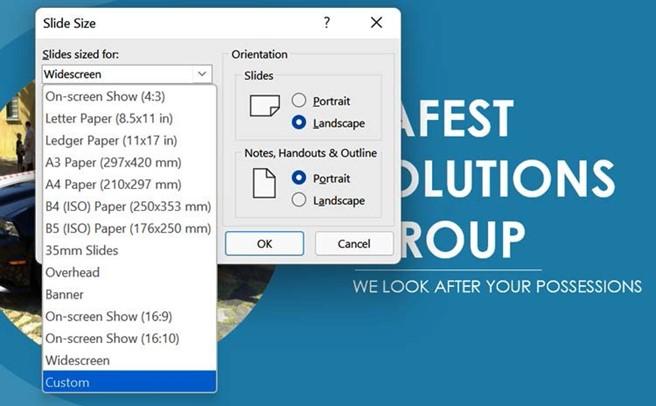
Figure 5.10 – The slide sizes available in PowerPoint 2021
We will now learn how to change the slide orientation in the next topic.
Changing the slide orientation
Slide layouts are landscape by default in PowerPoint and are always the same throughout the presentation. You cannot have some slides in portrait format and others in landscape format. When the orientation is changed, the entire presentation will update to the new orientation.
To change the slide orientation, click on Design | Slide Size | Custom Slide Size…, and then select either Portrait or Landscape from the right-hand side of the dialog box. You will be prompted to select a scaling option; either maximize the size of the content or scale down the content by selecting Ensure Fit. Sometimes, the content (especially objects) may shift around, so it may be necessary to reposition objects or try switching between the Maximize and Ensure Fit orientations.
Let’s learn how to embed fonts in a presentation to ensure that when others work on the presentation, it will preserve all fonts, even if the destination computer does not have the fonts available.
Embedding fonts
When customizing presentations, adding specific fonts to a presentation aids the look of the design and also enhances diagrams and custom drawings. The only problem is that when sharing the presentation with others or presenting it at a specific location, you might find that the fonts are converted automatically, which will drastically change
your presentation design. This is because fonts applied to the presentation before sharing are not the default application fonts and, therefore, not necessarily available at another location or computer.
Let’s fix this, as follows:
- Click on the File | Save As… option.
-
Navigate to the location where you wish to save the presentation. Click on Browse
to populate the Save As dialog box. Look for the Tools option at the bottom of the dialog box. Choose Save Options… from the Tools drop-down list. The
PowerPoint Options dialog box will populate. You will notice that the Save option is highlighted, and options related to Save are presented on the right-hand side of the dialog box
- Navigate to Preserve fidelity when sharing this presentation.
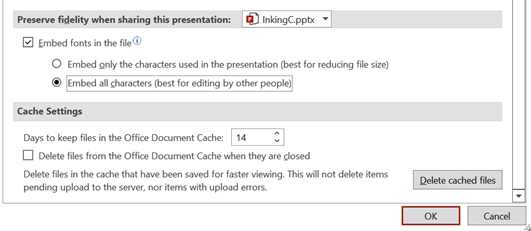
Figure 5.11 – Preserving fidelity when sharing presentations
- Click the checkbox to the left of Embed fonts in the file.
- Then, choose Embed only the characters used in the presentation or Embed all characters.
- Click OK to commit the change. Save the presentation, and then share it with others.
We have learned how to preserve fonts when sharing presentations with others; now, let’s learn how to collaborate in PowerPoint.


