
Managing Professional Documents
Word 2021 includes an array of features that aid in creating attractive and professional documents. In the previous edition of this book, we concentrated on creating professional documents and looked at ways to restrict and control access. In this new edition chapter, we will revisit some of these features with updates applicable to the Office 2021 interface and learn about some new features.
This chapter will teach you how to construct a form using the content controls and generate an online form within the Word desktop and online versions to collect information from others. We will also recap headers and footers in a document, revisit tracking and the compare/combine tools, and learn how to automate processes when using Word 2021.
We will cover the following topics in this chapter:
- Modifying page layouts
- Constructing online forms
- Recording document automation
- Tracking, comparing, and combining documents
Technical requirements
As this chapter focuses on managing professional documents and building on skills, you will have already mastered the basics, as well as having some intermediate knowledge.
The examples that will be used in this chapter can be accessed from the following GitHub URL: https://github.com/PacktPublishing/Learn-Microsoft-Office- 2021-Second-Edition.
Modifying page layouts
In this topic, we will look at how to work with different types of breaks in a document and construct headers and footers. This is an area where we quite often need to troubleshoot when working with different document sections.
Inserting and modifying section breaks
Breaks in a document are extremely useful if you would like to have a different layout or formatting changes for a certain section of the document, such as a page, or pages. By formatting or layout, we include the following:
- Margins
- Paper size or orientation
- Page borders
- Vertical alignments of text
- Headers and footers
- Columns
- Page numbering
- Line numbering
- Footnote/endnote numbering
The following is an explanation of these special break types:
-
Continuous: A continuous section break is inserted before and after a portion of text on the same page. Changing text into columns is an example of where a continuous break is used:
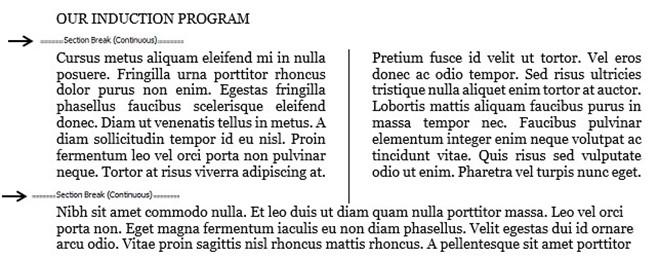
Figure 4.1 – Section breaks visible in Draft View
- Even Page or Odd Page: This prepares the document for formatting changes on all the odd pages or all the even pages only throughout the document. You might like to place a header or footer on only the odd pages in the document, and, therefore, would insert an Odd Page section break.
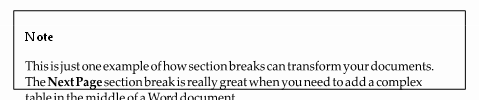
- Next Page: Inserting this section break instead of a normal page break (before and after the page) will control what happens on that page only. Th s type of section break is very useful when you want to create portrait pages followed by one landscape page, and thereafter, the document returns to portrait mode. Another use for this type of break is to sort out a problem table that is too big to fit on a portrait page!
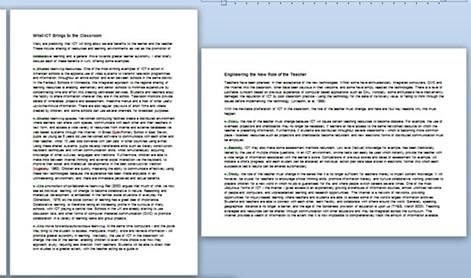
Figure 4.2 – Next Page section break in a document displaying both portrait and landscape pages
Now, we will learn how to locate and insert Next Page section breaks into a document to create different page orientation layouts in a single document.
Viewing section breaks
Follow these steps to learn how to view section breaks:
-
Let’s open a document to work on. In this example, we will work on
SectionBreaks.docx.
On page 2 of this document, you will notice that columns have been inserted in a particular paragraph. At the start and the end of the paragraph, there are section breaks. These breaks are not evident in the document, but because this section of the document contains columns, we know that they are there.
- If a document contains section breaks, they can be viewed in three ways:
-
By changing the document view from Print Layout to Outline
-
By changing the document view from Print Layout to Draft
-
By using the Show/Hide icon on the Home tab:
-
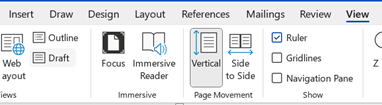
Figure 4.3 – Click on View | Draft to see breaks in the document
- Click on the Print Layout icon to return to the normal working view.
Adding section breaks
Follow these steps to learn how to add section breaks:
-
Click into the document where the section break is required. I have continued using the file from the previous section.
- Insert the type of section break required into the document.
-
Here, the second page will be changed to landscape orientation. We have inserted a Next Page section break at the end of the first page (to show where the change must start) and at the end of the second page (to show where the change must end):
Figure 4.4 – Next Page section break between landscape and portrait pages
- Let’s replicate these by inserting the Next Page section breaks into the document to create a landscape page in the middle of the document.
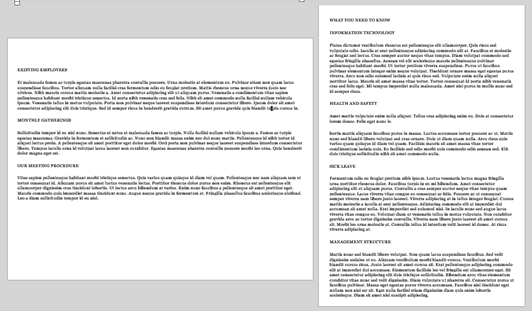
- Click before the text Existing Employees.
- Visit the Layout tab and select Breaks from the list.
-
Choose the Next Page section break to insert a break before the text
Existing Employees.
- Move to the end of the paragraph, before the text What You Need to Know.
- Insert another Next Page section break at the end of the paragraph.
-
Make sure your mouse pointer is clicked into the text of the page beginning with
Existing Employees.
- Click on the Layout tab and choose Orientation.
- Choose Landscape from the list provided.
- The page will turn into a landscape page with portrait pages on either side.
To delete the section breaks, click on the non-printing symbols (the Show/Hide icon) icon on the Paragraph group, which is located on the Home tab. Alternatively, change the document view to Draft and click to place the cursor on the section break line in the document. Then, press Delete on the keyboard.


