Multi View Drawings in AutoCAD
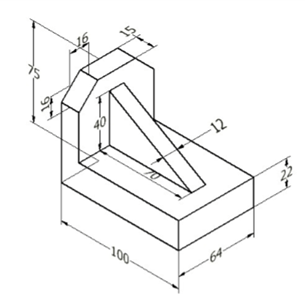
In this chapter, you will learn concept of drawing views. The drawing views are generated to show
accurate shape and size of the object that can be dimensioning properly.
In this chapter, you will learn about:
Orthographic Views
Auxiliary Views
Named Views
Multi View Drawings
To manufacture a component, you must create its engineering drawing. The engineering drawing
includes various views of the object, showing its accurate shape and size that can be clearly
dimensioned. This can be done by creating the orthographic views of the object.
In the first section of this chapter, you will learn how to create orthographic views of an object. The
second section introduces you to auxiliary views. The auxiliary views describe the features of a
component, which are located on an inclined plane or surface.


