
Comparing Absolute and Relative Macro Recording
Now that you’ve read about the basics of the Macro Recorder interface, it’s time to go deeper and
begin recording macros. The first thing you need to understand before you begin is that Excel has two
modes for recording — absolute reference and relative reference.
Recording macros with absolute references
Excel’s default recording mode is in absolute reference. As you may know, the term absolute reference
is often used in the context of cell references found in formulas. When a cell reference in a formula is
an absolute reference, it does not automatically adjust when the formula is pasted to a new location.
The best way to understand how this concept applies to macros is to try it out. Open the Chapter 1
Sample File.xlsx file and record a macro that counts the rows in the Branch list worksheet. (See
Figure 1-2.)

Figure 1-2: Your pre-totaled worksheet containing two tables.
Follow these steps to record the macro:
1. Before recording, make sure cell A1 is selected.
2. Select Record Macro from the Developer tab.
3. Name the macro AddTotal.
4. Choose This Workbook for the save location.
5. Click OK to start recording.
At this point, Excel is recording your actions. While Excel is recording, perform the following
steps:
6. Select cell A16 and type Total in the cell.
7. Select the first empty cell in Column D (D16) and type = COUNTA(D2:D15). This gives
a count of branch numbers at the bottom of column D. You need to use the COUNTA func-
tion because the branch numbers are stored as text.
8. Click Stop Recording on the Developer tab to stop recording the macro.
The formatted worksheet should look something like the one in Figure 1-3.

Figure 1-3: Your post-totaled worksheet.
To see your macro in action, delete the total row you just added and play back your macro by follow-
ing these steps:
1. Select Macros from the Developer tab.
2. Find and select the AddTotal macro you just recorded.
3. Click the Run button.
If all goes well, the macro plays back your actions to a T and gives your table a total. Now here’s the
thing. No matter how hard you try, you can’t make the AddTotal macro work on the second table.
Why? Because you recorded it as an absolute macro.
To understand what this means, examine the underlying code. To examine the code, select Macros from
the Developer tab to get the Macro dialog box you see in Figure 1-4.
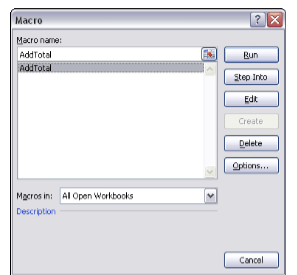
Figure 1-4: The Excel Macro dialog box.
Select the AddTotal macro and click the Edit button. This opens the Visual Basic Editor to show you
the code that was written when you recorded your macro:
Sub AddTotal()
Range(“A16”).Select
ActiveCell.FormulaR1C1 = “Total”
Range(“D16”).Select
ActiveCell.FormulaR1C1 = “=COUNTA(R[-14]C:R[-1]C)”
End Sub
Pay particular attention to lines two and four of the macro. When you asked Excel to select cell range
A16 and then D16, those cells are exactly what it selected. Because the macro was recorded in abso-
lute reference mode, Excel interpreted your range selection as absolute. In other words, if you select
cell A16, that cell is what Excel gives you. In the next section, you take a look at what the same macro
looks like when recorded in relative reference mode.
