
Presenting and Collaborating Online
In the previous chapter, we introduced all the significant features of communicating and collaborating using online tools such as Microsoft Teams and Zoom. We concentrated on joining and managing meetings using the Outlook 2021 Calendar and the methods to present content using the Share icon within Teams.
In this chapter, we will discover the Teams app while pointing out useful features and understand the different locations we can save to in the online space. In today’s climate, it is important to learn about features that are advantageous to hybrid working. In this chapter, we will explore the best ways to share and present PowerPoint slides using PowerPoint Live, as well as the new Presenter modes. We will look at important features to become familiar with such as Spotlight, attendance reports, raising a hand, recording videos, and meeting notes. Finally, we will address collaborating and file sharing using Teams and learn about versions and Sheet View.
The following topics will be covered in this chapter:
- Differences between OneDrive and SharePoint
- Overview of Teams apps
- Presenting during online meetings
- Collaborating and file sharing
Technical requirements
Prior knowledge of the Teams/Zoom meeting environment is advantageous. It is, however, imperative that you have the relevant software available to practice and work through this chapter. The examples for this chapter can be found on GitHub at https://github. com/PacktPublishing/Learn-Microsoft-Office-2021-Second-Edition.
Differences between OneDrive and SharePoint
Before we start collaborating in real-time and working with files in the online space, we need to understand a little more about the different locations to save data.
Let’s investigate the difference is between OneDrive and SharePoint:
- OneDrive is an online document/file storage platform. Typically, it is used by individuals and business teams who require a centralized location to store and access files.
- SharePoint is a collaboration tool for businesses, which allows multiple individuals and teams to work on documents and products at the same time. The following table shows the difference between OneDrive and SharePoint:

Table 17.1 – The difference between OneDrive and SharePoint
The next feature we will explore is quite vast, with many skills we can learn for each app we select within the Teams environment. We will cover only a few as an introduction.
Apps within Channels
There are several apps we can use within a Team or Channels within a Team. Teams is a one-stop location for all collaboration requirements.
The following table outlines some of the apps we can add to our Teams environment:
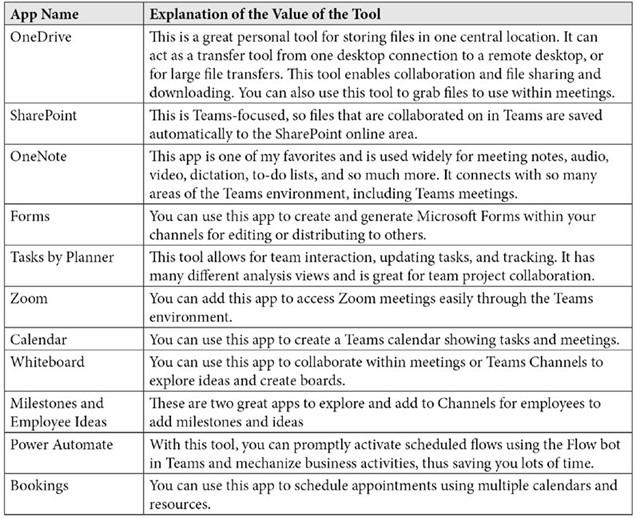
Table 17.2 – The apps that are available in Teams
We hope that this gave you a general overview of the apps that are available in the Teams environment. You can always delve into those you think would suit your requirements in the Teams app.
In the next section, we will concentrate on how to present PowerPoint slides within a meeting, as well as collaborating in real time.
Presenting during online meetings
In this section, we will concentrate on how to present PowerPoint slides within a meeting.
When it is time to present slides to an audience in a remote meeting, we can use several
Share options through Teams. Let’s investigate them.
Presenting PowerPoint options
The Screen option allows you to share content from multiple desktops or areas on your computer. Follow these steps:
- Join the meeting from your Teams calendar, or directly from within your Teams Channel.
- Click the Share button from within the Teams meeting to see the available options.
- Notice the Screen and Window options in the Share content side panel.
- Choose Screen if you would like to have control over whether you share a local desktop or remote desktop and would like to move from one area to another with ease (this is popular when moving from a local desktop to a remote desktop).
- Select Window if you would like to select a specific window to share only and have control over what you share with your audience. When in doubt, select Screen:
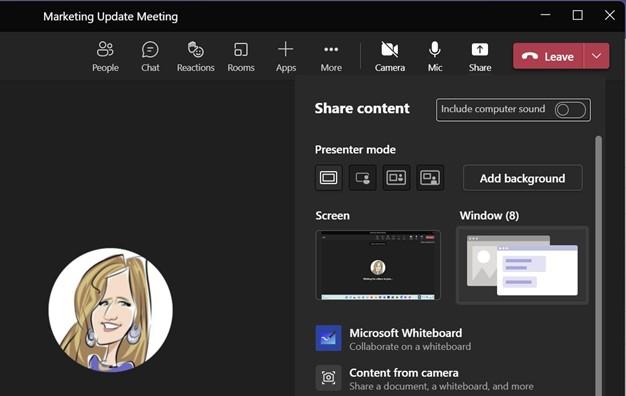
Figure 17.1 – Teams meeting Share options
-
For this example, we will select Window as we only want to share content from the desktop and be able to navigate to another area (the server) if we need to.
Everything you have open currently will be displayed in the Window area. Notice that the preceding screenshot shows that (8) windows are currently open. Select one of the windows to share with your audience.
- Once you are sharing your desktop, open the file you wish to share with your audience or navigate to the presentation if you already have it open.
- If you’re sharing PowerPoint, be sure to choose Slide Show | From Beginning so that your audience enjoys the presentation in Slide Show view and not Edit mode:

Figure 17.2 – PowerPoint 2021’s Slide Show | From Beginning option
- Once the presentation is open to your audience, you can change the host presentation view to show in Presenter View. This helps you take control of the presentation as a host and allows you to see the working view, including your speaker notes to aid your presentation. Right-click on the slide background, then select Show Presenter View. The view will load differently for the presenter:
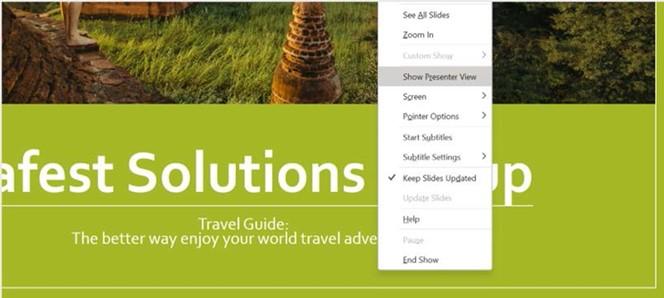
Figure 17.3 – Show Presenter View

- Once you have finished the presentation and are ready to return to the meeting, minimize any open remote desktop connections (normally, there will be a bar at the top of the screen you can click to minimize) and return to the meeting. Here, you can select the Stop presenting button at the top of the screen:

Figure 17.4 – The Stop presenting button in the Teams meeting
If you are presenting from your desktop, click on the Stop sharing button on the minimized meeting on the progress screen to end the screen share and return to the meeting:
Figure 17.5 – Meeting in progress screen
The next presenting option is the best by far as it allows you to see your slide notes, use the laser pointer, and view the audience. Let’s check this out!
Presenting using PowerPoint Live
This option allows you to access a presentation using either the Browse… option to collect files from your computer or your OneDrive online storage account. Follow these steps:
- Join the meeting from your Teams calendar, or directly from within your Teams Channel.
- Click the Share button from within the Teams meeting to see the available options.
-
Glance down to the bottom of the screen. You will notice the PowerPoint Live heading. Directly under the heading, you may see some PowerPoint files listed. Select one of the PowerPoint files, if applicable, or use the Browse OneDrive or Browse my computer option to locate the relevant file to present.
- If you are using the Browse my computer option, make sure that the PowerPoint presentation you want to show your audience is on your local desktop area if you are working on a remote session setup. You cannot navigate to a remote session using this option. Alternatively, Browse OneDrive and select the file you wish to present. For this example, we will choose the Safest Solutions Travel.pptx file:
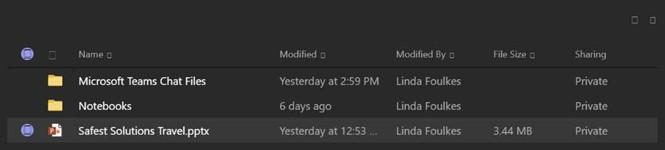
Figure 17.6 – Locating the presentation on OneDrive
- Click the Share button at the bottom of the window to share the presentation with your audience.
- The selected presentation will open in Presenter mode. The audience, however, will see only the slide preview. As a presenter, you can do the following:
- View your currently shared slide.
- See a thumbnail of the presentation along the bottom of the window.
- Refer to any slide notes you need to elaborate on during your presentation, or so that you don’t forget certain points. You can adjust the font size of the notes too.
- See the participants (People) to the right of the presentation.
- See any comments from the audience by being able to visit the Chat area during the session and respond to the audience.
- Adjust your video so that you are displaying content and hosting the video by selecting Standout mode so that you retain engagement with the audience:
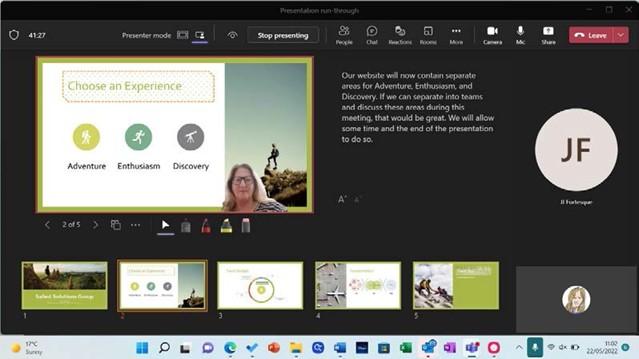
Figure 17.7 – PowerPoint Live
- Create Breakout Rooms using the Rooms button to break the participants up into groups so that they can discuss elements of the presentation and provide feedback. Another great reason to use Breakout Rooms is for trainers to assign tasks to their trainees and collaborate in group discussions and brainstorming sessions.
- Apply cursor, laser pointer, and highlight options.
- Use the eye icon at the top of the screen to prevent participants from moving through the presentation independently.
- The audience can Take control of the presentation, should they wish to demonstrate something to the audience or presenter, or it may be time for the next host to explain a section of the presentation. The following screenshot shows the Take control button on the slide view, which the audience can press to take control:
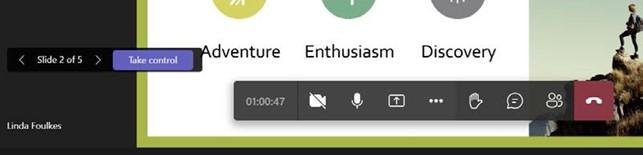
Figure 17.8 – The Take control feature
- The audience can take control of the presentation by pressing the Take control button. Once this is selected, the presenter will receive a notification at the top of the Teams meeting to indicate that a user has taken control and can Take back the control, if necessary:

Figure 17.9 – Take back
In this section, we looked at some of the options to explore within the meeting environment. In the next section, we will look at the different Presenter Modes that are available when using the Share feature in Teams.
