
Attaching item content
By the end of this topic, you will have learned how to attach an Outlook item and various external file types to an email.
Attaching an Outlook item
At times, it might be required of you to attach another email message, task, calendar item, or contact to a message you are sending. Here is the quickest way to attach multiple items of this nature:
- Open a New Mail message. From the Insert tab, locate the Include group, then click on Outlook Item.
- From the Insert Item dialog box, locate the folder to search (this could be an item from a Task, Contact, Calendar, or Email types), then the item you wish to attach to the existing email message. Alternatively, use the Business Card dropdown to insert a contact as an email attachment from the Include group on the Insert tab. The former option is highlighted in the following screenshot:
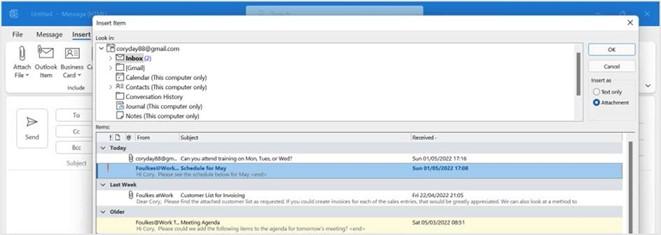
Figure 13.41 – Insert Item dialog box
- Click on the item, and then click on OK to insert the item into the mail message.
- In the email message, the inserted item will appear in the Attached area in the message header, as illustrated in the following screenshot:
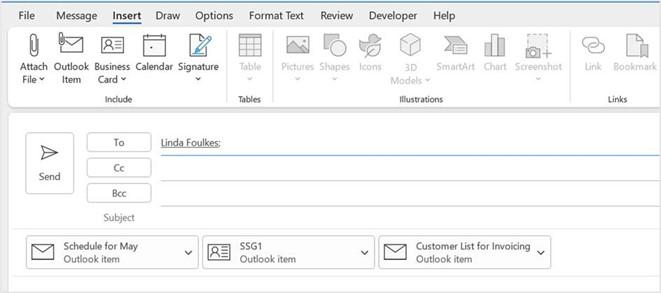
Figure 13.42 – Outlook items attached to an email
- Don’t forget to click on Send once you have added the recipients and attached the item content to the email.
Attaching external files
To attach an external file, proceed as follows:
-
Open an existing email or a New Mail message to add an attachment. From the
Message tab, locate the Include group.
- Click on the Attach File icon. You will see a drop-down list populate, containing most recently worked-on files, as well as a Browse this PC… option to locate the file you wish to add to the email.
- Once you have located the file attachment on the PC, click on Open to place the document into the email message. The file is inserted below the Subject line, into the Attached section. To remove an attachment, if you have inserted it in error, simply click on the drop-down arrow at the end of the inserted filename attached, then select Remove Attachment.
Summary
Throughout this chapter, you have collected skills to create and send email messages within the Outlook 2021 application. You are able to attach item content from different items in Outlook, and can confidently add and remove file attachments and content.
Quick methods to enhance productivity have also been learned, and you will now be able to apply Quick Steps and item tags and set a message as being of high importance. You will also be able to set a message so that the sender receives a notification that the message has been read by the recipient. We have also learned how to search, print, and filter mail messages in Inbox.
In the next chapter, we will cover best practices while working with message attachments and will learn about keeping your mailbox clean and streamlined. You will learn how
to set up rules and manage junk-mail options and create or modify signatures within the Outlook application. The next chapter will also teach you how to set up and manage contacts and contact groups.
