
Creating and Attaching Item Content
This chapter will take you through Outlook 2021 enhancements, where we will explore and configure objects such as mail, contacts, tasks, notes, and journals. You will set some advanced options and language options in the interface and learn how to manipulate item tags and arrange the content pane.
In addition, we will apply some search and filter tools and print Outlook items. You will learn best practices for sending email messages, as well as configure send and delivery options to improve productivity in the Outlook application. You will also learn to professionally format item content and attach content to an email.
The following topics are covered in this chapter:
- Investigating the Outlook environment
- Previewing Outlook items
- Manipulating Outlook program options
- Manipulating item tags
- Working with views, filtering, and printing
- Creating and sending email messages
- Creating and managing Quick Steps
- Attaching item content
Technical requirements
Although in our previous book, Learn Microsoft Office 2019, the basics of the email application were covered, we do not need any prior knowledge of this to learn how to use Outlook 2021 as a new user. Any examples used in this chapter are accessible from GitHub at https://github.com/PacktPublishing/Learn-Microsoft- Office-2021-Second-Edition.
Investigating the Outlook environment
You will take a tour around the Outlook 2021 interface and explore elements that are applicable to Outlook, such as the Focused inbox and the To-Do Bar, and learn how to view Outlook items. In the previous chapters of this book, we have already familiarized you with the generic interface options applicable to all of the Office 2021 applications.
Note that it depends on the subscription and platform of Outlook you are running on your system as to which features are visible or are deployed to the software. The interface icons and features depend greatly on whether you have Offi 2021 desktop, Offi 365, or Offi for the web installed. Although we are concentrating on the desktop version of Offi 2021 in these chapters, we will highlight important features from the other platforms.
In this chapter, you will also learn program options for all objects in the Outlook 2021 interface such as Mail, Calendar, Tasks, Notes, advanced options, and language options. We will cover the creating, formatting, and attaching of content to email messages, as well as how to set up Quick Steps to automate repetitive Outlook tasks. We will cover features such as Instant Search, Translator, and Ink functions, and touch on media features too.
Outlook is a better choice than web-based email for business- or work-related emails, tasks, calendars, and contacts, as you will have considerably more functionality and access to a productivity workflow. Multiple email accounts can be configured within Outlook, such as Gmail, Yahoo, and many more mail providers.
In addition, the ability to include Teams and Zoom meeting apps within the Outlook calendar offers a seamless approach to all your remote business needs. These features will be discussed in the Calendar chapters of this book.
The Outlook 2021 interface is upgraded with a slick design, and buttons are crisper and clearer than the Office 2019 interface.
Outlook 2021 has a choice between a Simplified Ribbon and a Classic Ribbon. The Simplified Ribbon is the default. To change the ribbon so that it displays more buttons and tabs, right-click over the existing ribbon area, then select the relevant option from the drop-down list, as illustrated in the following screenshot:

Figure 13.1 – Changing the ribbon from the Classic Ribbon to Simplified Ribbon
Accessing the Mini toolbar
The Mini toolbar is a formatting toolbar that pops up above selected text when editing an email message. It is automatically activated by double-clicking on a word, or after selecting a sentence or paragraph. If you move the mouse pointer away from a selected area of a message or click away from the selected text, the Mini toolbar will disappear. The Mini toolbar can be seen in the following screenshot, but is also evident in other Office applications:
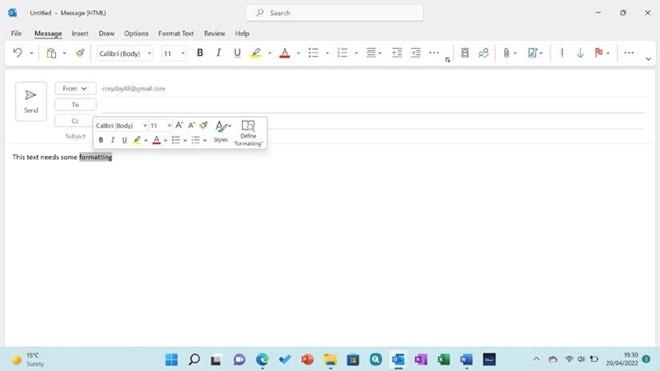
Figure 13.2 – Mini toolbar
This toolbar is an efficient way of changing text attributes, instead of moving the mouse pointer to the top of the Outlook screen to access the relevant format group. The toolbar also includes a Define button that, when clicked on, opens the Search pane to the right of the document window offering Web, Media, and Help features for the selected text.
Using the To-Do Bar
The To-Do Bar is formed of separate peek windows that can be populated to the right of the Outlook screen. The To-Do Bar can display the calendar, tasks, and people either all at the same time or separately. Note that when you add items from the To-Do Bar options, they will appear in order of selection to the right of the Outlook environment.
Only contacts you have marked as favorites will appear in the Favorites peek. Right-click on an existing email address to mark a contact as a favorite. The areas defi ed to the right of the Outlook screen are called peeks. To the right of each peek added to the Outlook
environment, you will see a Remove the peek icon, as illustrated in the following screenshot:
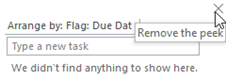
Figure 13.3 – Peeks appear to the right of the Outlook window
Change the To-Do Bar display properties by locating the Layout option on the View tab. Click the To-Do Bar icon to add or remove options. Use the To-Do Bar to create new tasks quickly by adding task details directly into the peek shown to the right of the Outlook environment, as illustrated in the following screenshot:
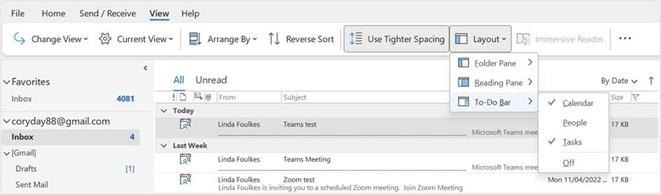
Figure 13.4 – To-Do Bar
You will also be able to view any emails that have been marked for action (flagged) in your mailbox on the To-Do Bar.
Outlook stores each type of information it manages in separate Outlook folders. A single piece of information is known as an item. An email message would be an item stored in the Inbox folder, and a single appointment would be an item stored in the calendar, and so on. It is also possible to create additional folders to store items.
Using the Message pane to display folder items
To view a folder, you need to click on the folder name to open it, after which Outlook displays the folder items in the Message pane of the Outlook window. Once the Message pane lists the contents of the current folder, the ribbon will change to reflect the options available to manage the information in the current folder. For instance, if I select the Calendar folder at the bottom left of the window, the Home tab will display calendar icons along with the ribbon, and so on.
The Navigation Pane
The Navigation Pane exists to the left of the Outlook screen. This allows you to select default folders in Outlook (Inbox, Sent Items, Drafts, and so forth). It is possible to drag an existing folder—for example, the Inbox—to the Favorites section of the Navigation Pane to enable quick access to the Inbox or other mail folders, as illustrated in the following screenshot:
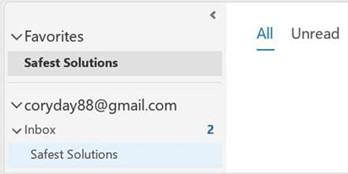
Figure 13.5 – Dragging a folder to Favorites
Let’s learn about the Peek feature in the next section.
The Peek bar
At the bottom of the Navigation Pane, you will find the Peek bar with default icons (Mail, Calendar, Contacts, Tasks, and an ellipsis). You are able to change the options on the Peek bar by visiting the ellipsis (three dots) to the right of it, after which a shortcut menu will open, allowing access to Notes, Folders, Shortcuts, and Navigation Options…, as illustrated in the following screenshot:
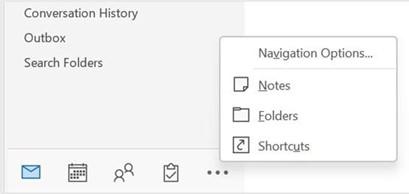
Figure 13.6 – Peek bar showing the ellipsis options
This bar is named Peek as it allows the user to hover over the icons on the bar to display a peek preview of an item. Users are able to create shortcuts to open favorite and most frequently used folders quickly.
