Generating maps
In the previous edition of this book, we explored the ins and outs of chart creation and formatting. Let’s add to this by learning about the new 3D geography Maps feature:
- Open Population.xlsx to follow this example. In this workbook, you will see a list of populations ranked by county for the UK.
- Select the second sheet, named Country.
- Click inside the sheet, then use the Ctrl + Shift + * key combination to select the entire list.
- Navigate to Insert | Maps | Filled Map. Click the map image to insert the geographic map into the worksheet:
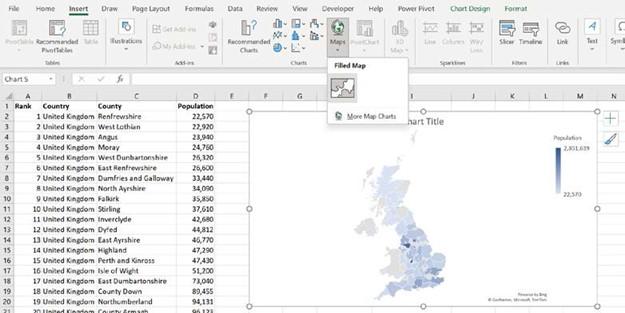
Figure 9.13 – The new Maps feature
- If you update the worksheet data, the map will update accordingly. You can insert and delete data columns too. This feature can be used for sales data or any other type of data representation you require.
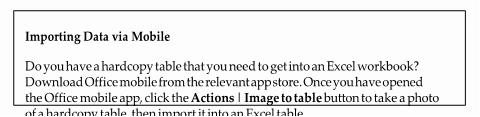
Importing data from a PDF
At times, we may need to copy data that has been saved in PDF format into an Excel workbook. Using the normal copy/paste method is cumbersome, and normally, data would need to go through a bit of editing before you can work on the workbook (see the following screenshot for an example).
There is a much easier method to get this done without you having to make any further amends to the data, as well as viewing and importing from a list of tables located within a PDF:
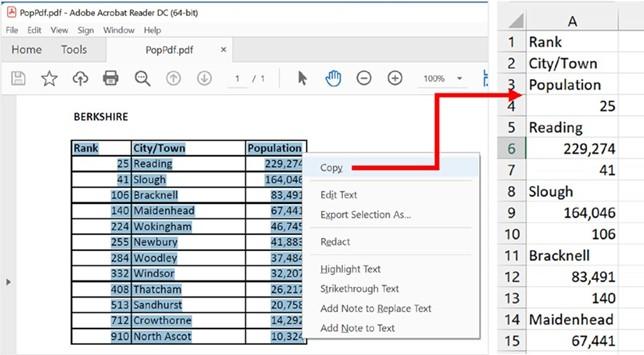
Figure 9.14 – Copying from a PDF to a workbook
- Instead of copying from a PDF, open the workbook where you would like to insert the data.
- Click Data | Get Data | From File | From PDF:
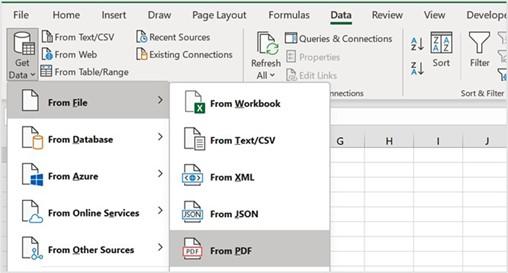
Figure 9.15 – Adding data from a PDF to Excel using the Get Data option
- Navigate to and select the PDF to import into the worksheet. To follow along, select the file named PopPDF.pdf.
- If there is more than one table of data in the PDF, you have the opportunity to select each dataset from the left-hand side of the Navigator window. Select the table, then decide whether you would need to modify the dataset before importing it. If so, select the Transform button at the bottom of the Navigator window. Alternatively, click the Load button to import the data into the workbook:
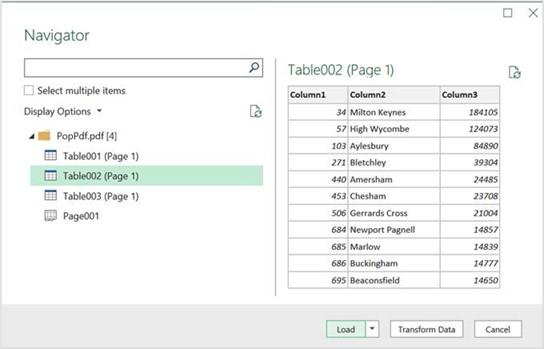
Figure 9.16 – Using the Navigator window to select the relevant data table to import from a PDF into Excel
- The data will be added to the workbook and formatted as a table:
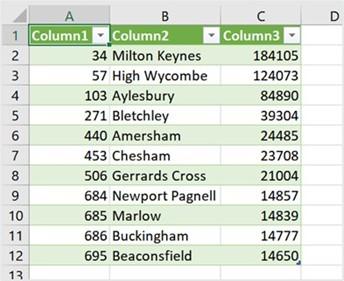
Figure 9.17 – Data table inserted into the workbook
- Don’t forget to save the workbook.
The Get Data feature within Excel is a powerful tool that can be used to analyze and transform data. There are many features you can explore using the Data, Power Pivot, and Query tabs of the ribbon.