
Using the Selection pane
This feature is absolutely brilliant when working with numerous objects that overlap. Sometimes, you won’t be able to see all the elements on a slide, and often, elements are hidden from view. I use this extensively when working with Microsoft PowerPoint animations, as it allows me to move elements up and down and rename the elements so that the order of the elements makes more sense when working with the diagram. Additionally, you can hide or unhide elements from view. Follow these steps:
- We will use the presentation named Safest Solution-Selection.pptx.
-
Select an object and click on the Graphics Format tab to access the Selection Pane
option.
- Note that the Selection pane is now visible on the right-hand side of the PowerPoint environment:
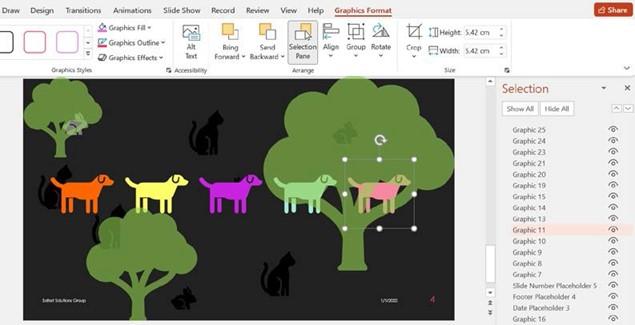
Figure 6.25 – The Selection pane on the right-hand side of the window
- Each object is an item in the pane. To use the pane, click on an object listed in the pane – the object will be selected on the slide.

- Click again to make the object visible. This feature is great for objects that overlap so that you don’t have to move your whole document around to access the shape and make a change!
- The Selection pane can also be used to select objects.
- Use the Selection pane to rename the dogs, in order, from DOG1 to DOG5.
- Hold down the Ctrl key on the keyboard while selecting DOG1 through DOG5:
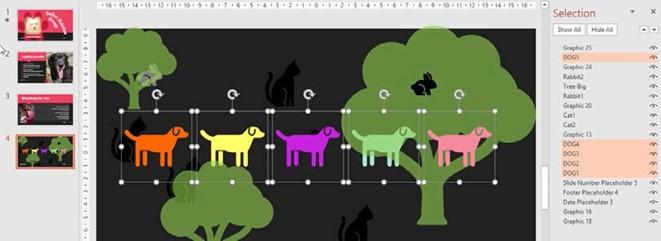
Figure 6.26 – The Selection pane showing the renamed dog shapes

So, we have learned how to work with the Selection pane. In the next section, we will concentrate on grouping elements on a slide.
Grouping objects
Grouping objects together creates one object. This might be the way to go if you are moving objects or working with multiple objects on one slide. Instead of formatting each object separately, you can group them and then apply formatting. When objects relevant to each other are grouped together, they can be moved together from one position in the document to another without repeating the step for each part of the drawing. For example, you would be able to group labels on a picture so that they stay intact when moving to another location in the presentation. Perform the following steps:
- Use the Selection pane, as per the previous example, to select the objects on a slide. Alternatively, select the objects that you wish to combine into one object. To do this, click on the first object and hold down the Shift or Ctrl key on the keyboard. Move your mouse pointer to the second object, making sure that the Shift key (or the Ctrl key) is still depressed. Then, click on each object to add it to the group.
- To form a group, click on the Graphic Format tab and select the Group icon drop- down list. The object will become one movable object.
- To ungroup objects, select the grouped object, then simply navigate back to the
Group option and select Ungroup.
I am sure you learned how to resize objects prior to this new edition book, but we will recap this topic here as the tab names have changed slightly.
Resizing objects
To learn how to resize objects, follow these steps:
- Select the object to resize by clicking on it. Place your left mouse pointer on the sizing handle. Hold down the left mouse button and drag toward the center of the image to make it smaller and to keep the proportion of the image intact. Alternatively, drag outward to make the object bigger.
- The ribbon is another method that can be used if you wish to enter specific widths and heights for objects. Select the object by clicking on it. Notice that the Graphic Format tab or the Picture Format tab is now visible, depending on the object type (for example, picture, shape, or chart) that you are resizing. Locate the Size group and enter the width and height measurements as desired. The object will adjust on the slide as you enter the new measurements.

Resetting objects
The reset option removes all changes in terms of size, effects, rotation, and scaling and brings the object back to its original size. Follow these steps:
- Select the object to reset.
- In the Picture Format tab, select the Reset Picture option (when dealing with pictures).
-
Click on Reset Picture to remove all formatting changes and select Reset Picture
& Size to remove any formatting and size changes.
In the next section, you will learn how to create tables using a range of methods, and you will discover how to apply table styles. Additionally, you will be able to master chart modifications by learning how to switch elements; edit elements such as data labels, data tables, legends, and chart titles; and add objects
