
Adjusting the playback options
The video playback options are located on the Video Format tab, and the audio options are available on the Audio Format tab. Make sure you have clicked on the video or audio first before you complete any of the following tasks:
- To start the video (or audio) with a mouse click when clicking on the video icon, select When Clicked On from the Start: option.
- To start the video automatically when the slide is displayed on the screen, click on Automatically.
- In Click Sequence means that the video will play in the order it appears among all the other animated elements on the slide. Normally, this is the default option.
-
To hide the video icon so that it does not show on the slide show while presenting, click on Hide During Show. Be careful of this option if you have the Start: option set to On Click. This is because you won’t see the icon and be able to click on it to play the video. Only use this option for automatic playback:
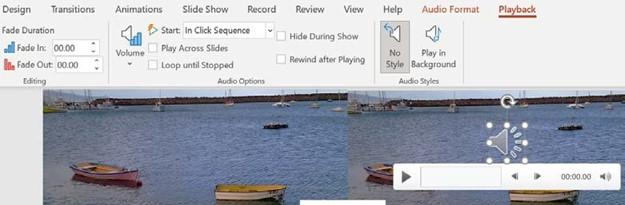
Figure 6.42 – The audio options are set via the Playback tab
- To play a video continuously in a presentation, click on the Loop until Stopped checkbox. This is great to use if, for instance, you’re presenting at a show and the presentation must keep on playing for many visitors walking by a marketing stand.
- The Rewind after Playing options will set the video to the start position once it’s finished playing.
- The Play Across Slides checkbox or Play in Background option will play the video over the entire slide presentation.
- The Volume setting allows you to adjust the sound level, as well as mute the video.
-
The Trim feature is a valuable tool when you need to remove content from a video or audio clip. Simply drag the green and/or red markers to edit the Start Time and End Time settings:
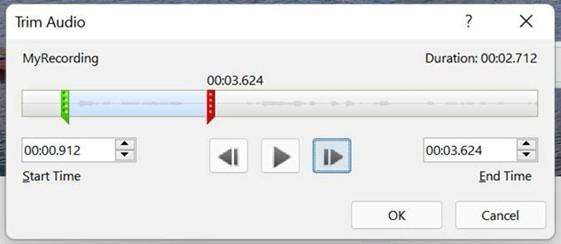
Figure 6.43 – Trimming audio and video content with PowerPoint 2021
-
Bookmarks are another feature that can aid you when needing to jump to a certain spot along the timeline when presenting. Often, the entire video or audio content is not relevant; this way, you can control which content is shown at the time of presenting. To add a bookmark, simply click on the video (or audio) timeline to
select the time you need to insert the mark. Then, select Playback | Add Bookmark. A yellow dot is inserted at the marked position on the timeline. Repeat the process to add further bookmarks. Click on Slide Show | From Current Slide to see the bookmarks while presenting. Click to navigate directly to the desired bookmark along the timeline.
Another useful feature within the Playback tab is the ability to add captions to your video file. Let’s investigate this next.
