
Creating macros
As mentioned in a previous topic, we can automate document processes using macros. Macros are normally created to automate Microsoft Excel but can be just as effective in other applications. It is always important to note that macros can contain viruses if
sourcing them online. Macros that you create are not harmful, as you will understand the purpose and nature of the macro you generate.
Before a macro is created by a user, a decision is made as to the purpose and actions the macro will perform. Remember, macros are the recording of actions we perform by
clicking, typing, and formatting. We will create a macro in later chapters of this book, as macros are used more frequently when working with Excel workbooks. For now, let’s run through the steps to create a simple macro:
- To begin recording, click on the Macro button on the Word status bar:
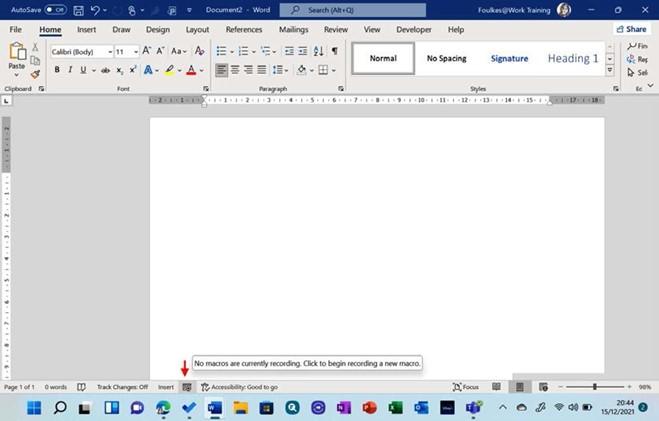
Figure 4.39 – Macro recording button on the status bar
- Macros can also be recorded and edited by clicking on Developer | Record Macro:

Figure 4.40 – Developer tab showing the Record Macro option
-
The Record Macro dialog box will populate. Enter the name of the macro you wish to create into the Macro name: area provided. We will use SSMac as the name in this case.
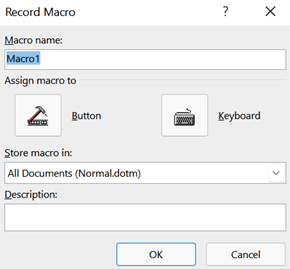
Figure 4.41 – The Record Macro dialog box
-
Under the Store macro in: drop-down list, select whether to store the macro in the current document only or make it available to all documents. For this example, we will leave the default selected.
- Use the Description: area to provide any details to others having access to the macro. This will help them understand what the purpose of the macro is.
- Click on the Button option under the Assign macro to heading. This will populate the Options dialog box so that we can assign the macro to a button. We can also assign the macro to a keyboard shortcut if required.
- Click on the Customize Ribbon category to the left.
-
Locate the Choose commands from: heading, then select Macros from the drop- down list. Click to select Normal.NewMacros.SSMac. Make sure that you click on the Help tab (the last tab on the right-hand side of the dialog box).
- Select the New Tab button. Click Rename… to rename the tab. For this example, we will use Automation as the tab name.
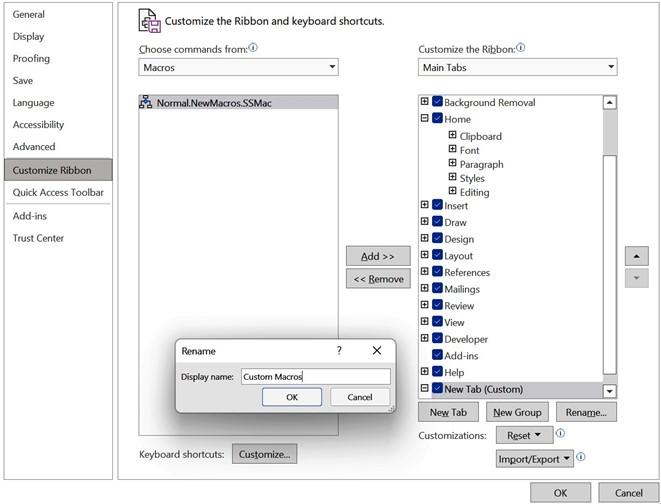
Figure 4.42 – Word Options dialog box
- Make sure that you have clicked on the Automation tab, then choose the New Group button to add a new group.
- Select the New Group (Custom) button to add a group named Branding so that we can assign the macro to this group.
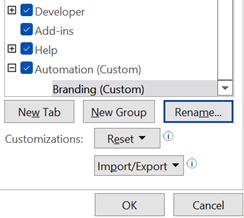
Figure 4.43 – Options dialog box showing the Automation and Branding (custom) group
- Select the Normal.NewMacros.SSMac macro, then click on the Add >> button to assign the button to the Branding group.
- Click on the Rename… button, then select a symbol as the macro button, and then type the text Format Doc into the Display name: field.
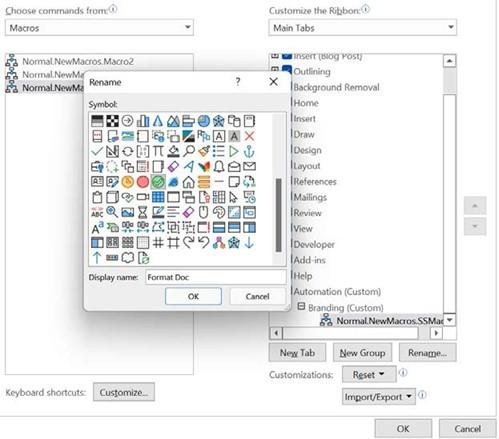
Figure 4.44 – Screenshot detailing the renaming of the macro
-
Click on the OK button to start recording. There will now be a tape recorder icon on your mouse pointer – this indicates that you are in the record mode. Note that every keystroke you perform will be recorded as part of the macro sequence.
- We will now format the document as usual. The actions we need to perform for the macro are as follows:
-
Insert a Facet (Even) page header, then change Design | Colors to
Blue Green.
- Insert a Filigree footer.
- Change the page layout vertical alignment to Center.
-
Insert the Intense Quote style and change the font size to 20. Type the text
Safest Sol Report.
- Add any other formatting as desired.
-
- Once the recording process is complete, double-click on the macro button on the status bar to stop the macro recording.
It is possible to rename and assign macros to the Quick Access Toolbar (QAT) in addition to tabs along the ribbon. We can record the macro first, then assign the macro for quick access, or follow the steps in the previous example to assign the macro to a group prior to creating the recording. In the next topic, we will learn how to run and edit macros.
