Dimensioning the First and Second Floor Plans
You should have most of the dimensioning for the first and second floors completed. You will now add in any missing dimensions and set the distances for the first and second rows of dimensions to the correct distances.
- Open the RL1-5 file. Save the file as RL1-6.
- Switch to the First Floor view.
- Scan the drawing for missing dimensions.
If you find any, click on the dimension line and select the Edit Witness Lines tool to add the dimensions.
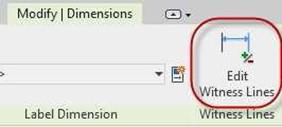
Edit Witness Lines Tool
- After picking the tool, select the feature that you wish to dimension. This will add the dimension to the chain. When you are finished, click in an open area of the drawing to end the command. You should try to have single chains of dimensions where possible rather than individual dimensions.
 To set the distances for the dimension lines you will use the Detail Lines tool.
Go to the Detail Line tool in
the Annotate tab, Detail panel.
Detail Line Tool
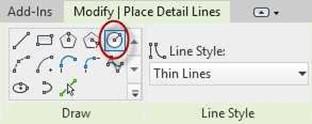 Select the Circle Tool in the Draw panel.
Circle Tool
- Draw the circle at the corner of the wall where the extensions lines meet. Set the radius to 3′-0″.
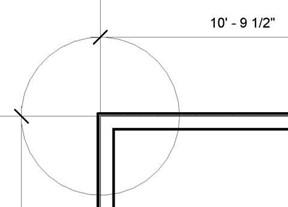
Detail Line Circle
- Drag first dimension line so that the line lines up with the edge of the circle.
- Add another circle at a 5′-0″ radius for the second dimension line. Use a 7′-0″ radius for the third dimension line if needed. Delete/Hide the circles when finished.
- Your First Floor Plan should look like this…
The scale in this example has been changed to 3/16″ = 1′-0″ for clarity. The scale of your view will remain at 1/4″ = 1′-0″
Note: Some dimensions may have changed from earlier in the tutorial. Do not be concerned if your dimensions are slightly different (within 6″). The dimensions should be to the nearest 1/4″.
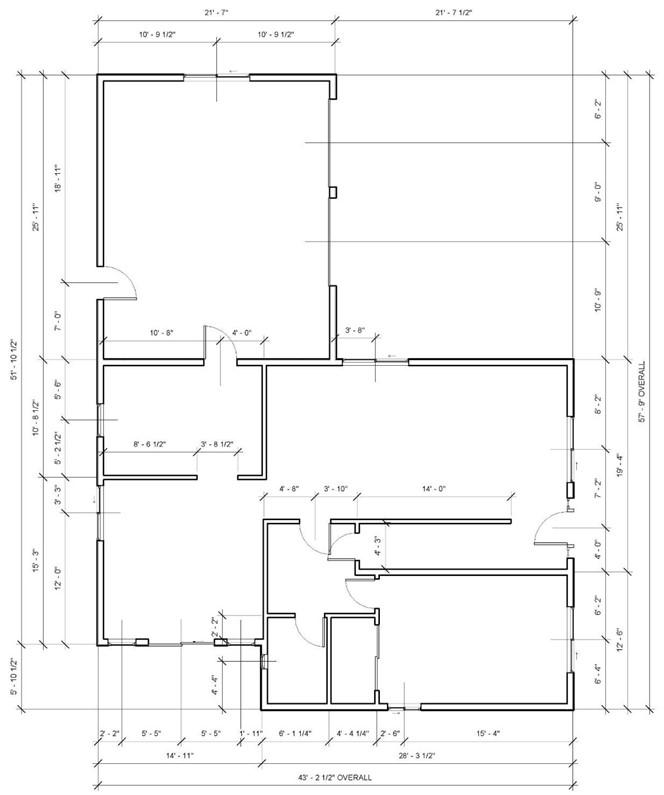
First Floor Final Dimensions
- To add the “Overall” text to the south and east dimensions, double-click on the text and type the word OVERALL text in the suffix box.
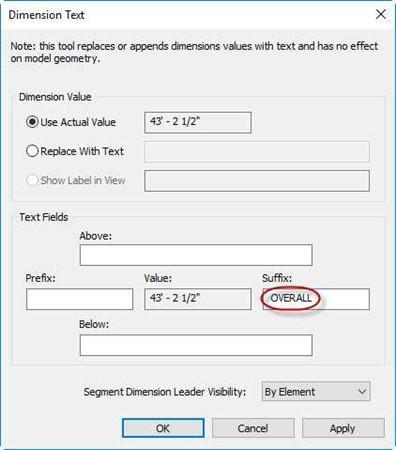
Add a space in front of the text.
Dimension Text Dialog Box
- Add the second floor dimensions.
Locate the features to the nearest 1/2″. You may line up the walls to the first floor walls where possible. The final dimensions may be different than in
RL1-4.
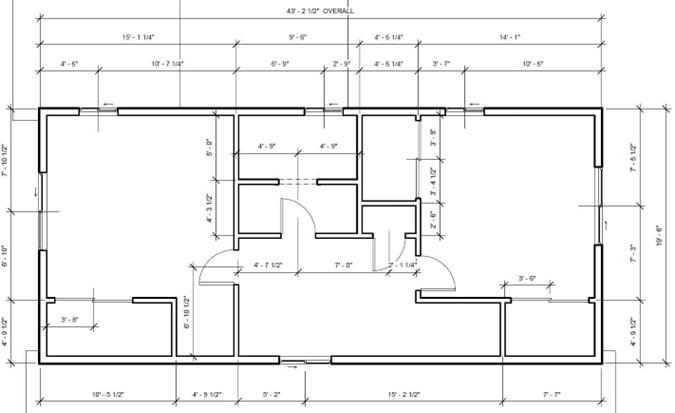
Second Floor Final Dimensions
- You may notice that the ridge of the garage roof is showing as a double line.
To open the View Range dialog box, click the Edit… button next to View Range in the Extents area.
- Set the View Range of the second floor view to 5′-6″.
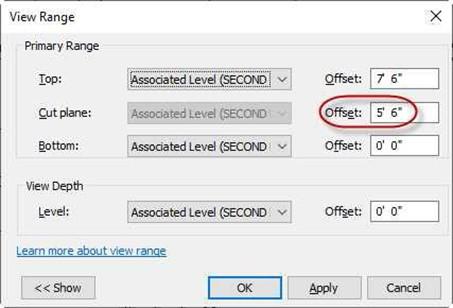
View Cut Plane Set to 5′-6″
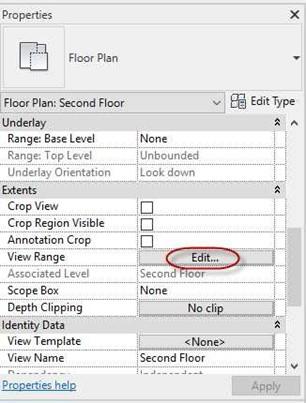
View Range Edit… Button
- This is the end of Part 6. Save your file as RL1-6.


![AutoCAD shortcuts & hotkey guide [All]](https://civilmdc.com/learn/wp-content/uploads/2020/06/AutoCAD-Shortcut-keys-scaled-e1591837739256-931x1024.jpg)
