Creating the Schedules and Color Room Legend
Starting the Tutorial
- Start Revit 2021 by clicking on the icon on the desktop.
- Open the last file from Tutorial Two, RL2-10.
- Save the file as RL3-1.
In this tutorial you will create Door, Window, and Room Finish Schedules. These schedules are tables that are used to identify the drawing elements and spaces based on tags. Since you have already tagged the doors and windows, you will only need to set up the appearance and fields of the door and window schedules. You will also tag each room in the house, name it, and create a color-coded room legend of both floors.
Creating the Door Schedule
This part will involve cataloging the doors and creating a door schedule based on the tags that were assigned earlier.
- Go to the Schedules/Quantities Category in the Project Browser. Click the “+” to expand it.
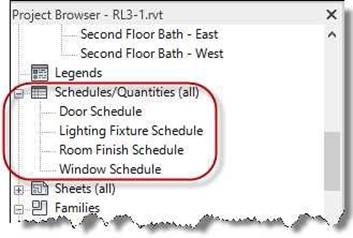
Schedules/Quantities Category Expanded
- Double-click on the Door Schedule.
- You will see that the default version of the Door Schedule has many columns and describes just about every aspect of the door. Rather than use this schedule, you will create your own.
- Right-click on the default Door Schedule in the Project Browser and select Delete to delete it. Below is an example of the Door Schedule that you will create.

Completed Door Schedule
- To create the new schedule, go to the Schedules tool in the View tab, Create panel.
- Choose the Schedule/Quantities tool.
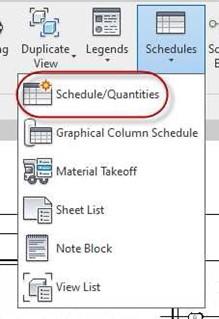
Schedules/Quantities Tool
- Then, choose Doors in the Category window within the New Schedule dialog box.
Press the OK button.
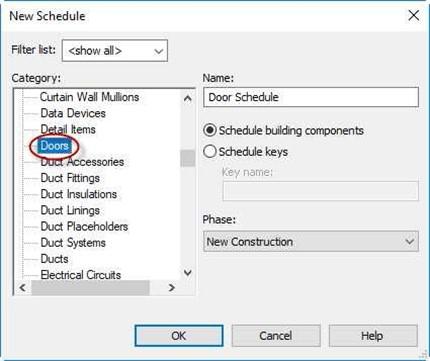
New Schedule Dialog Box
- The Schedule Properties box opens.
This is where you will add the fields for the schedule.
Click on the following fields and click the green arrow to add to the Scheduled fields box.
Type Mark Count Family Width Height Thickness Comments
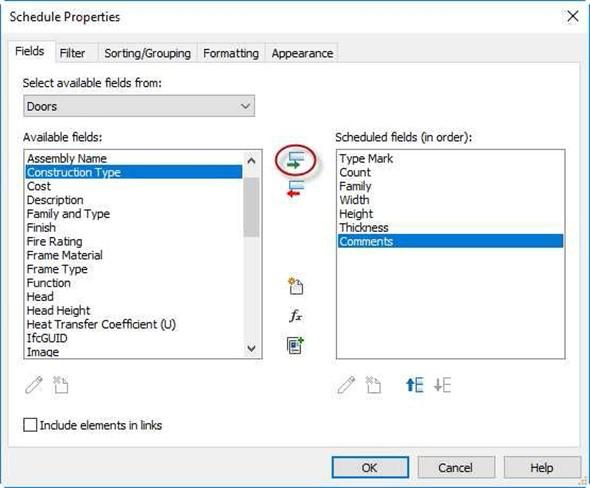
Schedule Properties
- The GLZ AREA-DS and MATERIAL fields are not in the available fields; you will need to create them.
Click on the New Parameter button in the dialog box.
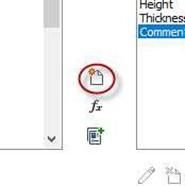
New Parameter Button
- The Parameter Properties dialog box opens.
- Click inside the Name: field and type in the first parameter (GLZ. AREA-DS) this is the field for the glazed area of the door.
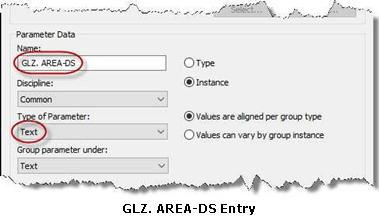
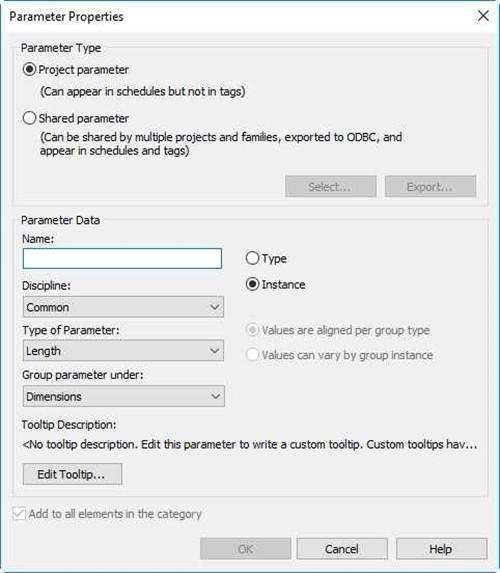
Parameter Properties Dialog Box
Even though this is a numerical value, choose Text for the Type of Parameter.
Note: The reason for the letters DS (Door Schedule) after GLZ. AREA parameter is that you will be creating a similar parameter for the window schedule later.
The parameters that you create need to have unique names.
- Repeat the process for the MATERIAL field.
Use Text for the Type of Parameter for this one as well.
Use the Move parameter up and Move parameter down arrows to change the order of the fields.
Click the OK button to close the dialog.
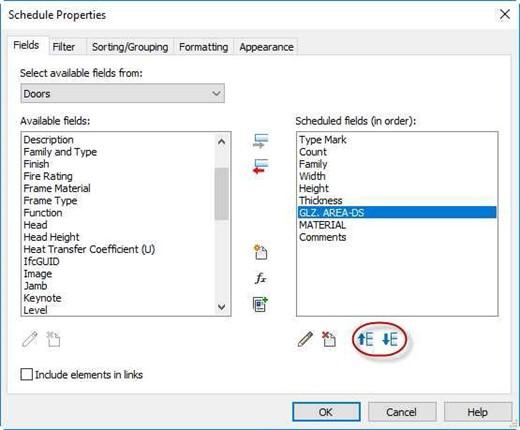
Scheduled Fields Added
- The Door Schedule opens.
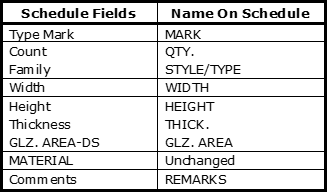
Next you will rename the columns to conform to the example.
Click inside the box containing the header text, rename the text, and change the letters to all caps.
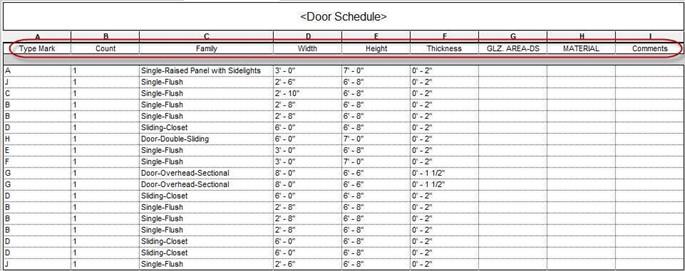
Door Schedule (Before changing header titles.
- Next you will add the words ROUGH OPENING above the WIDTH and HEIGHT columns.
Click and hold on the WIDTH cell then drag the mouse to the HEIGHT cell so that both cells are selected.
-
Click the Group tool in the Title & Headers.
- A new cell will appear above the two cells.
- Type in the words ROUGH OPENING in the cell.

 Width and Height Cells Selected

Group Tool

New Cell
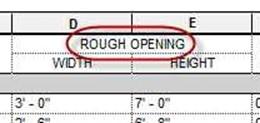
Text in the New Cell
Formatting the Door Schedule Text and Modifying the Sort Order
Next you will format the Door Schedule text and fill out the remaining fields. Refer to the example at the beginning of Part 1 for the entries.
- While in the Door Schedule view, highlight the header row with your mouse by clicking and dragging the mouse across the entire header row. (Hold the mouse button when doing this.)

Header Row Highlighted
- Click on the Font tool in the Appearance panel.
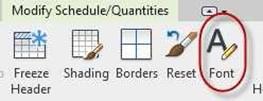
Font Tool
-
In the dialog box, set the text to Bold and
9/64″ high.
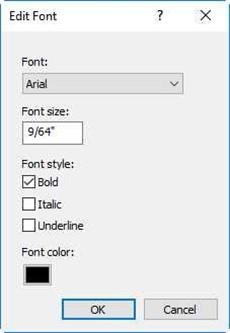
Font Settings
- Set the Align Vertical setting to Middle.
This will place the Header text vertically aligned in the schedule.
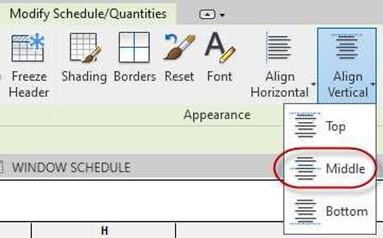
Middle Vertical Alignment
- Format the title of the schedule to Bold, 1/4″ high and vertical middle alignment. Delete and retype the text as all caps.
Your schedule will now look like this…

Updated Font
- Next you will modify the Door
Schedule to only show one line per door type and sort by the door mark.
Click on the Edit… button next to Sorting/Grouping in the Properties dialog.
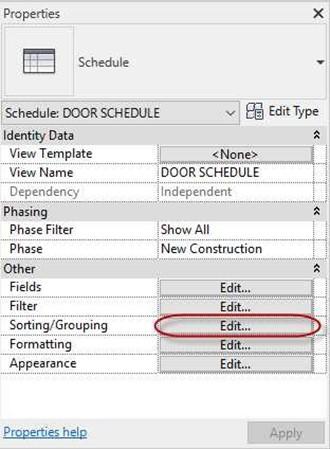 Sorting/Grouping Edit… Button
- Change the Sort by: setting to Type Mark and uncheck the Itemize every instance checkbox.
Click the OK button.
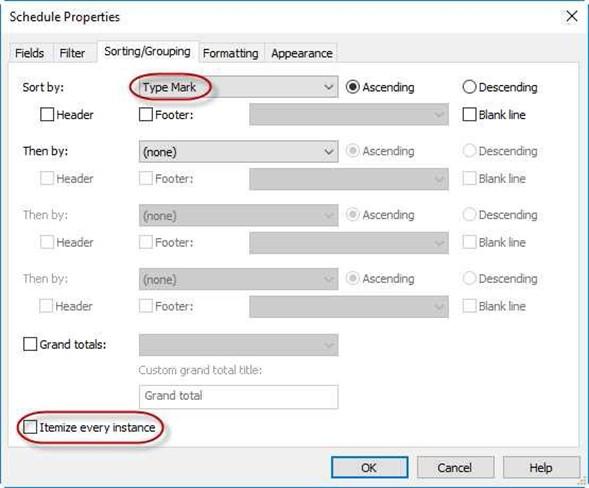
Sorting/Grouping Changes
- Your door schedule should now look like this…

Updated Door Schedule
- In the Properties palette, click the Edit… button next to Formatting.
Set the Type Mark, Count, Width, Height, Thickness, GLZ. AREA-DS, and MATERIAL to Center Alignment.
Click the OK button. (You may select all the fields at once and then modify the alignment.)
Note: You may adjust the width of the columns by holding the mouse over the vertical lines and then clicking to adjust the width.
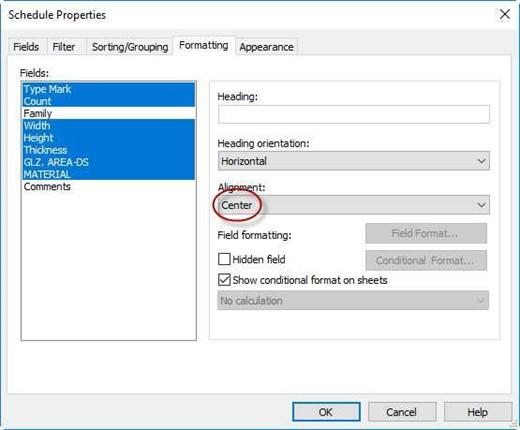
Fields Aligned to Center
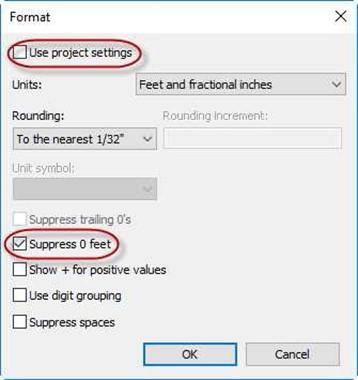
- You will need to remove the zero feet for dimensions less than one foot in the Thickness column.
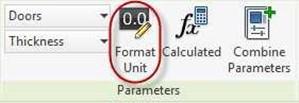
Click on one of the values inside the Thickness column and then click on the Format Unit tool in the Parameters panel.
- Uncheck the Use project settings checkbox and check the Suppress 0 feet checkbox.
Click the OK button.
Format Dialog Box
The values in the Thickness column will now be in inches only.
Format Unit Tool
- Click inside the cells and fill out the values for the GLZ. AREA, MATERIAL, AND REMARKS columns.
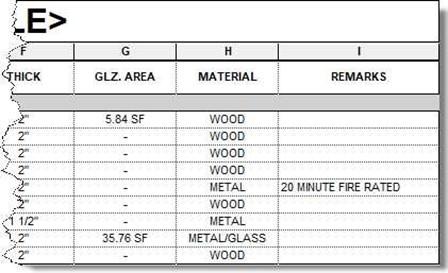
Remaining Columns Filled Out and Formatted
- Next you will an additional column to the schedule. This will replace the Style/Type column with simpler text for the type of door. The text will also be in all caps.
Open the Schedule Properties dialog box and create a new field called “Name on Schedule – DS” (The DS is for Door Schedule).
Use Text as the parameter.
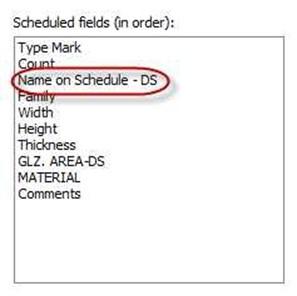
New Field Added
- As you did with the Material column, add the text to the new column as shown.
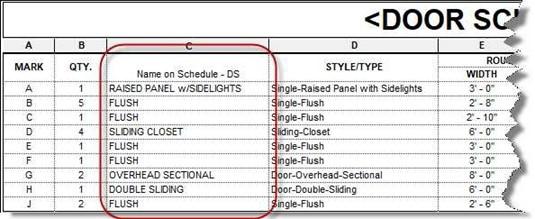
Name on Schedule Column Filled Out
- Rename the new column STYLE/TYPE. Change the text properties to match the other header text.
- Hide the original STYLE/TYPE column.
Select the column by clicking on the letter D above the header text.
Click the Hide tool in the Columns panel.
Note: This will also add a new parameter for each door.
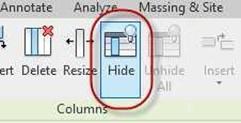
Hide Tool
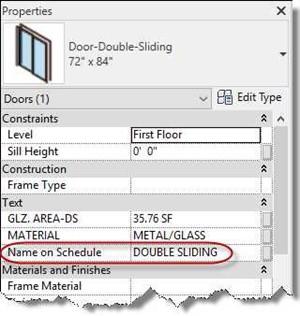
Parameter Added

Updated Door Schedule
- Make the following changes to the appearance of the schedule:
Remove the blank row before the data
Turn on the Outline setting and change it to Wide Lines.
Turn on the Stripe Rows setting and check the Show Stripe Rows on Sheets checkbox.
Click on the Edit… button next to the Appearance button in the Properties
palette and make the following changes.
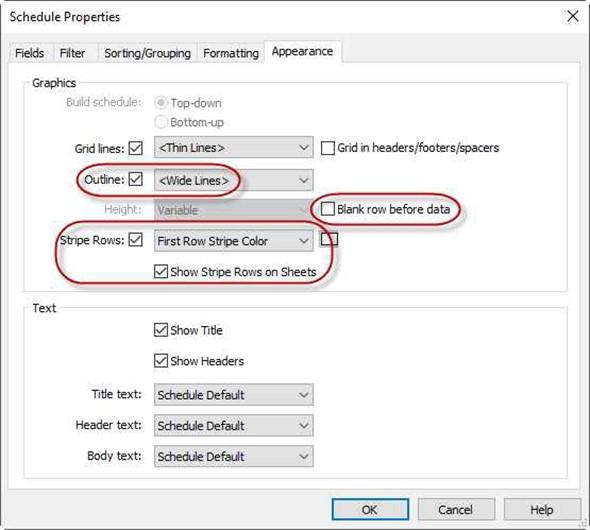
Appearance Tab Changes
 Create a new blank sheet.
Click on the View tab and select the Sheet tool.
Sheet Tool
- The New Sheet dialog box opens.
Select the None choice in the Select titleblocks area.
- Open the sheet by double clicking on the sheet in the Project Browser.
- Click and hold on the Door Schedule text in the Project Browser.
-
Drag and drop the schedule onto the sheet.
- Zoom in on the door schedule.
Use the arrows at the top of the schedule to adjust the width of the columns.
The column widths should be wide enough so that each row of the schedule is one line in height.
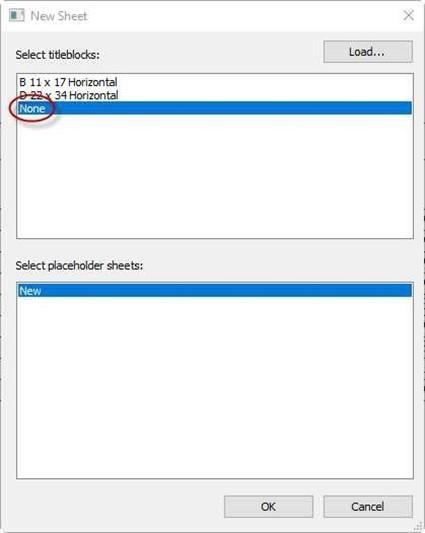
New Sheet Dialog Box

Arrows to Adjust Column Width

Door Schedule Complete
- This is the end of Part 1. Save your file as RL3-1.


![AutoCAD shortcuts & hotkey guide [All]](https://civilmdc.com/learn/wp-content/uploads/2020/06/AutoCAD-Shortcut-keys-scaled-e1591837739256-931x1024.jpg)
