Creating the Room Finish Schedule
In this part you will create a Room Finish Schedule based off the room tags that were added in the last part of the tutorial.
- Open the RL3-3 file. Save the file as RL3-4.
- Find the Room Finish Schedule in the Project Browser. This time you will modify the one that came with the template file instead of creating a new schedule.
- Make the following changes:
- Sort the rows based off the Room Number.
- Rename the Room Number column to NUMBER.
- Rename the Room Name column to NAME.
- Rename the Comments column to REMARKS.
- Change the remaining header names to all caps.
- Select and Ungroup the columns under the Finish group.
- Delete the Ceiling Height field from the Scheduled fields.
- Add a new parameter called CEILING HEIGHT. Set the Type of Parameter to Text.
- Move the Ceiling Height field up in the list so that it is above Comments.
- Add a new field called Area from the available fields. Move the field so that it is after the Ceiling Height field and change the text to all caps. The Area field will automatically populate based on the size of each room.
-
Format the headers to Bold
and 9/64″ high.
-
Format the title of the schedule
to Bold and 1/4″ high.
- Remove the blank row before data and set the outline to wide lines.
- Group the FLOOR, BASE, WALL, and CEILING columns and name the group FINISH.
- Center the columns as shown.
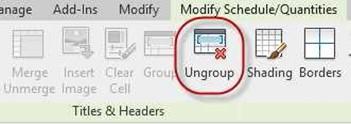
Ungroup Tool

Room Finish Schedule
- You will need to fill out the Floor, Base, Wall, Ceiling, Ceiling Height, and Remarks cells for each room.
This can be done within the schedule or in the properties of each room.
Regardless of which method used, the information will appear in both locations.
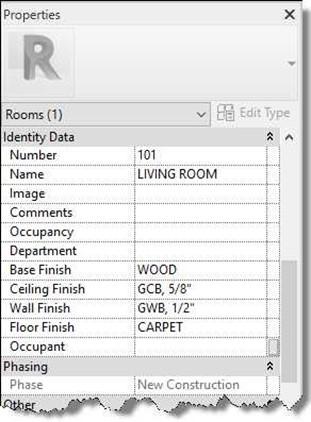
Living Room Identity Data
Adding a Grand Total Value
Next you will add a field that shows the total square footage for the rooms within the house.
- Click on the Sorting/Grouping tab in the Schedule Properties Dialog box.
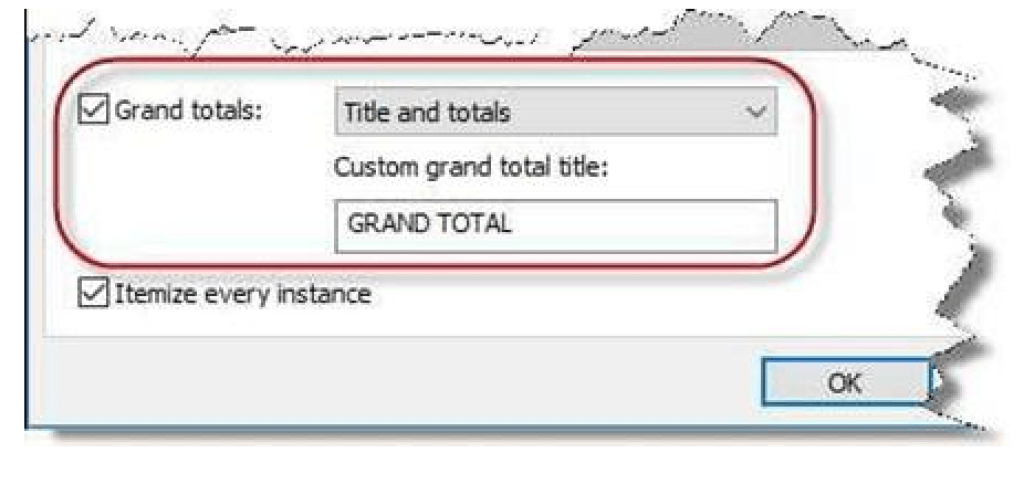
- Check the Grand totals: check box and select the Title and totals option in the pulldown.
Rename the Grand total name to GRAND TOTAL
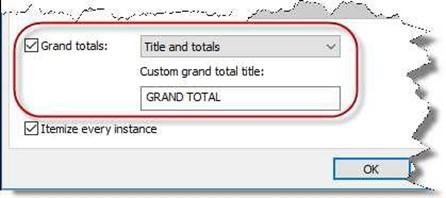
Grand Totals Checkbox
- Click on the Formatting tab, select the Area field, and select “Calculate totals” in the drop-down menu.
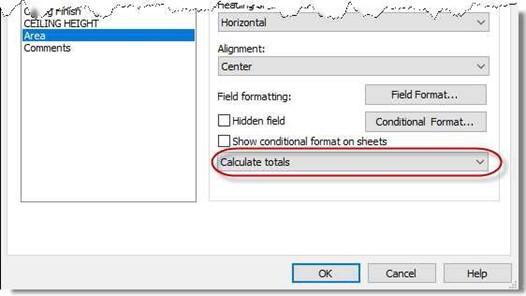
Calculate Totals Checkbox
- You will now see the words Grand total and the total square footage at the bottom of the schedule. (Your total square footage may vary.)

Grand Total of Square Footage
Now that you have finished the Room Finish Schedule, place it on the same sheet as the Door and Window Schedules. Adjust the columns so that they are lined up with the other schedules. At the end of the project, you will insert these schedules onto the Floor Plan sheet.
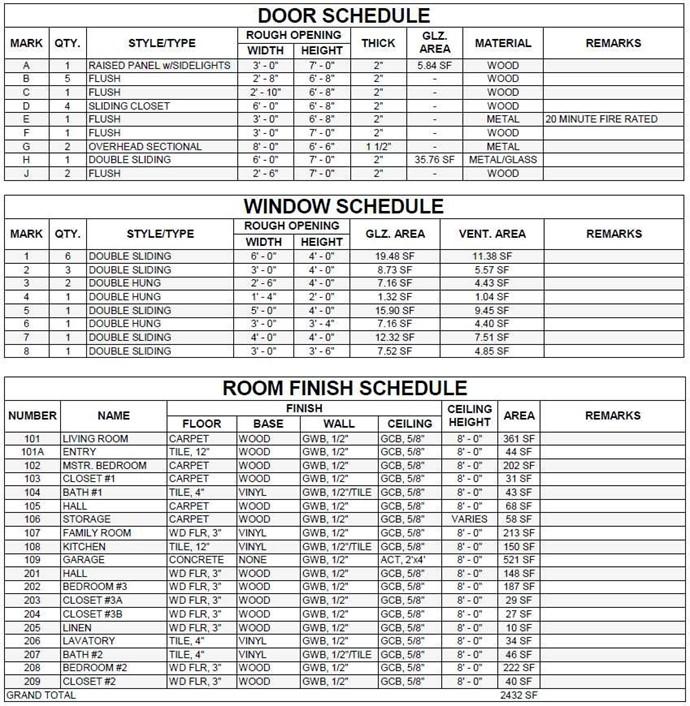
Schedule Examples
- This is the end of Part 4. Save your file as RL3-4.
![AutoCAD shortcuts & hotkey guide [All]](https://civilmdc.com/learn/wp-content/uploads/2020/06/AutoCAD-Shortcut-keys-scaled-e1591837739256-931x1024.jpg)