Creating Named views
While working with a drawing, you may need to perform numerous zoom and pan operations to view
key portions of a drawing. Instead of doing this, you can save these portions with a name. Then,
restore the named view and start working on them.
Open the ortho_views.dwg file.
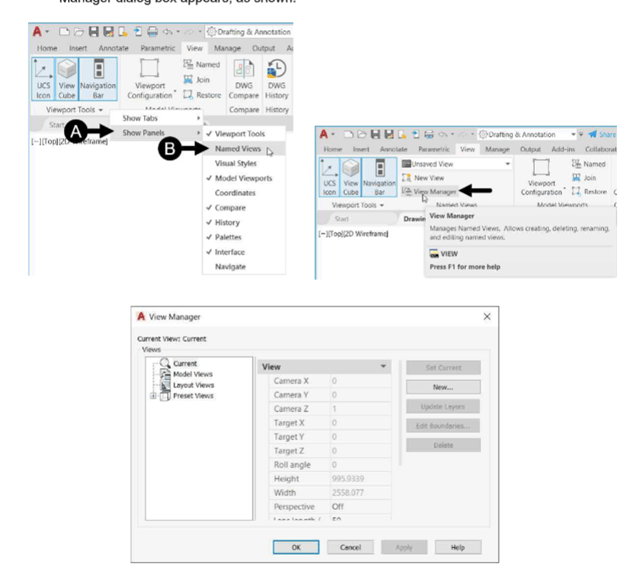
Click on the View tab from the Ribbon.
Right click on the Ribbon and click Show Panels > Named Views, to display Named Views
panel on the Ribbon, if not displayed by default.
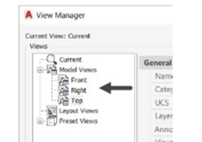
To create a named view, click View > Named Views > View Manager on the ribbon; the View
Manager dialog box appears, as shown.
Click the New button on the View Manager dialog box; the New View/Shot Properties
dialog box appears.
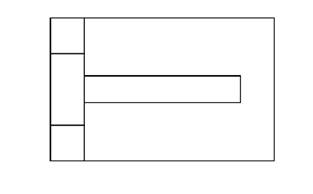
Select the Define Window radio button from the Boundary section of the New View/Shot
Properties dialog box.
Create a window on the front view, as shown below.
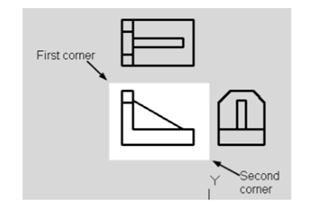
Press ENTER to accept.
Enter Front in the View name box.
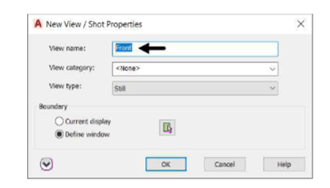
Click OK on the New View/Shot Properties dialog box.
Similarly, create the named views for the top and right views of the drawing.
To set the Top view to current, select it from the Views tree and click the Set Current button
on the dialog box. Next, click OK on the View Manager dialog box; the Top view will be
zoomed and fitted to the screen.
Questions:
1. In which projection method, the plane of projection lies between the observer and object?
2. In which projection method, the plane of projection is assumed to be non-transparent?
3. Where is Right View drawn in Third View projection method?
4. In which projection method, the object lies between the observer and plane of projection?
5. In which projection method, Top View comes below Front View and Right View drawn to the left
side of the elevation?
6. In which quadrant the object is kept in the Third View projection method?
Exercises
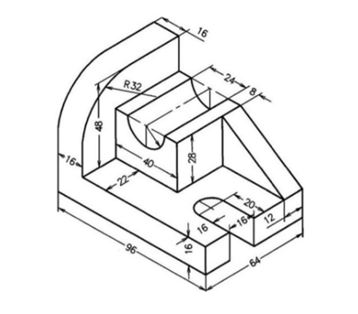
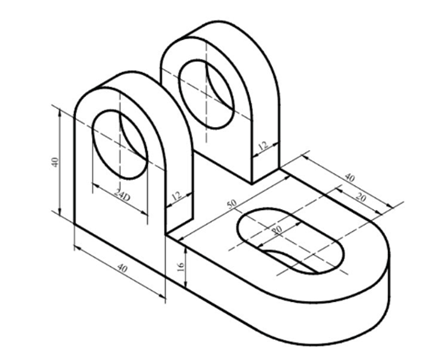
Exercise 1:
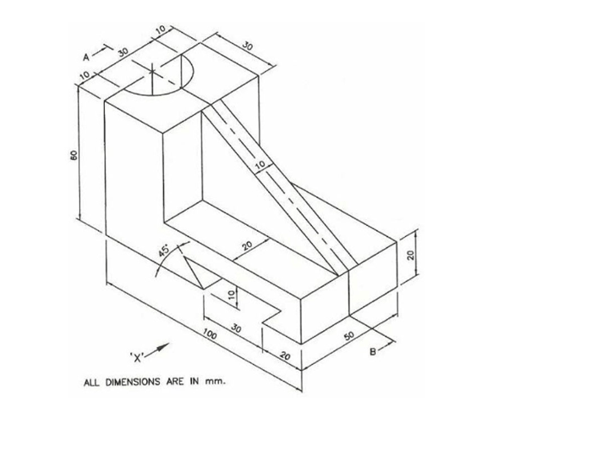
Create the orthographic views of the object shown below.
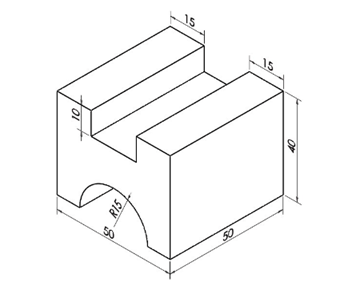
Exercise 2:
Create the orthographic views of the object shown below.
Exercise 3:
Create the orthographic and auxiliary views of the object shown below.
Exercise 4:
Create the orthographic and auxiliary views of the object shown below.